


– 5 –
LOCATION
Place the oven on a suitable countertop, shelf or table with a smooth, flat and stable surface. Do not
place the oven in a hot or damp area, near a gas or electric range. The microwave oven must not be
located above or next to sources of excessive heat or greasy air. Clean air must be free to flow around
the oven. There is a possibility of a small amount of interference with weak broadcast signals if the
microwave oven is too close to a radio or TV.
It is recommended that the microwave oven be located so the housing can be removed for service.
NOTE: The housing should NOT be removed by anyone except qualified service personnel. A Hobart
service technician is recommended.
The air filter MUST be in place whenever the microwave oven is being operated.
A protective film is used to prevent scratching of the outer case during transportation. Peel the film from
the exterior of the oven before installation or use.
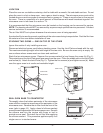
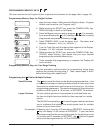
STACKING TWO OVENS — ONE ON TOP OF THE OTHER
Ignore this section if only installing one oven.
Disconnect electrical power cord before stacking ovens. Use the Joint Plate enclosed with the unit.
The maximum stacking height is the total height of the two units. Be sure the oven cavity is empty. Be
sure surfaces where ovens meet are clean and sanitized.
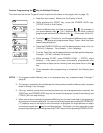
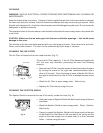
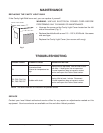
Stack the two microwave ovens. Remove five screws marked (a) and loosen the screw (b) (Fig. 1).
The projection on the Joint Plate must face away from the oven. Place the middle slot on the Joint Plate
over screw (b). Attach the Joint Plate (Fig. 2): Tighten the five screws (a) and tighten screw (b). Make
sure the upper oven is at a safe and workable height.
Fig. 1 Fig. 2
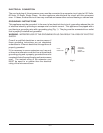
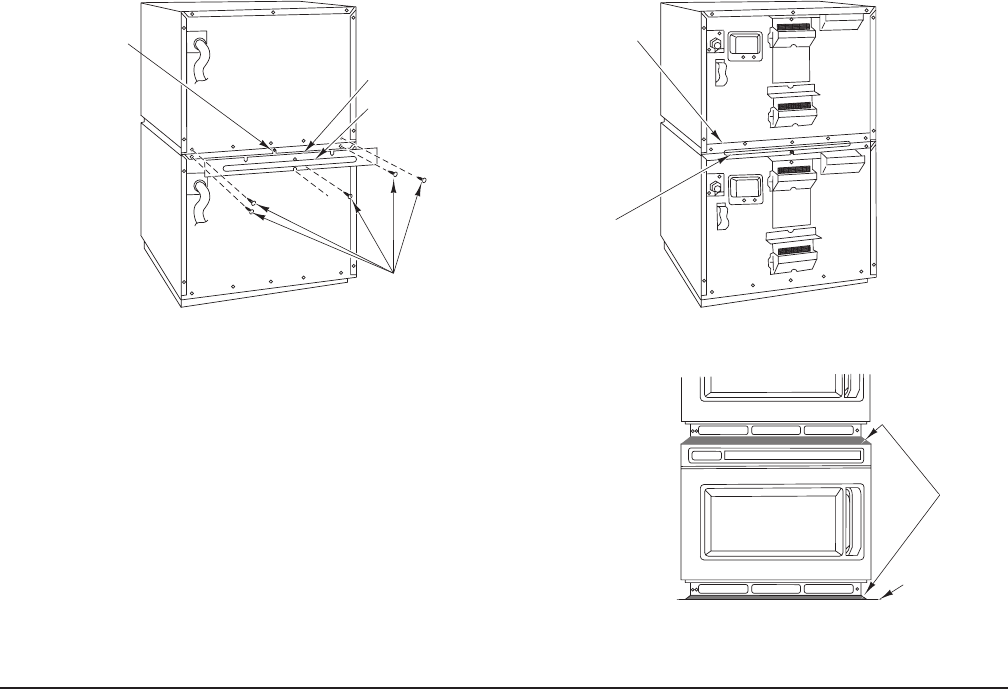
SEAL OVEN BASE TO COUNTERTOP
Thoroughly clean the bottom perimeter of the microwave
oven and the countertop area around the perimeter of the
microwave oven. Remove the air filter from the front of the
oven (refer to page 15). Apply a bead of silicone sealant
around the entire perimeter of the microwave oven. Smooth
the silicone seal into the crevice with finger or tool to
provide a cove seal. Re-install the air filter after applying
the silicone sealant. This procedure applies equally to a
single oven or to stacked ovens.
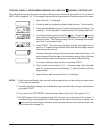
SILICONE
SEALANT
COUNTERTOP
JOINT PLATE
PROJECTION
(a)
(b)
JOINT PLATE
PROJECTION
Fig. 3