


– 14 –
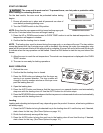
Changing Items in Setup Mode
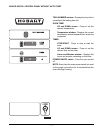
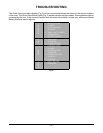
The number in the TIMERS section Hour and Minutes window is the Setup Number. The other windows
display the setup item(s) (the settings that can be changed). Depending on what setup number is being
displayed will determine what windows are lit.
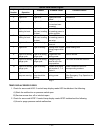
1. To change the setup number displayed in the Hour and Minutes window, press the UP or DOWN
arrow. The setup item(s) will be displayed in the appropriate windows.
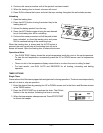
2. To make a change to the displayed setup item, go to the window where you want to make a change
and use the arrow keys to the left of the window to adjust the setting. Do not attempt to change the
items in Setup number 16 and up; these are for factory use only.
Where applicable, the Setup item window will display an E for enabled (turned on) or a
for disabled
(turned off). Press the UP arrow next to the window to enable or the DOWN arrow to disable.
Customizing Auto Start
NOTE: For Auto Start to work correctly, Setup number 7 must be enabled and each individual day must
be enabled or disabled. Also, start time and temperature must be the same for each enabled day. Different
start times and temperature can not be programmed.
For operators who use Auto Start on a regular weekly schedule, this feature will automatically advance
the Auto Start day of the week to the next enabled day, without having to manually set it each day. Any
day(s) can be enabled or disabled.
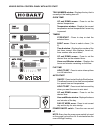
1. Ensure that Setup number 7 is enabled.
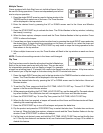
2. Go to Setup number 8, displayed in Hour and Minutes window of Timer Section.
3. In the Auto Start section, select the day of the week to be enabled or disabled by pressing the arrow
key to the left of the DAY OF WEEK indicators.
4. In the Hours and Minutes window of Auto Start section, an E for enabled or a
for disabled will
appear. The display can be changed by pressing the UP arrow to enable, or the DOWN arrow to
disable.
5. Repeat steps 2 and 3 for each day of the week. Each day must be enabled or disabled.
6. To exit Setup Mode, see appropriate Entering/Exiting Setup Mode on page 13.