


– 9 –
START UP PREHEAT
The oven and its parts are hot. To prevent burns, use hot pads or protective mitts
when loading or unloading the oven.
For the best results, the oven must be preheated before baking
begins.
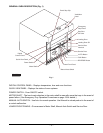
1. Ensure all panels are in place and all personnel are clear of
oven before preheating/starting oven.
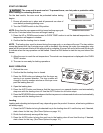
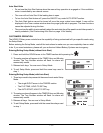
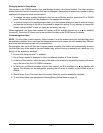
2. Turn the POWER switch to the ON position.
NOTE: Every time the oven power switch is turned on the purge cycle
will run for 6 minutes before the oven will begin heating.
3. Press the UP or DOWN arrow located in OVEN TEMP. section to set the desired temperature. The
temperature will appear in window.
4. Confi rm that the loading door is closed.
NOTE: The loading door must be closed during the purge cycle, or an alarm will sound. The tray rotation
cannot be started until the 6-minute purge cycle is complete. Also during this cycle, the emergency stop
panel will tilt and remain tilted until the purge cycle is complete. A buzzer will sound at the end of the cycle
to indicate when the tray operation can be started. Press the RUN button to start the tray and silence the
buzzer.
5. Allow the oven to reach the set temperature. The actual oven temperature is displayed in the OVEN
TEMP. window.
6. The oven is now ready for baking operations.
BASIC OPERATION
1. Preheat the oven.
2. Confi rm that the loading door is closed.
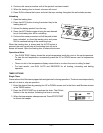
3. Press the RUN button and observe that the trays are
moving in an upward direction. The tray number will
change in the tray number window as the trays move
past the loading door sill.
4. Open the loading door.
5. Press the AUTO button and observe that the trays move in an upward direction and automatically
stop even with the loading door sill. Use the AUTO button for all routine stops.
6. Press the REVERSE button and observe that the trays move in a downward direction and automatically
stop even with the loading door sill.
Loading
Loading and unloading techniques will vary, depending upon the product. However, a few basic guidelines
will always apply.
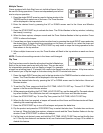
1. Press the AUTO button to bring the desired tray to the loading door sill. Load the tray and, if desired,
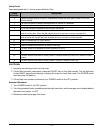
start a timer for this tray. (See Timer Options on page 10.)
2. Divide the load evenly among all the trays.
3. Press the AUTO button to bring the next tray to the loading door sill and load the tray. If desired,
start a timer for this tray. (See Timer Options on page 10.)
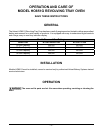
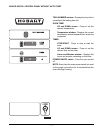
OVEN
TEMP
ON
OVENS WITHOUT AUTO START
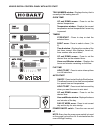
OVEN
TEMP
ON
OVENS WITH AUTO START