


– 5 –
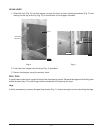
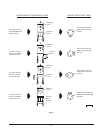
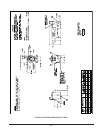
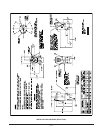
Assemble the legs as follows (Fig. 4):
1. Lay the peel trap on its side.
2. Assemble one of the rubber gaskets to one of the curved leg clamp bolts.
3. Assemble the bolt and gasket from the inside, through one of the leg bolt holes in the peeler
housing.
4. Assemble a leg and a leg slot cover on the leg clamp bolt.
5. Place a stainless steel washer and acorn nut onto the clamp bolt and partially tightened, set unit
upright.
6. Each leg has an upper and lower leg clamp bolt assembly. When all are assembled and partially
tightened, set unit upright.
7. Adjust each leg to a suitable height such that the unit is level, and tighten the acorn nuts.
PL-41651-1
LEG
RUBBER GASKET
CLAMP BOLT
SLOT COVER
WASHER
ACORN NUT
Fig. 4
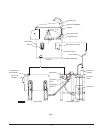
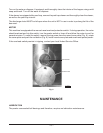
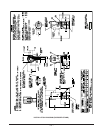
Peelers
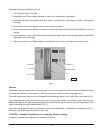
The peeler may be positioned on the peel trap in one of four positions. Each of the positions will cause
the peel trap drawer to be located in a different position relative to the discharge chute.
The peel trap drawer may be directly beneath the discharge chute, to the right, left or rear (see Fig. 5).
After selecting the most convenient position for the peel trap drawer, remove the cover disc from the
appropriate hole in the peel trap top and position the peeler on top of the peel trap, with the peeler drain
hose extending through selected hole (Fig. 5).
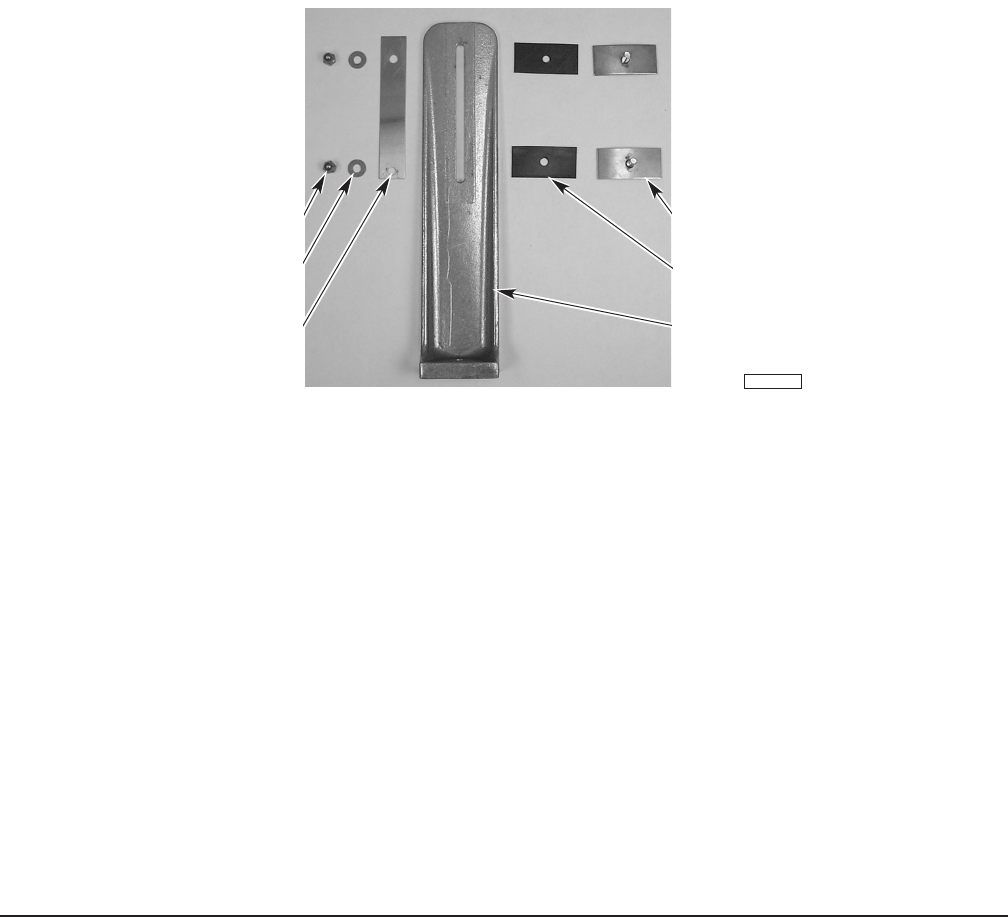
The cloth bag shipped in peel trap drawer contains the capscrews, lockwashers and washers (Fig. 1)
necessary for fastening the peeler to peel trap.
CAUTION: Excessive tightening of screws may distort housing.
If desired, the peel trap legs may be bolted to the floor.