11GB
CARE AND CLEANING
LIGHT REPLACEMENT
The hood can be provided with different types of
lamps: incandescent, halogen and neon lamps.
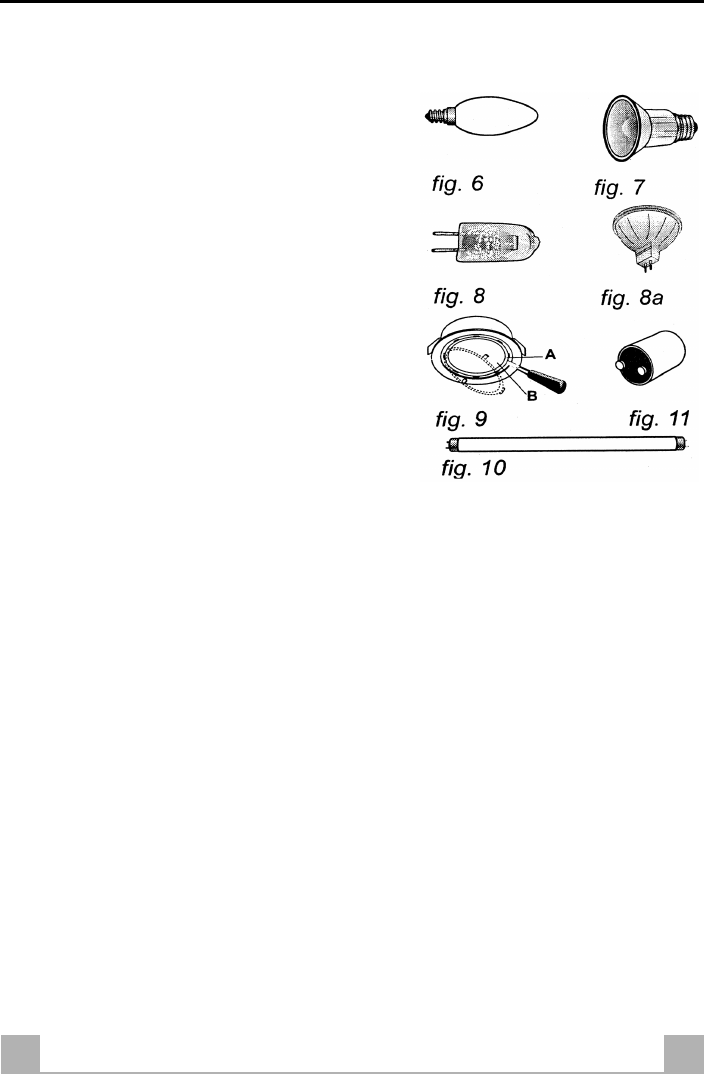
• Incandescent lamps (Fig.6): lamps with E14
cap, 40W power and 230V voltage, generally
olive shaped.
To replace them, remove the grease filters,
unscrew the faulty lamp and screw in the new
one, replace the grease filters. If using an
electronic bulb, use only those with an E14
coupling, max. 11W.
• Halogen lamps (Figs.7 & 8): Fig.7 illustrates
the type of lamps with E14 cap, 50W power
and 230V voltage. To replace them, follow
instructions given above for incandescent lamps.
Fig.8 illustrates the type of lamps with G4 cap,
20W power and 12V voltage.
To replace them, use a screwdriver to remove
the glass support ring A (Fig.9), then remove
the protection glass B. Pull out the used bulb
and replace it with the new one. Replace the
protection glass B fastening it in place with
support ring A. If using a 12V dichroic halogen
(Fig.8a) lamp, use only those with a GU5.3
coupling max. 20W.
• Neon lamps (Fig.10): neon lamps can come
with a ‘mignon’ G5 cap (8W or 13W power and
288mm or 516mm long) or a normal G13 cap,
(15W or 23W power and 437mm or 970mm
long). To replace them, remove the metal grease
filters, detach the neon, rotating it 90 degrees
and pull it out of its housing. Fit the new neon
light then replace the metal grease filters.
• Starter Replacement: for all types of neon
lamps, use a 220-240V / 4-80W Starter (Fig.11).
CLEANING
• Clean with a sponge soaked in warm water and
a sodium bicarbonate solution, which is among
other things a good disinfectant. If you do not
have any, you can use a neutral soap.
• Clean steel parts by rubbing in the direction of
the surface finish.
• DO NOT use abrasive detergents, bleach or
detergents using ammonia.
• NEVER use solvent based products.
Failure to carry out the basic standards of cleaning and replacement of the filters could cause a fire
risk. Therefore you must observe these instructions.


