5GB
INSTALLATION
Assembly Instructions
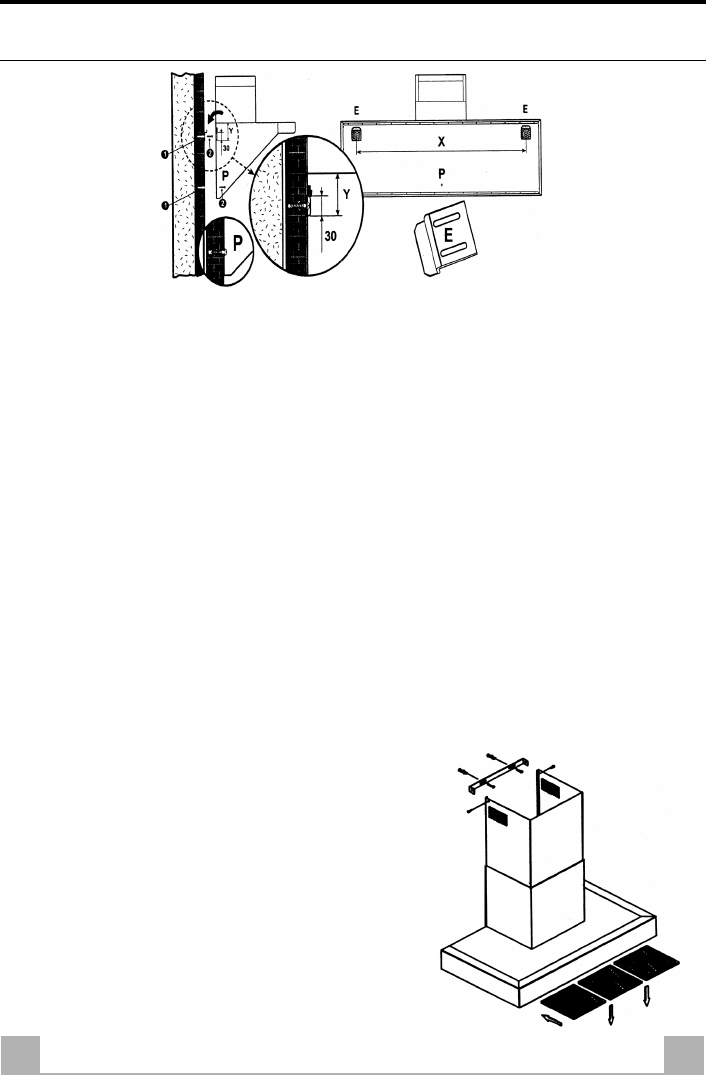
3RD TYPE OF SUPPORT
• This support (see E above) is supplied with the cooker hood (generally in two pieces) and should
be fastened to the wall by means of two wall plugs.
• In this case, some slots have been made on the back of the hood onto which these supports should
be hooked (see above).
To adjust the position of the hood, the support fixing screws should be loosened and the height of the
hood should be adjusted. The aforementioned 3 types of support are not sufficient to guarantee that
the hood is firmly anchored... you will also need to install one of the following:
ANTI-TIPPING BRACKET - (refer to Fig.2) This type of accessory (two pieces generally provided)
should be assembled onto the top part of the cooker hood and then fastened to the wall (D). Slots (B)
on the bracket allow for partial adjustment of the inclination of the hood.
ANTI-TIPPING SCREW - (refer to Fig.3) This anti-tipping device foresees that the hood is
fastened directly to the wall by means of one or more screws provided, using the holes on the back
panel of the hood (P).
Fig.3
ASSEMBLY OPERATIONS
• Locate the position of the holes to drill on the
wall for fastening screws and hooks.
• Remove the metal grease filters.
• Place the hood in its desired position, mark the
exact points on the wall where holes must be
drilled.
• Move the hood and follow above instructions
to anchor it to the wall according to the type of
support.
• Hook the hood on.
• Now proceed with the anti-tipping connections,
using the special bracket or screws (see above).


