


37
CONVERT THE BROIL BURNER SPUD
(on some models)
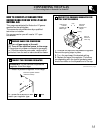
Using 1/2² wrench, adjust oven burner spud as
follows. For Natural to LP conversion tighten
spud down clockwise until snug (approximately
2
1
⁄
2
turns). This restricts the flow of gas through
the spuds to only that allowed by the hollow LP
metering pin. Do not over tighten.
For LP to Natural conversion, loosen spuds
counter-clockwise (approximately 2
1
⁄
2
turns).
This increases the flow of gas around the
metering pin.
5
AFTER CONVERSION IS COMPLETE,
FOLLOW NORMAL INSTRUCTIONS FOR
INSTALLATION AND BURNER
OPERATION/ADJUSTMENTS.
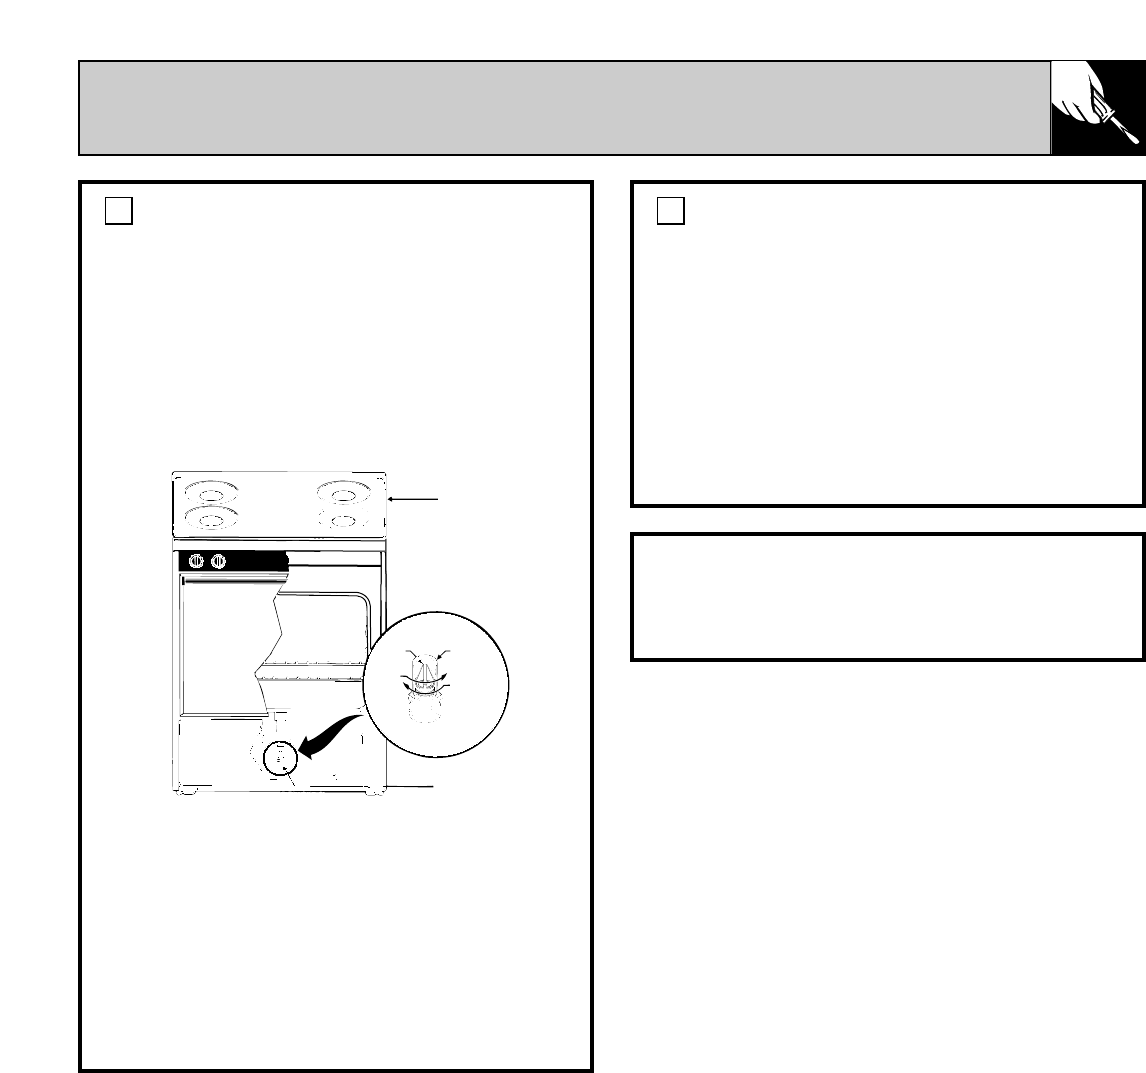
CONVERT THE OVEN BURNER SPUD
(on some models)
1. Remove oven bottom and oven burner baffle
located on top of burner. To remove oven
bottom, remove oven hold down screws at rear
of oven bottom. Pull up at rear, disengage front
to oven bottom from oven front frame, and pull
the oven bottom straight out of the oven.
Remove nut attaching burner baffle to oven
burner.
2. Using 1/2² wrench, adjust oven burner spud
as follows. For Natural to LP conversion tighten
spud down clockwise until snug (approximately
2
1
⁄
2
turns). This restricts the flow of gas through
the spuds to only that allowed by the hollow LP
metering pin. Do not over tighten.
For LP to Natural conversion, loosen spuds
counter-clockwise (approximately 2
1
⁄
2
turns).
This increases the flow of gas around the
metering pin.
4
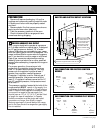
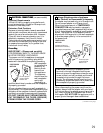
Cooktop
(shown raised)
Oven/broiler
burner spud
Spud
NAT
LP
Pin