Installation IOD150, IOD200, IOD250
1. Locate the ice dispenser on the counter. Allow vertical clearance above the unit for the removal of
the cover and for pouring ice into the hopper.
2. Plan the unit drain. A one-inch (1”) I.D. drain tube is required for draining. Routing is either
through the back or the base. Sufficient fittings are included with the unit to install in most cases.
3. In order to comply with the National Sanitation Foundation (NSF) requirements, this unit must be
either elevated above the counter top sufficiently to provide space for cleaning under the unit or
sealed to the countertop
Elevating the unit may be accomplished by using the legs. They will screw into threaded holes in
the base of the unit. Note: Before installing legs the plastic plugs must be removed.
IMPORTANT:
It is the responsibility of the Installer to ensure that the water supply to the dispensing equipment is
provided with protection against backflow by an air gap as defined in ANSI/ASME A112.1.2-1979: or
an approved vacuum breaker or other such method as proved effective by test.
Water pipe connections and fixtures directly connected to a potable water supply shall be sized,
installed and maintained according to Federal, State and Local Codes.
DRIP TRAY ASSEMBLY
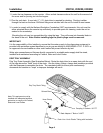
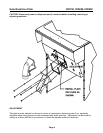
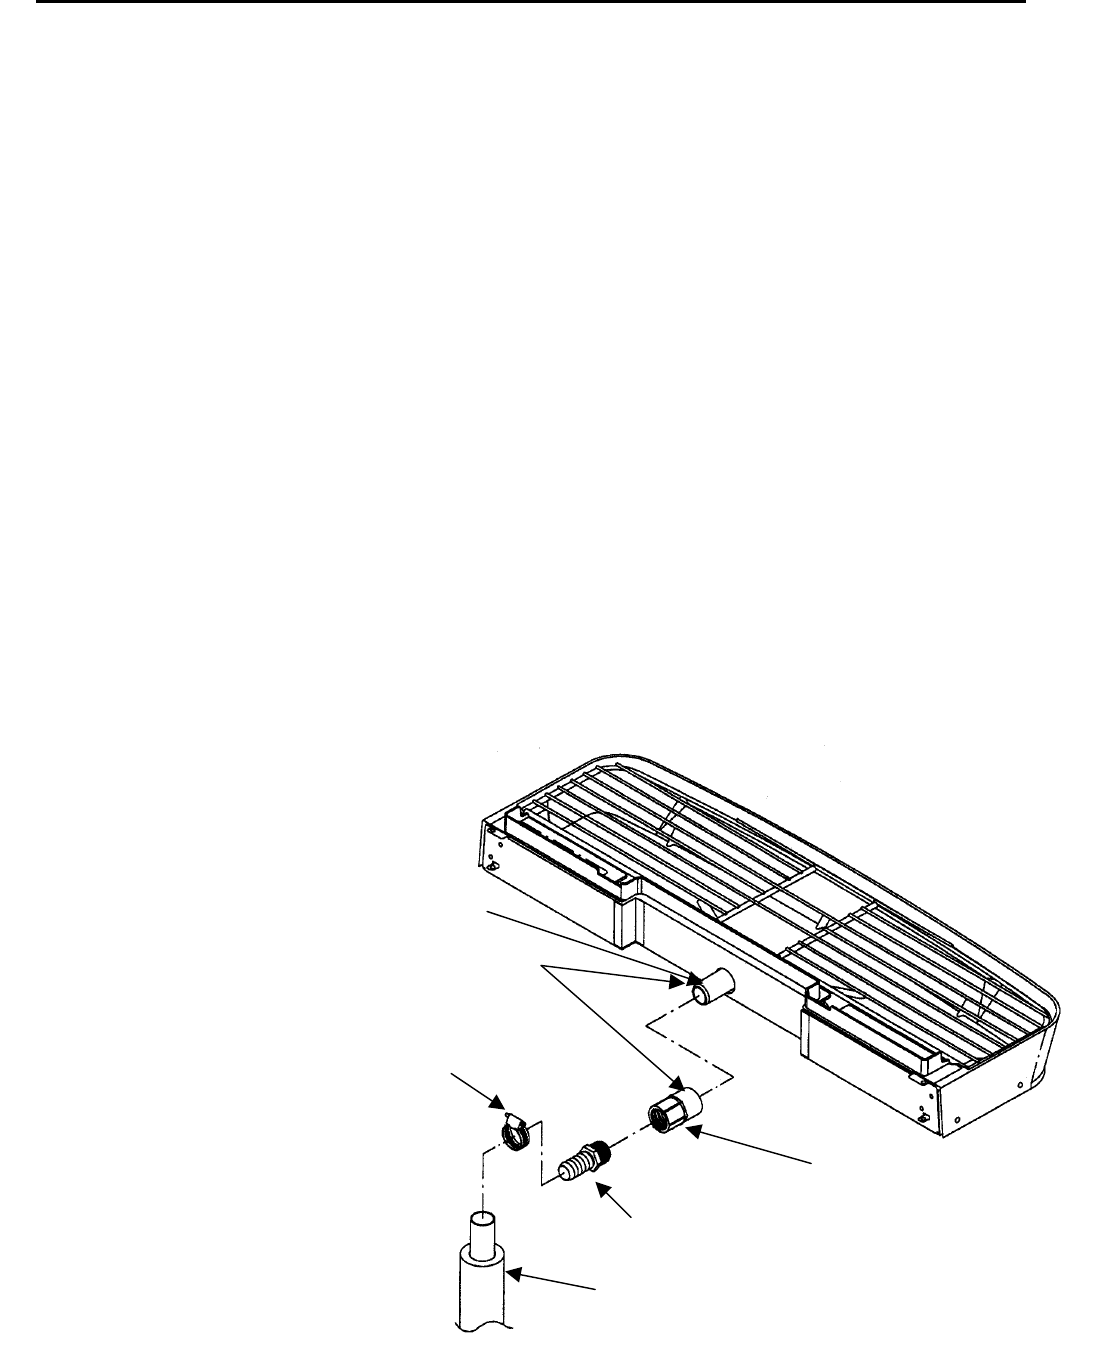
Drip Tray Drain Assembly (See Illustration Below): Route the drain tube to an open drain with the end
of the tube above the “flood” level of the drain. Use the tubing, fittings, clamps and insulation provided
with the Dispenser to assemble the drain. The completed drain line must pitch continuously
downward and contain no “traps” or improper drainage will result.
Note: This equipment must be
installed with adequate backflow
protection to comply with Federal,
State and Local Codes.
Drain Line 1-Inch Plastic Tubing with Insulation
Barb Ada
p
ter 1” Barb x ¾ MPT
Coupling ¾ Socket x ¾ FPT
Dri
p
Tra
y
Drain Fittin
g
Hose Clam
p
Solvent Bond
Page 4


