


Countertop Icemaker IMD Series Installation Manual
© 2004-2009, IMI Cornelius Inc. - 5 - Publication Number: 638085277INS
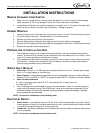
DRAIN CONNECTION
1. Install splash panel on machine and hold in place with (2) screws. Do not tighten at this time.
2. Remove drain tray mounting bracket from their shipping carton.
3. Clip the drain try mounting bracket onto the bottom of the splash panel in the brackets provided.
4. Hook the drain tray into the splash panel and onto the mounting bracket.
5. Push the drain elbow securely onto the drain tray. Do not glue in place.
6. Complete drain hookup according to the instructions provided with unit.
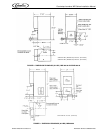
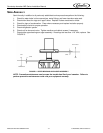
FIGURE 4. FLOAT ASSEMBLY
NOTE: Steps 7 and 8 to be completed only after all start up checks and adjustments are per-
formed.
7. Replace side panels tightening all (6) screws (including splash panel screws left loose).
8. Replace top panel and front cover and secure with (2) screws.
NOTE: In those cases where the unit is base mounted and not on legs it should be sealed all
around the base with NSF listed sealant. (IMI Wilshire P/N 04815-B).
AUGER ENGAGEMENT
Be certain that auger is fully engaged to lower drive and that extruding head is fully engaged to evapora-
tor.
INITIAL START UP, CHECKS & ADJUSTMENT INSTRUCTIONS
NOTE: Do not start unit before completing above Installation Instructions.
Turn on water supply and main power switch (located on top of electric box). All IMD 30 lb. and 90 lb.
series units are equipped with a 45 second delay timer. This means that the refrigeration system will not
start until 45 seconds of dispense are accumulated in the timer. Start the refrigeration system by
depressing the ice dispense button for 45 seconds. Make the following system checks:
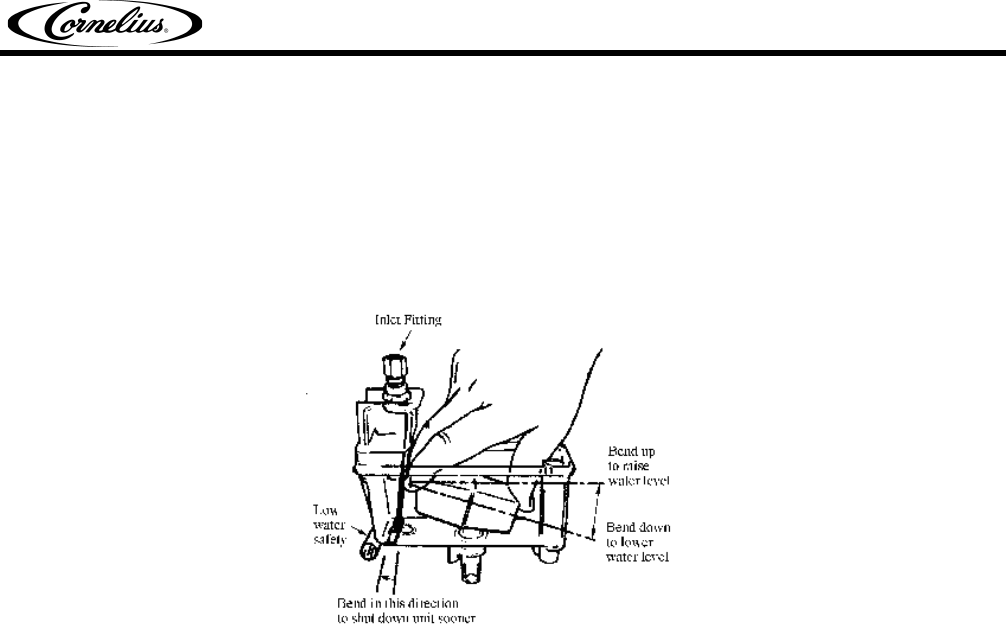
NOTE: If unit will not start be sure water reservoir is full. Low water safety control must be prop-
erly adjusted to start and shut down unit. If water level drops below bottom of reservoir, unit
must shut down. Adjustment is made by moving magnet up or down.
Water Level - If necessary adjust Float by bending float arm up or down as needed, push float assembly
down until unit stops running. Release float and unit will restart. Keep water in reservoir at level line
while unit is in operation. See FIGURE 4.