


4
Receiving & Unpacking
1. Inspect the carton and note any damage,
regardless if it appears minor. If the carton is
damaged, note on the consignee copy of the
freight invoice “exterior carton damage -
concealed damage possible.”
2. Cut the plastic banding strap and remove the
exterior carton sleeve, internal fillers and
plastic bag around the dispenser. Carefully
inspect for damage.
Note: IMI Cornelius is not responsible for
damaged freight. If damage is found, you
must save all packaging material and
contact the freight carrier. Failure to
contact the carrier within 48 hours of
receipt may void your claim.
3. Confirm receipt of the installation kit
#720202300 packaged with the dispenser. If
any item is missing, contact our customer
service department at 1-800-238-3600
Monday - Friday between the hours of
8:00 AM and 4:30 PM CST.
Kit Contents:
Qty Description
4 3/8” barb
4 3/8” swivel nut
5 3/8”x3/8” elbow barb
6 3/8” nylon washer
10 #170 clamps
10 ft. 3/8” braided tubing
4 ft. 1/2” I.D. clear tubing
1 1/2”x1/2” 90o elbow
4 Generic B-I-B connectors
2 Flavor strip kits
1 Installation template
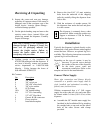
4. Remove the four 9/16” (15 mm) retaining
bolts from the underside of the shipping
pallet by carefully tilting the dispenser from
side to side.
5. With the assistance of another person, lift
the dispenser from under the base and place
it on the counter.
The dispenser is extremely heavy when
operational. Make certain the counter can
support a minimum of 300 lbs directly
below the dispenser.
Installation
Typically the dispenser is placed directly on the
counter and a food grade silicone sealant applied
around the base. However, an optional leg kit is
available. The following instructions assume the
optional leg kit will not be used.
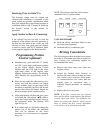
Depending on the type of counter, it may be
necessary to provide access through
the counter at the rear of the dispenser
for the drain, power, water and
concentrate connections. Refer to the
template enclosed in the installation kit.
Connect Water Supply:
Water pipe connections and fixtures directly
connected to a potable water supply shall be
sized, installed, and maintained according to
federal, state, and local laws.
Wilshire recommends that a ½” O.D. copper
supply line with a shut-off valve and water filter
be located within 3-6 feet (0.91-1.83 m) of the
dispenser.
a. Assemble the 3/8” braided water supply line
furnished in the Installation Kit by attaching
the straight barb on one end and the elbow
barb on the other. Secure with clamps
provided.