


5
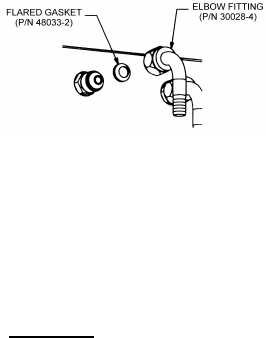
b. Insert a 3/8” nylon washer into the elbow
barb of the supply line. Connect the
assembled
supply line
to the water
inlet fitting
located on
the rear of
the dispenser.
c. Connect the water supply line to the shut
off. Turn on the water and check for leaks.
NOTE: The dynamic water pressure must be 20
PSIG (1.4 bar) minimum to ensure correct valve
flow control and must not exceed 100 PSIG
(7 bar) to avoid valve damage.
Fill Ice Water Bath:
a. Remove the top cover
b. Remove the large red plastic plug from the
filler hole in the top of the refrigeration
deck.
c. Fill the water bath with cool water until it
begins to trickle out of the overflow tube.
d. Reinstall the red plastic plug and top cover.
Connect Power Supply / Start
Refrigeration:
a. Start the refrigeration system by plugging
the power cord into a 115 VAC (+ 10%),
15 amp grounded receptacle.
The Millennium forms an ice bank of
approximately 30 lbs (13.61 kg) in 4-5 hours at a
room temperature of 75
o
F (24
o
C). Once the ice
bank has grown to the proper size, the ice bank
control will shut down the refrigeration circuit.
NOTE: It is normal to see water trickle from
the over flow as the ice bank forms.
Connect B-I-B Concentrate
a. Attach the supplied 3/8” (9.5mm) elbow
barbs to the end of each 3/8” I.D. B-I-B
concentrate supply line (not supplied).
Secure with clamps provided. Insert a 3/8”
nylon washer into the elbow barb and
connect the supply lines to the rear of the
dispenser noting the valve numbering
(numbered 1-4 from left to right as viewed
from the front of the dispenser).
b. Route the concentrate supply lines to the
B-I-B location and attach the gray plastic
B-I-B connector (supplied) to the end of
each line. Secure with clamps provided.
Connect Drain:
a. Attach the clear drain hose to the barb fitting
on the drip tray. Route the drain hose out
from the rear of the dispenser and connect it
to a suitable drain source, ensuring
compliance with all federal, state, and local
plumbing codes. Slide the drip tray into
place.
Purge Air from the Water Coil
Prior to initial use, purge all air from the valves
by pushing the dispensing switch repeatedly.
Continue until a steady flow of water is
observed. Repeat the above on the remaining
valves.
Priming the Concentrate Pumps
a. Turn off the water supply.
b. Connect the concentrate lines to their
respective B-I-B.
c. Depress and hold each start button until
concentrate is observed flowing from the
dispense nozzle.
d. Turn on the water supply.