6
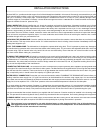
PREPARATION: Before proceeding with the start-up of the unit, verify the following:
1. The strainer is in place and is clean.
2. That the wash arms are screwed securely into place and that their endcaps are tight. The wash arms should rotate freely.
3. Verify all chemical levels for machine chemical feeder pumps are correct.
POWER UP: To energize the unit, turn on the power at the service breaker. The voltage should have been previously verified as being
correct. If not, the voltage will have to be verified.
FILLING THE WASH TUB: For the initial fill, close the door and ensure that the auto/manual switch is in the “AUTO” position and turn
the power switch to the “ON” position. The machine will automatically fill. Allow the cycle light to turn off. Open the door and check the
water level. Close the door, the machine will now automatically run a warm up cycle. For the initial fill, run the machine through 3 cycles
to fill the tub sump. The machine will run a partial cycle and fill to the bottom of the pan strainer. Open the door and verify that the
water level is correct.
Hereafter, the water level is controlled by the timer that has been preset at the factory. Verify that there are no other leaks on the unit
before proceeding any further. The wash sump must be completely filled before operating the wash pump to prevent damage to the
component. Once the wash tub is filled, the unit is ready for operation.
The machine runs a complete cycle to drain and fill. If the machine is not allowed to drain, the water will build up inside the tub. After
the initial fill, the rinse water for the current cycle will become the wash water for the next cycle.
WARE PREPARATION: Proper preparation of ware will help ensure good results and less re-washes. If not done properly, ware may
not come out clean and the efficiency of the dishmachine will be reduced. It is important to remember that a dishmachine is not a
garbage disposal and that simply throwing unscraped dishes into the machine simply defeats the purpose altogether of washing the
ware. Scraps should be removed from ware prior to being loaded into a rack. Pre-rinsing and pre-soaking are good ideas, especially
for silverware and casserole dishes. Place cups and glasses upside down in racks so that they do not hold water during the cycle. The
dishmachine is meant not only to clean, but to sanitize as well, to destroy all of the bacteria that could be harmful to human beings. In
order to do this, ware must be properly prepared prior to being placed in the machine.
DAILY MACHINE PREPARATION: Refer to the section entitled “PREPARATION” at the top of this page and follow the instructions
there. Afterwards, check that all of the chemical levels are correct and/or that there is plenty of detergent available for the expected
workload.
WARM-UP CYCLES: For a typical daily start-up, it is recommended to run the machine through 3 cycles to ensure that all of the cold
water is out of the system and to verify that the unit is operating correctly. To cycle the machine, ensure that the power is on and that
the tub has filled to the correct level.
WASHING A RACK OF WARE: To wash a rack, open the door completely and slide the rack into the unit. Close the door, the cycle
will then automatically begin and cycle light will come on. When the cycle light goes out, open the doors and remove the rack of clean
dishes. Replace with a rack of soiled ware and close the door. The process will then repeat itself.
OPERATIONAL INSPECTION: Based upon usage, the pan strainer may become clogged with soil and debris as the workday pro
-
gresses. Operators should regularly inspect the pan strainer to ensure it has not become clogged. If the strainer does, it will reduce the
washing capability of the machine. Instruct operators to clean out the pan strainer at regular intervals or as required by work load.
SHUTDOWN AND CLEANING:At the end of the workday, close the door. Start a cycle. Wait approximately five seconds and then place
the power switch to the “OFF/DRAIN” position. The machine will run a wash cycle, drain and turn off. DO NOT spray water into the
machine, it will not drain without running another drain cycle. Once the wash tub is drained, remove the pan strainer. Remove soil and
debris from the strainer and set to the side. Unscrew the wash arms from their manifolds. Remove the endcaps and flush the arms with
water. If the nozzles appear to be clogged, use a toothpick to remove the obstruction. Wipe the inside of the unit out, removing all soil
and scraps. Reassemble the wash arms and replace them in the unit. The arms only need to be hand tight, do not use tools to tighten
them down. Reinstall the strainer and close the door.
OPERATION INSTRUCTIONS


