NOTE: In Canada, gas utilization codes prohibit use of street Step 3: Trim a small piece of masking tape to the size of
elbows. Use standard pipe elbows and make modifications to a dime and affix it over the end of a 5/16" nut
these instructions as necessary, driver.
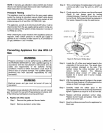
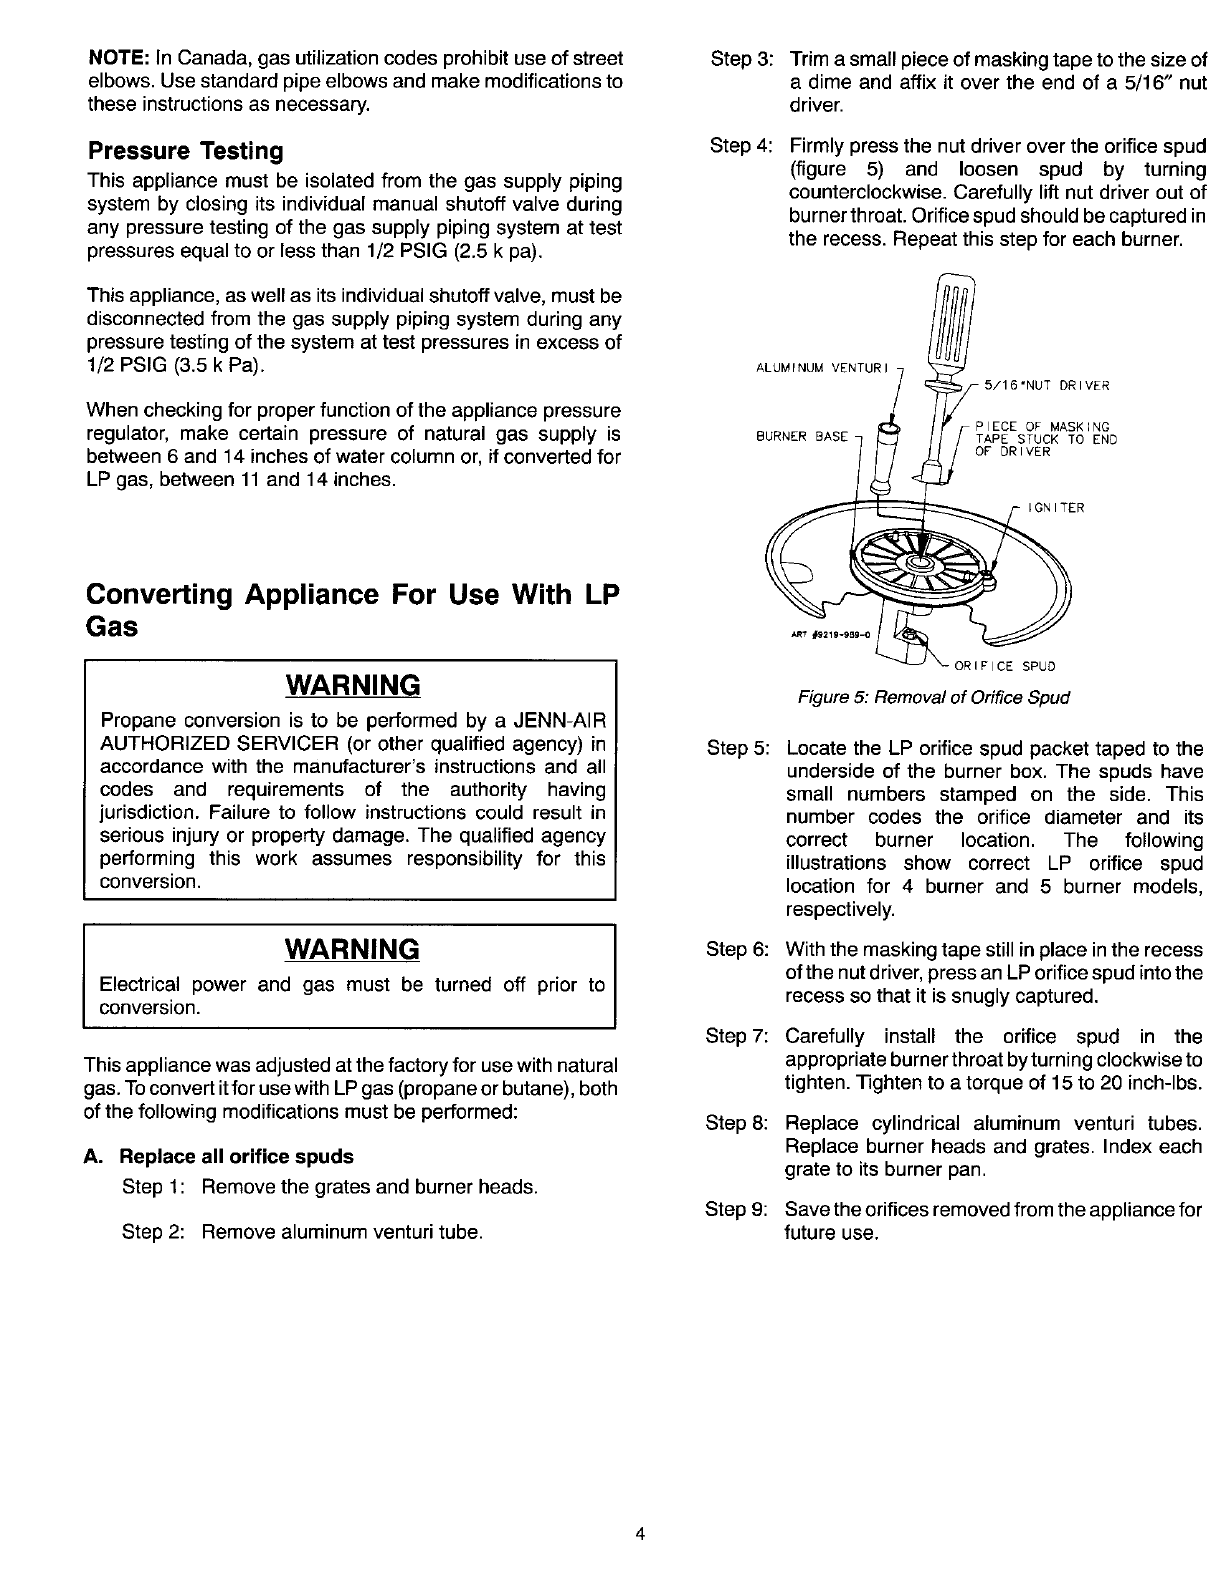
Pressure Testing Step 4: Firmly press the nut driver over the orifice spud
(figure 5) and loosen spud by turning
This appliance must be isolated from the gas supply piping counterclockwise. Carefully lift nut driver out of
system by closing its individualmanual shutoff valve during burnerthroat. Orificespudshould becaptured in
any pressure testing of the gas supply piping system at test the recess. Repeat this step for each burner.
pressures equalto or less than 1/2 PSIG (2.5 k pa).
This appliance, as well as itsindividualshutoff valve, must be
disconnected from the gas supply piping system during any
pressure testing of the system at test pressures in excess of
1/2 PSIG (3.5 k Pa). ALUMfNUMVENTURI
5/16 mNUT DRIVER
When checking for proper function of the appliance pressure
regulator, make certain pressure of natural gas supply is P_ECEOr MASK_NCBURNER BASE TAPE STUCK TO END
between 6 and 14 inches of water column or, if converted for oF DRIVER
LP gas, between 11 and 14 inches.
IGNITEn
Converting Appliance For Use With LP
Gas
ORIFICE SPUD
WARNING Figure5: Removalof Orifice Spud
Propane conversion is to be performed by a JENN-AIR
AUTHORIZED SERVICER (or other qualified agency) in Step 5: Locate the LP orifice spud packet taped to the
accordance with the manufacturer's instructions and all underside of the burner box. The spuds have
codes and requirements of the authority having small numbers stamped on the side. This
jurisdiction. Failure to follow instructions could result in number codes the orifice diameter and its
serious injury or property damage. The qualified agency correct burner location. The following
performing this work assumes responsibility for this illustrations show correct LP orifice spud
conversion, location for 4 burner and 5 burner models,
respectively.
I WARNING Step 6: With the masking tape still in place in the recess
ofthe nut driver, press an LP orifice spud intothe
Electrical power and gas must be turned off prior to recess so that it is snugly captured.
conversion.
Step7: Carefully install the orifice spud in the
This appliance was adjusted at the factory for use with natural appropriate burner throat byturning clockwise to
gas. Toconvert itfor use with LP gas (propane or butane), both tighten. Tighten to a torque of 15 to 20 inch-lbs.
of the following modifications must be performed: Step 8: Replace cylindrical aluminum venturi tubes.
Replace burner heads and grates. Index each
A. Replace all orifice spuds grate to its burner pan.
Step 1: Remove the grates and burnerheads.
Step 9: Savethe orifices removed fromthe appliance for
Step 2: Remove aluminum venturi tube. future use.


