


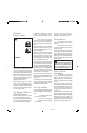
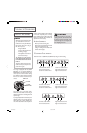
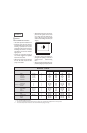
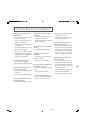

CONTROL LOCATIONS
All burners have a 15,000 BTU (12,000 BTU LP) rating on the HI setting.
MODEL PRG4810
1. Left front surface burner. 4. Center rear surface burner.
2. Left rear surface burner. 5. Right front surface burner.
3. Center front surface burner. 6. Right rear surface burner.
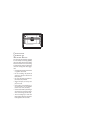
MODEL PRG3610
1. Left front surface burner. 4. Center rear surface burner.
2. Left rear surface burner. 5. Right front surface burner.
3. Center front surface burner. 6. Right rear surface burner.
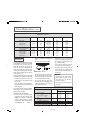
MODEL PRG3010
1. Left front surface burner. 3. Right front surface burner.
2. Left rear surface burner. 4. Right rear surface burner.
CAUTION:
5
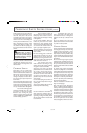
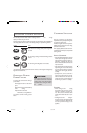
SURFACE COOKING
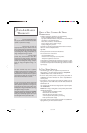
SURFACE BURNERS
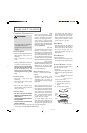
Your range is equipped with one (Model
PRG3010) or two (Model PRG3610,
PRG4810) three-part simmer burners. The
center caps cover the low flame settings
from boilovers. These caps also spread the
flame out to avoid too much heat in pan
centers.
• All burner ignitors will spark when
any surface burner is turned on.
• Surface burners may be difficult to
light at times due to air in the gas
line. This may occur:
a) during installation
b) if range is disconnected from
the main gas supply
c) if the appliance has not been
used for several days
To remove air in the gas line,
hold a lighted match next to the
burner head and turn the control
knob on.
• The burner flame may appear sepa-
rated from the port, if a pan is not
placed on the grate.
LO FLAME
INNER CAP
PORTED
BURNER RING
NO TES:
If the flame should go out during a
cooking operation, turn the burner off.
If a strong gas odor is detected, wait 5
minutes for gas odor to disappear be-
fore relighting the burner.
The burners have a solid state ignitor.
When the control knob is turned on, gas
will flow into the burner and the ignitor will
spark to light.
A properly adjusted burner with clean ports
will light within a few seconds. The flame
will be blue with a clearly defined inner
cone. There should be no trace of yellow in
the flame. (During initial use, dust in the line
or in the air may briefly cause an orange
flame.) With LP gas, some yellow tips on the
flames are acceptable. This is normal and
adjustment is not necessary.
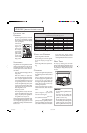
TO SET CONTROLS
1. Place a pan on the burner grate.
2. Push in on the control knob and turn the
knob counterclockwise to the LIGHT
setting. A clicking sound will be heard
until the burner lights.
8113P418-60 2/2/04, 2:01 PM6