


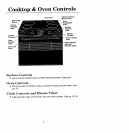
Surface Controls
The variable heat controls for the cooktop provide flexibility in heat setting selection.
To Set Controls
• Sincethe controls area push-turntype,they must bepusheddown beforeturning.
To set (from the OFF position), push down on control knob and turn in either
direction to desired heat setting.
• When control is in any position,other than OFF, it may be turned in anydirection
without pushing down.
• A red indicator light will glow when a surface heating element is ON. There are
two indicator lights,onefor theheating elements onthe leftside ofthe range, one
for the heating elements on the right side of the range.
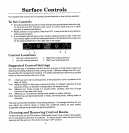
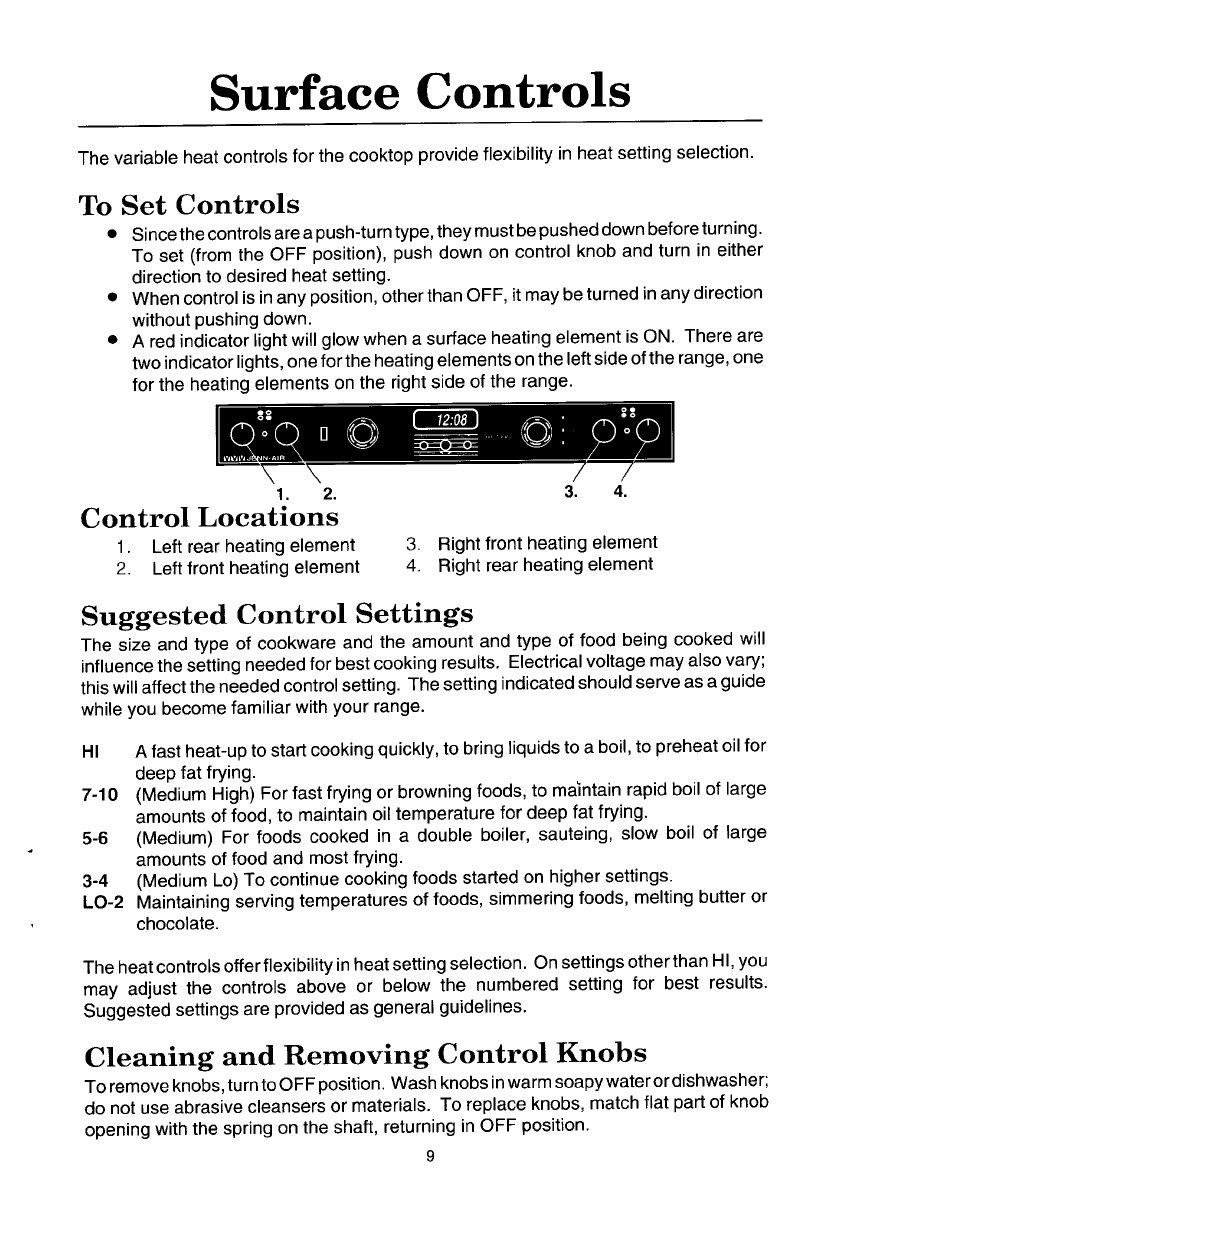
1. 2. 3. 4.
Control Locations
1. Left rear heating element 3. Right front heating element
2. Left front heating element 4. Right rear heating element
Suggested Control Settings
The size and type of cookware and the amount and type of food being cooked will
influence the setting needed for best cooking results. Electrical voltage may alsovary;
this will affectthe needed control setting. The setting indicated should serve as a guide
while you become familiar with your range.
HI A fast heat-up to start cooking quickly, to bring liquids to a boil,to preheat oil for
deep fat frying.
7-10 (Medium High) For fast frying or browning foods, to ma)ntain rapid boil of large
amounts of food, to maintain oil temperature for deep fat frying.
5-6 (Medium) For foods cooked in a double boiler, sauteing, slow boil of large
amounts of food and most frying.
3-4 (Medium Lo) To continue cooking foods started on higher settings.
LO-2 Maintaining serving temperatures of foods, simmering foods, melting butter or
chocolate.
The heatcontrols offer flexibility inheat setting selection. On settings otherthan HI,you
may adjust the controls above or below the numbered setting for best results.
Suggested settings are provided as general guidelines.
Cleaning and Removing Control Knobs
To removeknobs,turnto OFFposition. Wash knobs inwarm soapywater ordishwasher;
do not use abrasive cleansers or materials. To replace knobs, match flat part of knob
opening with the spring on the shaft, returning in OFF position.
9