


• The operating time automatically sets to 1
hour and the cook time indicator
illuminates.
• When the cleaning cycle has finished a
warning will sound. Press any button to
stop the sound.
• It is a good idea to run the oven for an hour
or two per week to ensure continued good
performance from the Stay-clean finish.
• Slight discolouration and polishing of the
Stay-clean surfaces may occur in time. This
does not affect the Stayclean properties in
any way.
• Use minimal, if any, extra oil or fat when
roasting meat, potatoes only require
brushing with fat before cooking. Extra fat
in the oven during roasting will increase
splashing and staining of the cavity.
• It is not necessary to add water to a meat
tin when roasting. The water and the fat
juices from the joint create excessive
splattering during cooking – even at normal
temperatures, as well as causing
condensation.
• Covering joints during cooking will also
prevent splashing onto the interior
surfaces. Removing the covering for the last
20-30 minutes will allow extra browning if
required.
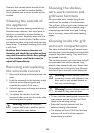
Cleaning the door(s)
Warning! Under no circumstances
should the door assembly be detached
from the product for cleaning.
Warning! To prevent damaging or
weakening the door glass panels avoid
the use of the following:
• Household detergents and bleaches
• Soap impregnated pads unsuitable
for non-stick saucepans
• Abrasive cleaning pads, scourers
and steel wool pads.
• Chemical oven pads or aerosols
•Rust removers
• Bath/Sink stain removers
Cleaning between the
outer and inner door glass
The inner door glass is removable for cleaning.
Clean the outer and inner glass using hot
soapy water or hob cleaner may be used. Do
not use hob cleaner on the Stainless Steel or
painted finishes.
Ensure that all parts are well rinsed and
thoroughly dried before attempting to replace
the glass.
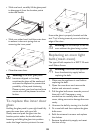
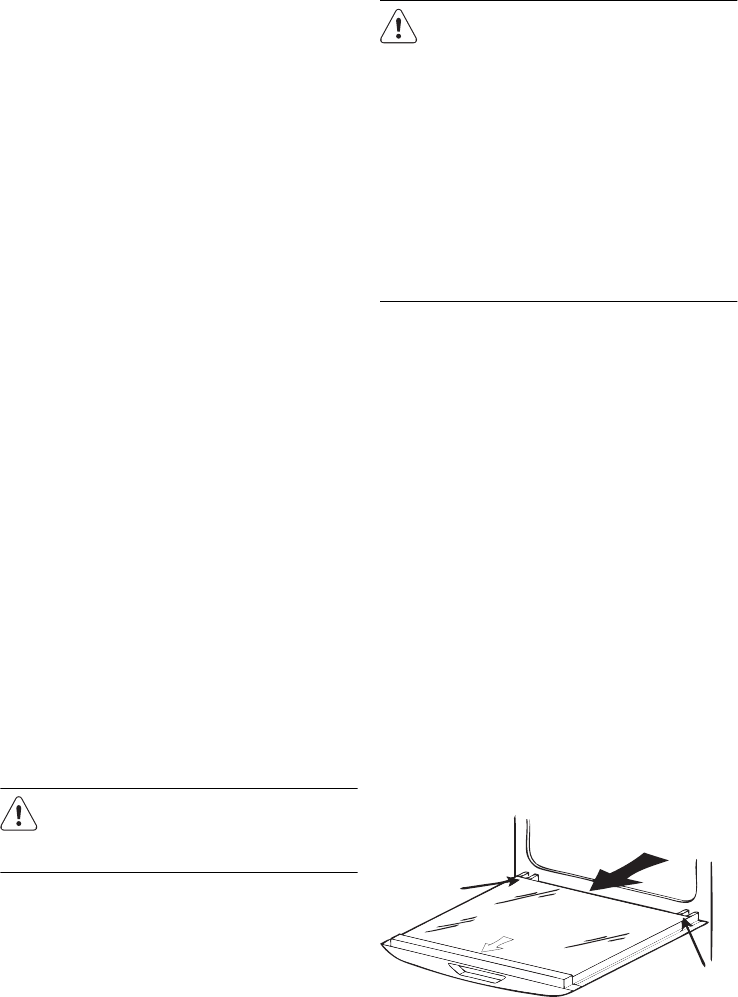
To remove the Inner glass
Open the oven door to gain access to the top
of the oven door.
• Firmly grasp the rear edge of the inner glass
panel with both hands.
• Push the glass panel towards you until it
clears the hinge location points at the rear.
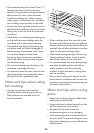
Hinge
location
point
Hinge
location
point
37