


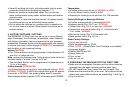

• Push the Ground Coffee button (Fig. 3.3) FILL PRE-GROUND
/ READY.
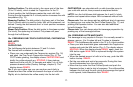
• Fill 1 or 2 level measuring scoops of ground coffee into the
opening for ground coffee (Fig. 1.7) and close the lid (Fig. 1.8).
• Now push one of the coffee buttons to brew your coffee, e.g.
1 COFFEE, then briefly PRE-GROUND. The pre-ground
coffee is tamped and brewed, then READY.
Please note: If the Ground Coffee button (Fig. 3.3) is pressed by
mistake just press one of the coffee buttons,
NOT ENOUGH
PRE-GROUND. The machine will automatically stop and return
to READY.
Please note: After use of sugar coated or flavored coffee
through the pre-ground coffee funnel you may experience some
flavor transfer when switching back to your regular coffee.
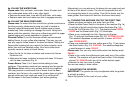
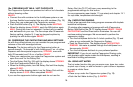
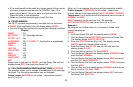
10. AUTO CAPPUCCINO SYSTEM
The C9 OT features the Auto Cappuccino System with two spouts
located one in front of the other (Fig. 16) The front spout produces
steam (steam nozzle). The rear spout produces high pressure
brewed coffee. Attached to the steam nozzle is the removable
frothXpress system (Fig. 13). It siphons, steams and froths milk.
The C9 OT Cappuccino System prepares a variety of milk based
drinks without ever moving the cup: Cappuccino, Latte, Café
Mocha, Hot Milk, Hot Chocolate.
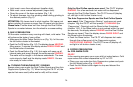
10a. PREPARING THE THERMAL MILK CONTAINER
The C9 OT comes with a 14 oz. double-walled vacuum stainless
steel container. This custom-made milk container can keep cold
milk cold for up to eight hours. There is no need to worry about
the milk getting warm during the day.
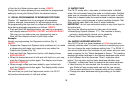
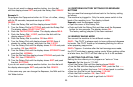
The milk container comes complete with: • lid and attached
stainless steel hose • two short flexible hoses • one long flexible
hose • spare black and transparent fittings (Fig. 14 and 15).
The two short hoses have a connecting piece on each end.
• Unscrew the milk container lid. A stainless steel hose is
attached to the inside of the container. A small transparent
fitting holds the hose in place (a spare fitting is included).
• Rinse the milk container with fresh water before first use and
fill with fresh cold milk. Close the container.
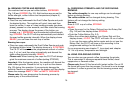
• Insert one end of the short flexible hose into the lid opening.
• Remove the red cap from the side of the frothXpress and
insert the other end of the short flexible hose (Fig. 16).
You are ready to steam/froth milk.
Storing the milk container: always remove the outside flexible
hose and unscrew the lid before storing the milk container in the
refrigerator.
Important: The milk container is not dishwasher safe. Do not
immerse the milk container in any liquid.
Using the long flexible hose: To siphon milk directly from a milk
carton or any other container, use the long flexible hose. Insert
one of the black connecting pieces in the straight-cut end of the
hose and insert into the frothXpress. Insert the other end with
the V-cut into the container with cold milk (Fig. 19).
10b. THE FROTHXPRESS SYSTEM
This system produces unlimited volumes of hot steamed or
frothed milk right into your cup.
Important: This system siphons milk and mixes it inside the
frothXpress with hot steam. It is necessary that all parts are
connected tightly, otherwise the siphoning process will not work.
16.