


3,
Remove the glass to stop dispensing.
NOTE: Ice may continue to dispense for several seconds
after removing the glass from the pad. The dispenser may
continue to make noise for a few seconds after dispensing.
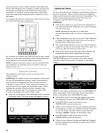
The Dispenser Light
When you use the dispenser, the dispenser light will
automatically turn on. If you want the dispenser pad light to be
on continuously, press the LIGHT button to turn it on. The display
screen indicates when the light is on.
Press LIGHT a second time to turn the dispenser pad light off.
The dispenser lights are LEDs that cannot be changed. If it
appears that your dispenser lights are not working, see
"Troubleshooting" for more information.
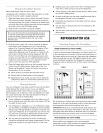
The DispenserLock
The dispenser can be turned off for easy cleaning or to avoid
unintentional dispensing by small children and pets.
NOTE: The lock feature does not shut off power to the
refrigerator, to the ice maker, or to the dispenser light. It simply
deactivates the controls and dispenser pad. To turn off the ice
maker, see "Ice Maker and Storage Bin."
• Press and hold LOCI< for 3 seconds to lock the dispenser.
• Press and hold LOCI< a second time to unlock the dispenser.
The display screen indicates when the dispenser is locked.
Do not use with water that is microbiologically unsafe or
of unknown quality without adequate disinfection before
or after the system. Systems certified for cyst reduction
may be used on disinfected waters that may contain
filterable cysts.
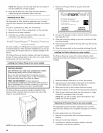
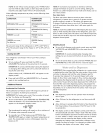
Water Filter Status Light
The water filter status light will help you know when to change
your water filter.
• When the dispenser control panel's water filter status
display changes to "ORDER," this tells you that it is almost
time to change the water filter cartridge.
• Replace the water filter cartridge when the water filter
status display changes to "REPLACE."
NOTE: If water flow to your water dispenser or ice maker
decreases noticeably, change the filter sooner. The filter
should be replaced at least every 6 months, depending on
your water quality and usage.
After changing the water filter, reset the status light. Press
the SETTINGS button, then press SETTINGS to initiate the
reset, then press MEASURED FILL to confirm that you want to
reset the status light. When the system is reset, the "ORDER"
and "REPLACE" icons will disappear from the display
screen.
NOTE: When the status displays "REPLACE," you can
temporarily reset the status icon manually, without changing
the water filter. Press and hold the LIGHT and
TEMPERATURE buttons at the same time for 3 seconds. The
"REPLACE" display will be turned off for 14 days. When it
turns back on, you can manually reset it again if desired.
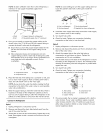
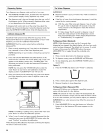
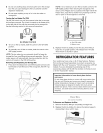
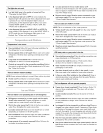
Changing the Water Filter
1. Locate the water filter in the top-right corner of the
refrigerator compartment.
2. Lift open the filter cover door. The filter will be released and
then eject as the door is opened.
3. When the door is completely open, pull the filter straight
out.
4°
NOTE: There may be some water in the filter. Some spilling
may occur. Use a towel to wipe up any spills.
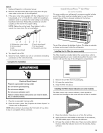
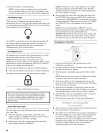
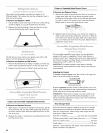
Take the new filter out of its packaging and remove the
covers from the O-rings. Be sure the O-rings are still in place
after the covers are removed.
5. With the arrow pointing up, align the new filter with the
filter housing and slide it into place. The filter cover door will
automatically begin to close as the new filter is inserted.
6. Close the filter cover door completely in order to snap the
filter into place. You may need to press hard.
7. Flush the water system. See "Water and Ice Dispensers."
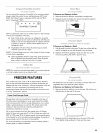
ce M@e Ste ,age Bn,
(o_'; some _s'sedes}
Allow 24 hours to produce the first batch of ice. Discard the
first three batches of ice produced.
The quality of your ice will be only as good as the quality of
the water supplied to your ice maker. Avoid connecting the
ice maker to a softened water supply. Water softener
chemicals (such as salt) can damage parts of the ice maker
and lead to poor quality ice. If a softened water supply
cannot be avoided, make sure the water softener is
operating properly and is well maintained.
2O