


9
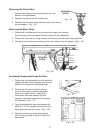
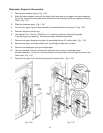
1. Disconnect the dishwasher from the electrical
supply and remove the toe panel and access
panel from the bottom of the dishwasher and
the inner door panel.
2. Disconnect the harness wires from the spade
connectors on the switch assembly.
(Fig. 1-24)
3. Remove the two (2) Hex-head screws securing
the switch assembly to the door frame.
(Fig. 1-24)
The switch assembly can now be removed.
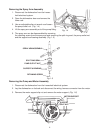
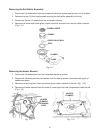
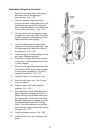
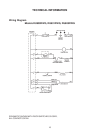
1. Disconnect the dishwasher from the electrical
supply and remove the toe panel and access
panel from the bottom of the dishwasher and
the inner door panel.
2. Disconnect the wiring harness connectors from
the timer terminals.
(Fig. 1-23)
3. Remove the three (3) Hex-head screws securing
the timer to the door frame.
(Fig. 1-23)
The timer,
cam and cam follower can now be removed.
NOTE: When reinstalling the cam, be sure it is aligned with the keyed shaft of the timer.
When reinstalling the timer, be sure the cam follower post is positioned inside the
cam’s groove.
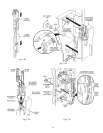
Removing the Timer
Fig. 1-23
Screw
Wiring Harness
Connector
Removing the Switch Assembly
Screw
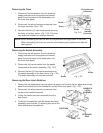
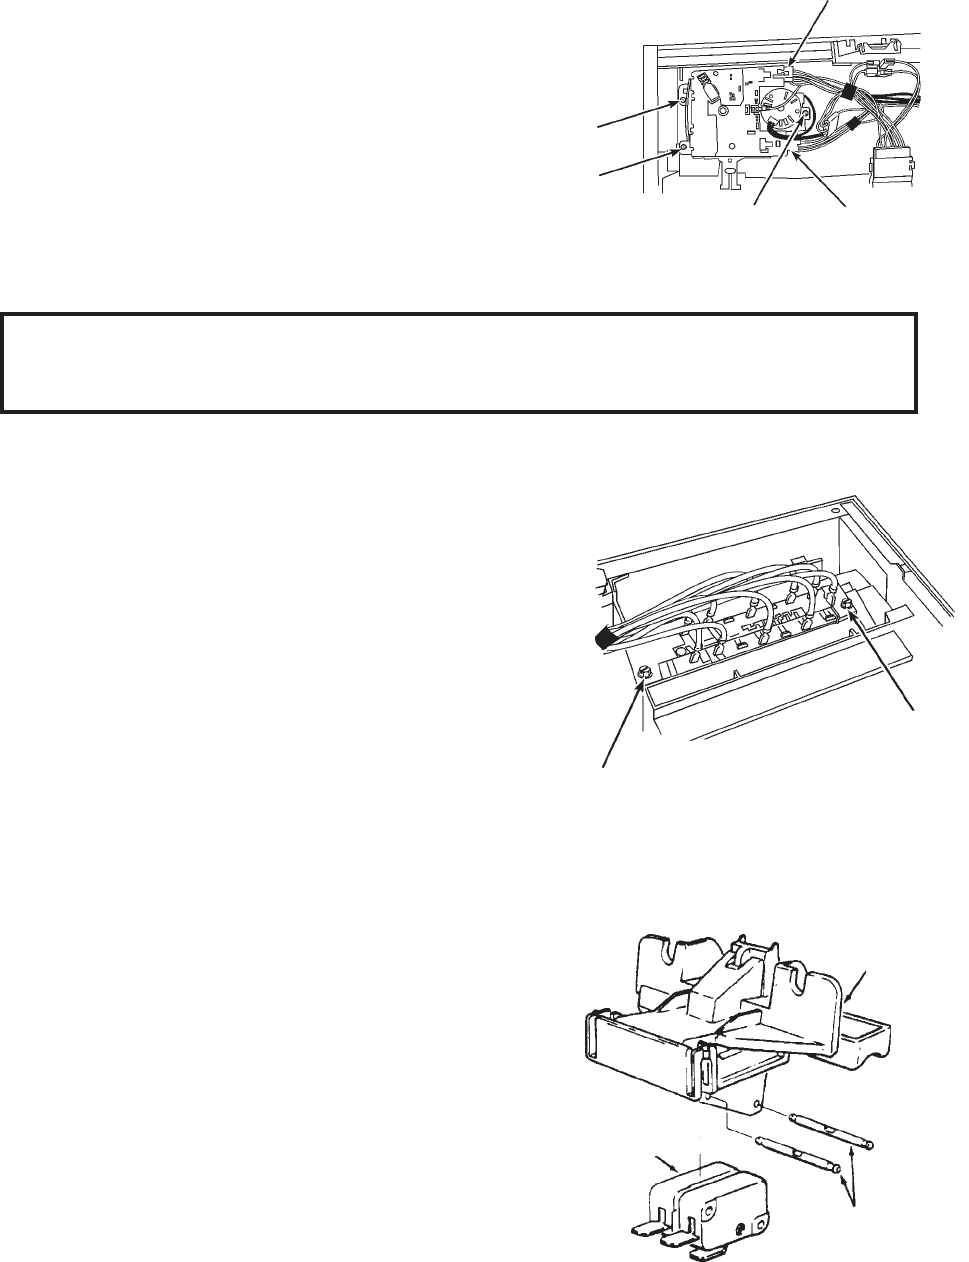
1. Disconnect the dishwasher from the electrical supply and remove the toe panel and access
panel from the bottom of the dishwasher and the inner door panel.
(Fig. 1-25)
2. Disconnect the wiring harness connectors from
the door latch switch terminals.
3. Unclip the handle and latch assembly from the
door frame.
4. To remove the switches from the handle and latch
assembly, push the two (2) retaining pins out of the
holes and remove the switches.
Removing the Door Latch Switches
Fig. 1-24
Fig. 1-25
SWITCHES
RETAINING
PINS
HANDLE &
LATCH
ASSEMBLY
Wiring
Harness
Connector
Screw
Screw
Screw