


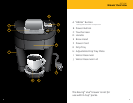

SECTION 3
Using Your Brewer
SECTION 4
Setting the Time & Temperature
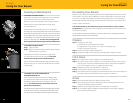
Adding Water
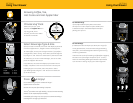
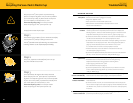
When the water supply is low, the Touchscreen will display
as pictured.
Bottled or filtered water is recommended.
Do not remove the Water Reservoir during the brewing process.
There are two options for filling the Water Reservoir:
Option 1
Remove the Water Reservoir Lid and pour water directly
into the Water Reservoir. Replace the Lid.
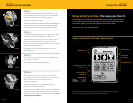
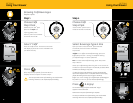
Accessing the Settings Menu
When the brewer is on and not brewing, the “Menu”
option will appear on the Touchscreen. Follow the
steps below to access the settings menu. Press and
hold the “Menu” button to access. Use the “Menu”
button to tab through the setting options.
Setting the Clock
Step 1
Touch and briefly hold the “Menu” button on the
Touchscreen until “Set Clock” is displayed.
Step 2
The “H” will flash, indicating you are programming the hours.
Use the + and - buttons to change the hours. Press the
“Menu” button again to access the minutes. Use the + and -
buttons to set the minutes. The clock is on a 11h setting and
will switch to PM once the 11h mark is passed.
Once the clock is set, touch the “Menu” button to save your
settings. The screen will move to the next programmable
setting (Auto Off).
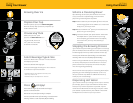
Programming the
“Auto Off” Feature
You can program the brewer to automatically turn off after a
certain period of time after the last brew. This feature can be
used as an energy saver.
In “Auto Off” programming mode, use the + and - buttons
to change the hours the brewer will remain on after the last
brew. For example, if you select “2,” the brewer will turn off
two hours after the last brew. Use the + and - buttons to
scroll to “Off” to deactivate the “Auto Off” feature.
Once the feature is set, press the “Menu” button to save your
settings. The screen will move to the next programmable
setting (Set On Time see page 18).
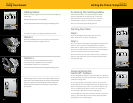
Option 2
You may also remove the Water Reservoir from
the brewer to fill it. Replace the Lid and return
the filled Water Reservoir to the brewer.
Do not remove the Water Reservoir during the brewing process.
When brewing at 14 oz. and 16 oz. sizes, if the brewer senses the
water level is low, the brewing process will stop until the Water
Reservoir is refilled. Once enough water has been added, the
brewing process will resume. Ensure that your mug is still on
the Drip Tray.
16 17