7
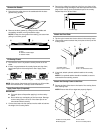
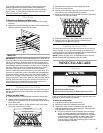
2. Place the door and overlay frame face down on the
cardboard.
3. Use the holes in the door frame as guides and drill pilot holes
for the screws that will attach the overlay frame to the door.
IMPORTANT:
■ Do not use a drill bit larger than ⁷₆₄".
■ Do not drill deeper than ³₈" (9.53 mm).
■ For correct door operation, align the overlay frame and
door frame properly.
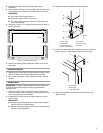
4. Using ten of the #6 x 1" pan-head screws attach the door to
the overlay frame.
5. Remove the masking tape holding the overlay frame to the
door frame.
Reinstall the Gasket
1. Starting at the corners and working toward the center of each
side of the door, push the door gasket back into place.
2. Be sure the door gasket is fully installed on all four sides of
the door.
Install the Door
IMPORTANT: To ensure proper operation, the pivot posts must
be clean and the closers must be clean and greased with
petroleum jelly.
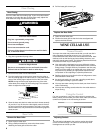
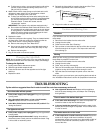
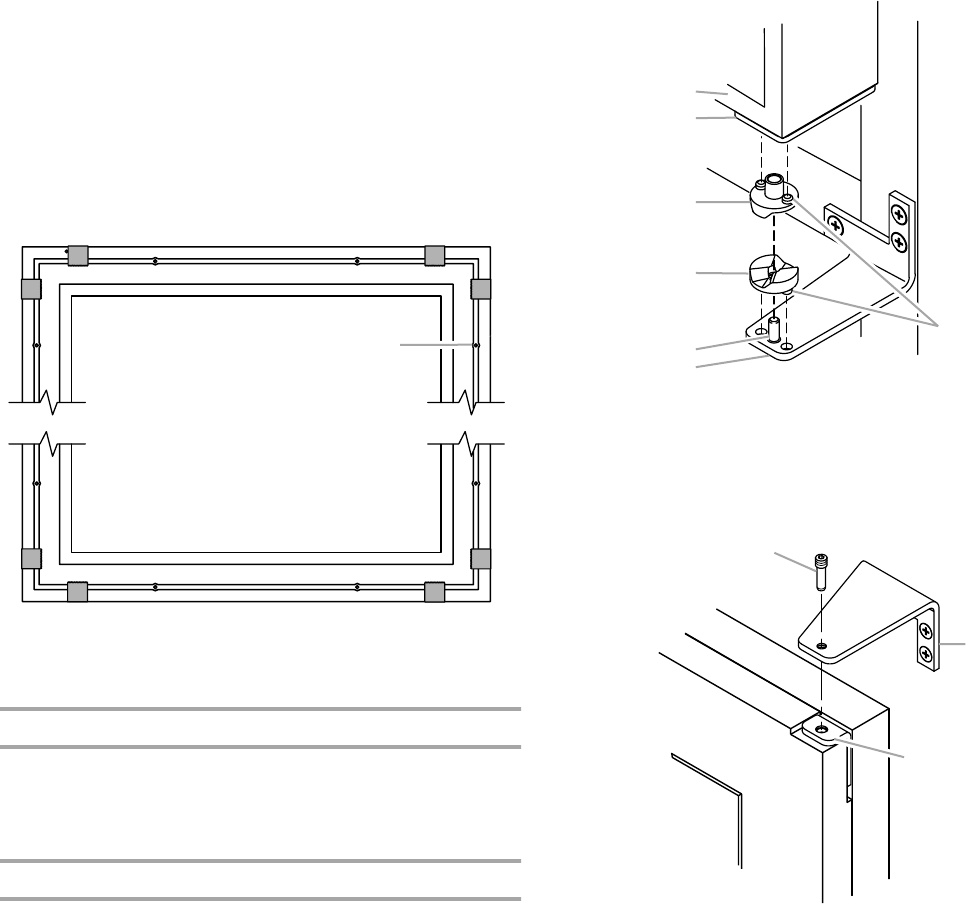
1. Remove the door closer–top and door closer–bottom from
the bottom hinge. Clean thoroughly and apply petroleum jelly
to the mating surfaces of the closers.
2. Install the door closer–bottom and door closer–top on the
bottom hinge.
IMPORTANT:
■ Be sure to properly align the door closer–bottom bosses
with the holes in the bottom hinge.
■ Be sure to properly align the door closer–top bosses with
the holes in the hinge plate.
3. Position the door onto the door closer assembly.
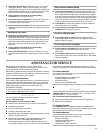
4. Position the door frame and install the pivot post on the top
hinge. Using a ⁷⁄₆₄" Allen wrench, secure the pivot post.
5. Adjust the door frame as needed for proper closure. See
“Door Closing.”
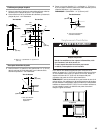
A.#6 x 1" pan-head screws (10)
A
A. Door frame
B.Pivot plate
C.Door closer–top
D.Door closer–bottom
E.Pivot post
F. Bottom hinge
G.Bosses
A.Pivot post
B.Top hinge
C.Top pivot plate
C
A
B
D
E
F
G
A
B
C


