20
OPERATING INSTRUCTIONS
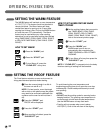
SETTING THE PROOF FEATURE
To avoid lowering the oven temperature and
lengthening proofing time,do not open the oven door
unnecessarily. Check bread products early to avoid
over-proofing.
NOTES:
• DO NOT use the proofing mode for warming food or
keeping food hot. The proofing oven temperature is
not hot enough to hold foods at safe temperatures.
Use the WARM feature to keep food warm.
• Proofing will not operate when oven is above
125°F(52°C). Oven is Hot will show in the display.
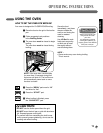
The Proof feature maintains a warm environment for
rising yeast leavened products before baking.
ᕡ Place the covered dough in a dish in
the oven on rack B or C.
NOTE: For best results, cover the dough
with a cloth or with plastic wrap (the plastic
may need to be anchored underneath the
container so the oven fan will not blow it
off).
ᕢ Press the “PROOF” pad.
PROOF will be displayed.
ᕣ Press the “START” pad.
ᕤ When proofing is finished, press the
“CLEAR OFF” pad.
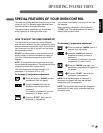
SETTING THE WARM FEATURE
HOW TO SET WARM
ᕡ Press the “WARM” pad.
ᕢ Press the “START” pad.
ᕣ To turn Warm off, press the
“CLEAR OFF” at any time.
The WARM feature will maintain an oven temperature
of 170°F(77°C). This feature should not be used to
reheat cold foods. The Warm feature will keep
cooked food warm for serving up to 3 hours after
cooking has finished. After 3 hours the WARM feature
will shut the oven OFF automatically. The Warm
feature may be used without any other cooking
operations or can be used after cooking has finished
using TIMED BAKE (CONV. BAKE, CONV. ROAST)
or DELAYED TIMED BAKE (CONV. BAKE, CONV.
ROAST).
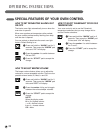
HOW TO SET WARM FEATURE WHEN
TIMED COOKING
ᕡ Set the cooking feature that you want to
use: TIMED (BAKE, CONV. BAKE,
CONV. ROAST), DELAY TIMED
(BAKE, CONV. BAKE, CONV. ROAST)
refer to the relevant previous page.
ᕢ Press the “START” pad.
ᕣ Press the “WARM” pad.
WARM mode is set to turn on
automatically after completing the
TIMED COOKING or DELAY TIMED
COOKING.
ᕤ To turn Warm off at any time press the
“CLEAR OFF” pad.
NOTE: If “CLEAR OFF” is pressed prior to the delay
functions starting all settings will be canceled.


