


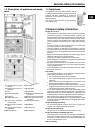
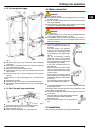
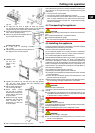
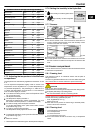
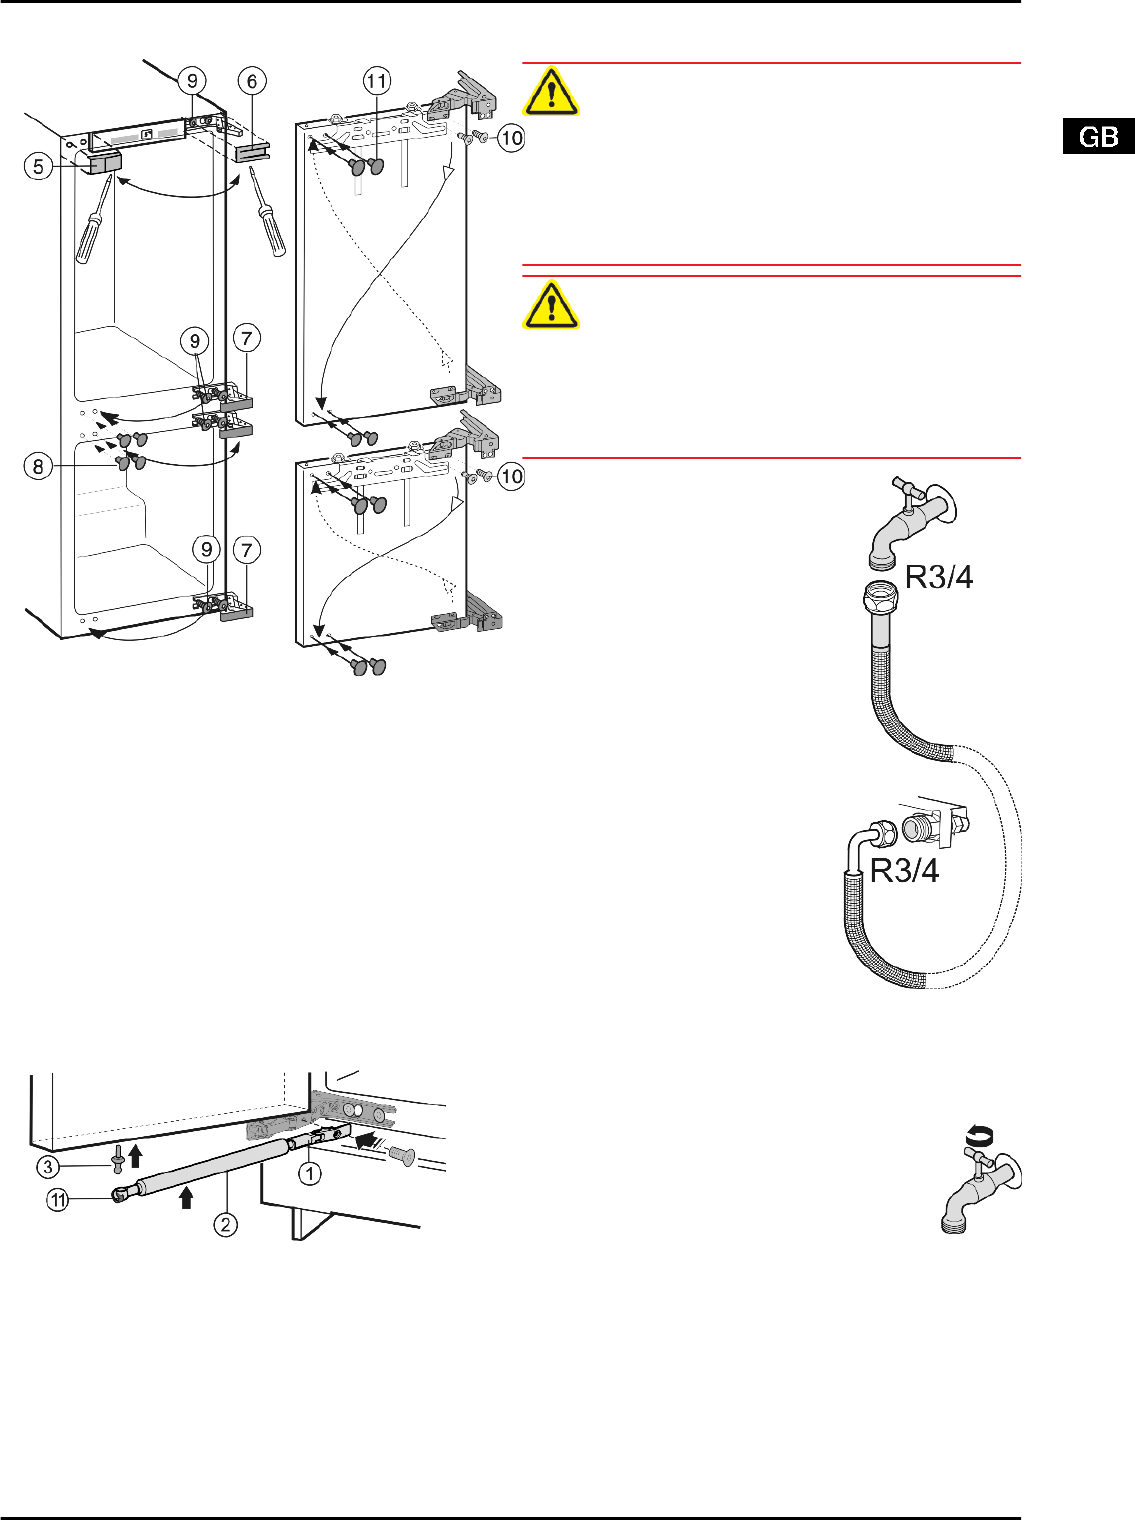
4.1.2 To change the hinges
Fig. 4
u
Lift off the covers
Fig. 4 (5,6,7,8)
forwards using a flat-blade
screwdriver.
u
Loosen the top and bottom screws
Fig. 4 (9)
on the appliance
body, without removing them.
u
Pull the doors outwards and detach them.
u
Transfer the screws
Fig. 4 (9)
to the opposite side and screw
them in a little.
u
Undo the screws
Fig. 4 (10)
and change over the hinges di-
agonally.
The screws
Fig. 4 (10)
are self-tapping: use a cordless screw-
driver.
u
Screw the hinges tight.
u
Place plugs
Fig. 4 (11)
in the now unused fastening holes.
u
Attach the doors to the prefitted screws
Fig. 4 (9)
and tighten
the screws.
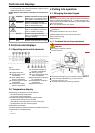
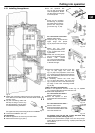
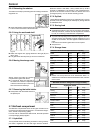
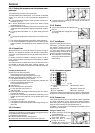
4.1.3 Re-fit the soft stop mechanism
Fig. 5
u
Fasten ball stud
Fig. 5 (3)
in the new fastening hole.
u
Push tension spring
Fig. 5 (11)
inwards again.
u
Screw on holder
Fig. 5 (1)
.
u
Attach soft stop mechanism
Fig. 5 (2)
to ball stud.
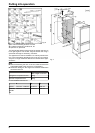
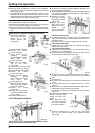
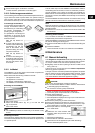
4.2 Water connection*
WARNING
Danger of electric shock!
u
Disconnect the appliance by unplugging it before you connect
it to the water line.
u
Shut off the water supply before you connect the water feed
lines of the IceMaker.
u
The connection to the drinking water system may be carried
out only by a qualified gas fitter and plumber.
WARNING
Risk of poisoning!
u
The water quality has to comply with the drinking water ordi-
nance of the respective country (e.g. 98/8
u
The IceMaker serves exclusively for making ice cubes in
household quantities and has to be operated with water suit-
able for the purpose.
- The water pressure has to be be-
tween 0.15 MPa and 0.6 MPa. (1.5
bar- 6 bar)
- The water supply to the appliance
must be via a cold water pipe which
withstands the operating pressure
and complies with the hygiene regu-
lations.
Use the accompanying stainless
steel hose (1.5 m). Do not reuse old
hoses. A 3 m hose is available from
the customer service department and
has to be fitted by an expert.
In the hose connecting piece is a
sieve with seal.
- Between the hose and the domestic
water connection there has to be a
stopcock to interrupt the water supply
in case of need.
- All the fixtures and fittings used for
water supply have to comply with the
applicable regulations of the respec-
tive country.
- Do not damage or kink the water inlet
pipe when installing the appliance.
u
Connect the straight part of the accompanying stainless steel
hose to the stopcock.
The solenoid valve is at the bottom back of the appliance. It has
a metric R3/4 connecting thread.
u
Connect the angled part of the stainless steel hose to the sol-
enoid valve.
u
Open the stopcock of the water supply and check
that the entire water system is leakproof.
Before initial use:
u
Have the water pipe bled of air by the proper ex-
pert.
4.3 Installation
All the mounting components accompany the appliance.
Putting into operation
5