


Always install the appliance directly against the wall.
Do not install the appliance without assistance.
Standard EN 378 specifies that the room in which you install your
appliance must have a volume of 1 m
2
per 8 g of R 600a refrig-
erant used in the appliance. If the room in which the appliance is
installed is too small, a flammable gas-air mixture may form in the
event of a leakage in the refrigeration circuit. The quantity of re-
frigerant used in your appliance is indicated on the type plate on
the inside of the appliance.
WARNING
Fire hazard due to dampness!
If live parts or the mains lead become damp this may cause short
circuits.
u
The appliance is designed for use in enclosed areas. Do not
operate the appliance outdoors or in areas where it is exposed
to splash water or damp conditions.
WARNING
Fire hazard due to refrigerant!
The refrigerant R 600a is environmentally friendly but flammable.
Escaping refrigerant may ignite.
u
Do not damage the piping of the refrigeration circuit.
WARNING
Fire hazard and danger of damage!
u
Do not place appliances emitting heat e.g. microwaves, toast-
ers etc. on the appliance!
WARNING
Fire hazard and risk of damage due to blocked ventilation grille!
u
Always keep the ventilation grille free. Always ensure that the
appliance is properly ventilated.
u
Detach the connecting cable from the rear of the appliance,
removing the cable holder at the same time because other-
wise there will be vibratory noise!
u
Remove the protective film from the outside of the appliance.
u
Evenly apply an agent for care of stainless steel, wiping in the
direction of the grain.
w
Subsequent cleaning becomes easier as a result.
NOTICE
The stainless steel doors have a high-quality surface coating and
must not be cleaned with the accompanying care product.
Otherwise the surface coating will be affected.
u
Wipe the coated door surfaces using a soft, clean cloth only.
u
Apply a stainless steel cleaner only to the stainless steel
side walls evenly, wiping with the grain. Subsequent cleaning
becomes easier as a result.
u
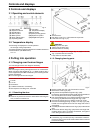
Remove all transit supports.
u
Dispose of packaging material (see 4.5) .
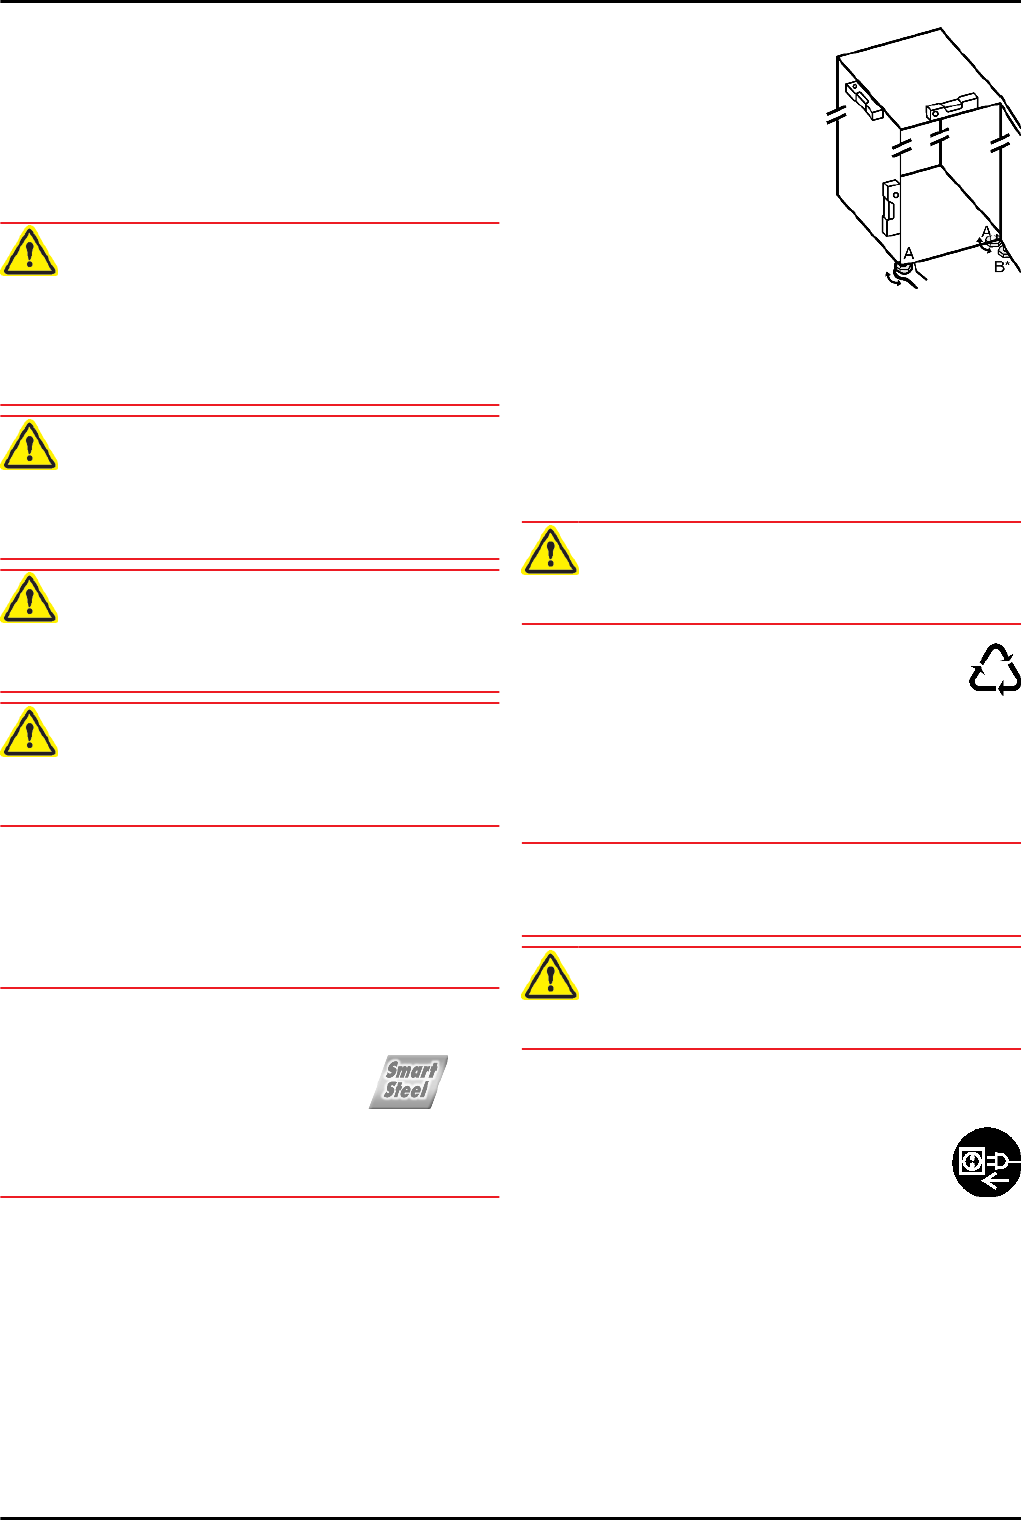
u
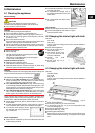
Align the appliance so that it stands
firmly and on a level by applying the
accompanying spanner to the ad-
justable-height feet (A) and using a
spirit level.
u
Then support the door: Extend the
adjustable foot at the turn hinge (B)
until it rests on the floor and then
make a further 90° turn.
When a Side-by-Side appliance (S…) is fitted together with a
second appliance (as a SBS combination):
u
Proceed according to the Side-by-Side combined fridge-
freezer installation instructions. (Accessories bag of the SBS
freezer/appliance with freezer compartment)
If the appliance is installed in a very damp environment, conden-
sate may form on the outside of the appliance.*
u
Always see to good ventilation at the installation site.
4.5 Disposing of packaging
WARNING
Danger of suffocation due to packing material and plastic film!
u
Do not allow children to play with packing material.
The packaging is made of recyclable materials:
-
corrugated board/cardboard
-
EPS moulded parts
-
polythene bags and sheets
-
polypropylene straps
u
Take the packaging material to an official collecting point.
4.6 Connecting the appliance
NOTICE
Risk of damage to the electronic control system!
u
Do not use stand-alone inverters (conversion of d.c. to a.c./
three-phase) or energy saving plugs.
WARNING
Fire and overheating hazard!
u
Do not use extension cables or multiple socket outlets.
The type of current (alternating current) and voltage at the instal-
lation site have to conform with the data on the type plate (see
Appliance at a glance).
Connect the appliance only with a properly installed
socket outlet with earthing contact. The socket outlet
must be fused with 10 A or higher.
It must be easily accessible so that the appliance can
be quickly disconnected from the supply in an emer-
gency.
u
Check the electrical connection.
u
Clean the appliance (see 6.1) .
u
Plug in the power plug.
4.7 Switching on the appliance
u
Press On/Off button
Fig. 3 (3)
.
w
The temperature display indicates the current temperature.
w
The interior light is on when the door is open.
Putting into operation
6