


5.7.1 Cooling with SuperCool
u
Briefly press SuperCool button
Fig. 3 (2)
.
w
The SuperCool symbol
Fig. 3 (12)
lights up in the display.
w
The cooling temperature drops to the coldest value. Super-
Cool is activated.
w
SuperCool is automatically deactivated after 6 to12 hours The
appliance continues to operate in the energy-saving, normal
mode.
5.7.2 To prematurely deactivate SuperCool
u
Briefly press SuperCool button
Fig. 3 (2)
.
w
The SuperCool symbol
Fig. 3 (12)
goes out in the display.
w
SuperCool is deactivated.
5.8 Fan
With the fan you can rapidly cool large quantities of fresh food or
achieve a relatively even distribution of temperature across all
the storage levels.
The forced-air cooling is to be recommended:
-
at high room temperature (from approx. 30 °C )
-
at high humidity
The forced-air cooling uses slightly more energy. To save ener-
gy, the fan switches off automatically when the door is open.
5.8.1 Switching on the fan
u
Briefly press the fan button
Fig. 3 (8)
.
w
The fan symbol
Fig. 3 (10)
shines.
w
The fan is active. It switches on automatically when the com-
pressor runs.
5.8.2 To switch off the fan
u
Briefly press the fan button
Fig. 3 (8)
.
w
The fan symbol
Fig. 3 (10)
goes out.
w
The fan is switched off.
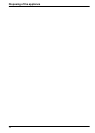
5.9 Relocating the shelves
The shelves have stops preventing them from being unintention-
ally pulled out.
u
Lift the shelf and draw it out forwards.
u
Insert shelf with the raised edge pointing upwards at the back.
w
The food does not freeze onto the rear wall.
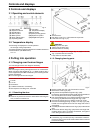
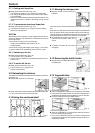
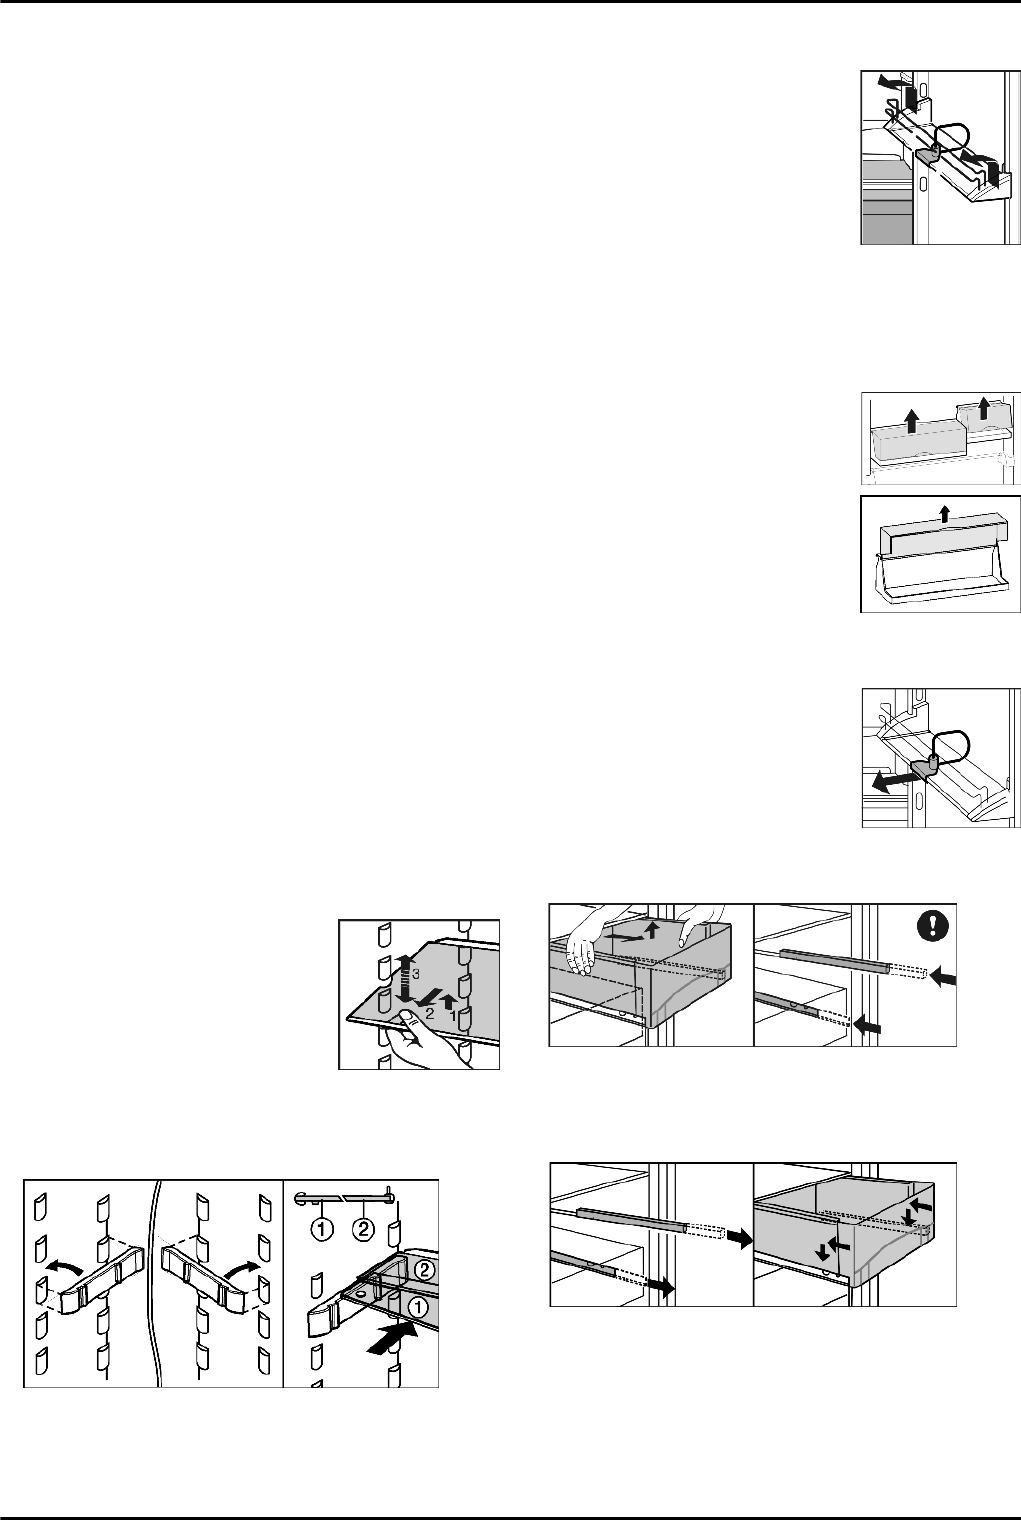
5.10 Using the sectioned shelf
Fig. 9
u
The glass shelf with stop face (2) has to be at the back.
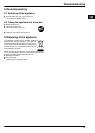
5.11 Moving the storage rack
u
Remove storage rack according to il-
lustration.
The boxes can be removed and placed on the table as a single
unit.
Only one box or both boxes can be used. If particularly tall bottles
are to be stored, attach only the wide box above the bottle rack.
Three small boxes are available through the customer service as
optional equipment instead of one wide and one small box.
u
Re-positioning the boxes: Lift them for
removal and re-position them as re-
quired.
u
To detach lid: Open 90° and raise to
disengage.
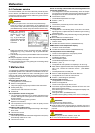
5.12 Removing the bottle holder
u
Always take hold of the bottle holder on
the plastic part.
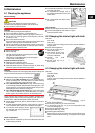
5.13 Vegetable bins
Fig. 10
To remove the vegetable bins:
u
pull the vegetable bin all the way out and tilt it forwards a little.
w
In the case of the bottom drawer, the drawer locking device is
additionally released and the vegetable bin can be removed.
u
Push the projecting telescopic slides back in.
Fig. 11
To insert the vegetable bins:
u
place the vegetable bin on the telescopic slides and push to
the rear, exerting slight pressure.
w
In the case of the bottom drawer, the drawer locking device
additionally engages and the vegetable drawer sits firmly on
the telescopic slides.
Control
8