


Impinger I – 1000 Series Ops Manual
17
2. Replace belt and reconnect splice clips as shown
in step 7 on page 16.
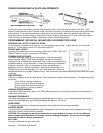
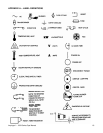
3. The conveyor has no adjustments (Series 1200
and 1400). If belt becomes too tight or loose, a link
will have to be installed or removed. Proper
tension allows the belt to be lifted within ¼” from
the top of the conveyor opening.
4. Model 1000 Series Only: Pull idler shaft toward the
end of the conveyor and screw tension adjustment
knobs back in. DO NOT OVER TIGHTEN BELT!
Tighten the jam nuts against the adjustment plate.
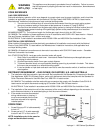
CAUTION:
SET TENSION ON THE CONVEYOR BELT. THE BELT SHOULD BE ABLE TO BE
LIFTED ENOUGH TO ALLOW IT TO BE ¼” (6 MM) FROM THE TOP OF THE
CONVEYOR OPENING ON THE OVEN. DO NOT OVER TIGHTEN BELT!
!
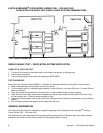
CONVEYOR REASSEMBLY
CONVEYOR BELT INSTALLATION
TO INSTALL CONVEYOR IN OVEN
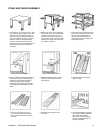
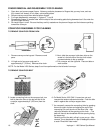
1. Put conveyor belt back on by setting the rolled
belt to the left of the conveyor and thread
approximately 2/3 of the belt over the bottom
slider bed.
Put the loose end of the belt around the idler
shaft and back on the conveyor. The belt must
lay on top of the upper conveyor slider bed.
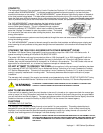
NOTE: The belt should curl around the conveyor
sprockets and lay flat on top of the sprockets. If
the belting does not curl around the sprockets
and lay flat, remove the belting and turn the
belting over. Reinstall.
Pull all of the slack belt through the conveyor until
both ends are on top of the conveyor on the left
end.
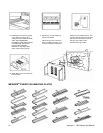
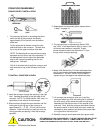
5. Insert the conveyor through the opening in the right
side. Sprocket should be to the right side of the
conveyor. NOTE: For Model Series 1200, step 1 is
performed on the left end of the conveyor.
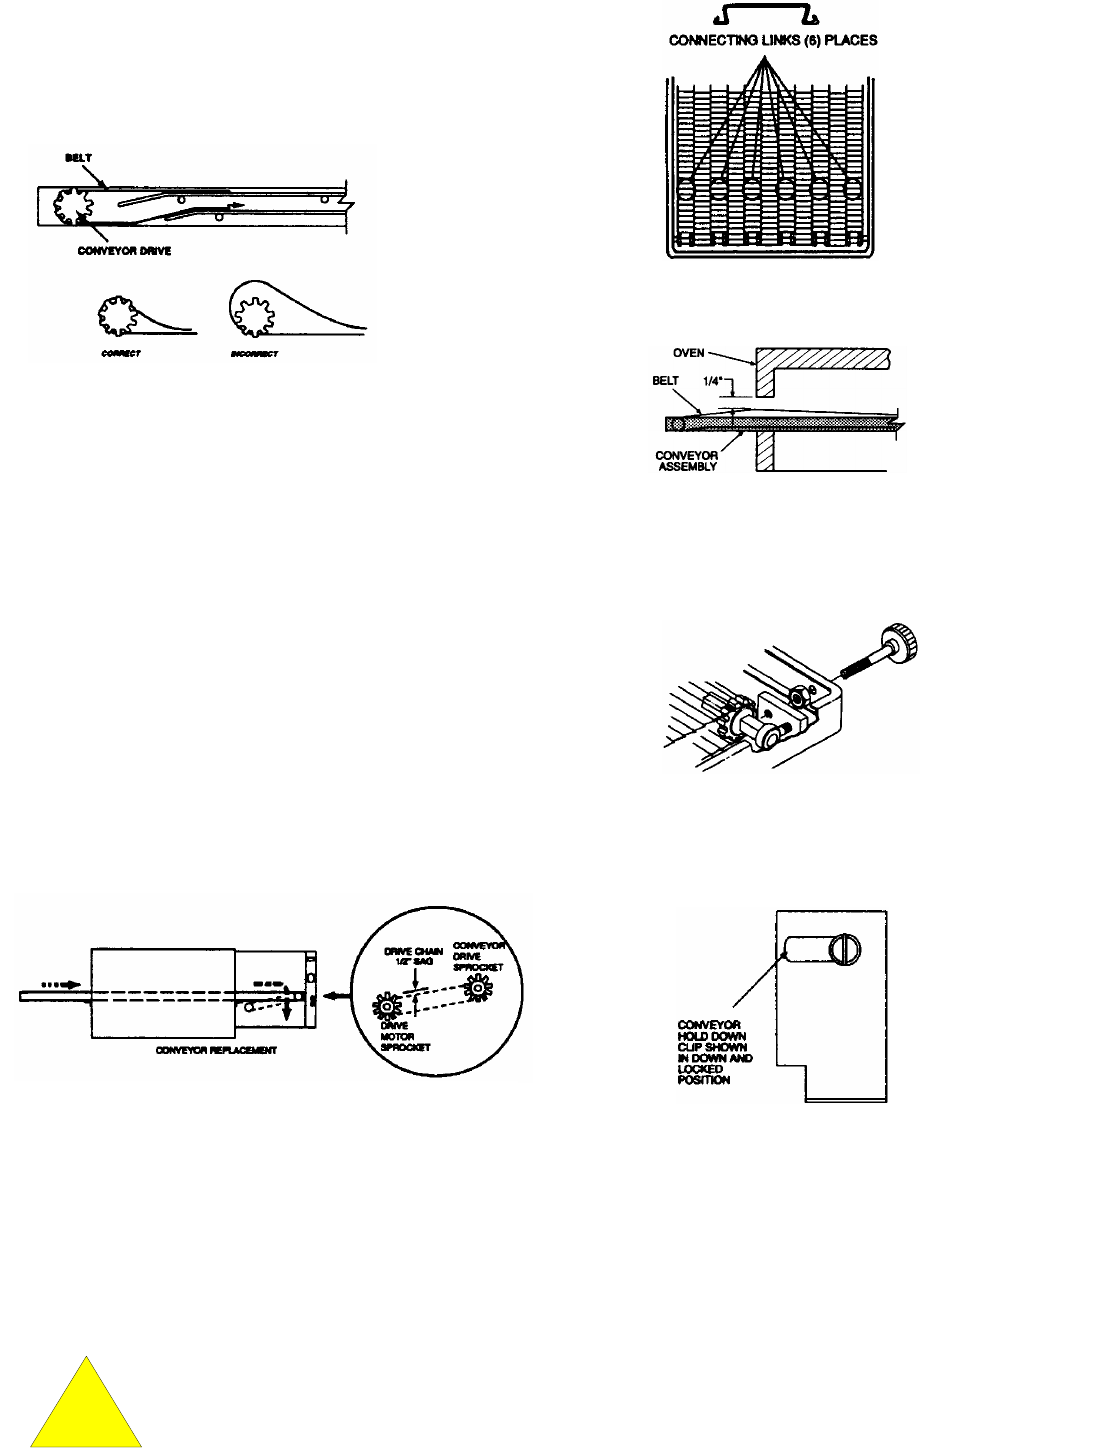
6. Slide conveyor through the oven chamber until the
locking bar on driving end of the conveyor is
approximately 2” – 3” (50 – 76 mm) into the oven
chamber. Install drive chain by placing it over the
driving sprocket and placing it over the conveyor
sprocket.
7. Lift conveyor just enough to allow you to pull the
conveyor toward you until the locking bar is outside of
the oven cavity, at the same time push the conveyor
downward so that the bar locks on the outside of the
oven wall. Next, slide the conveyor hold-down clips so
the screw head is in the left side of the slot, rotate clip
clockwise to down position and slide so the screw head
is in right side of the slot to lock.
8. Reinstall conveyor crumb pans and chain guard cover.