Impinger X2 – Digital Service Manual – Dom & Int’l
18
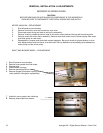
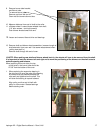
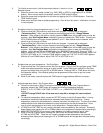
RELAY, MAIN FAN, - REPLACEMENT
1. Shut off power at main breaker.
2. Remove control box cover.
3. Disconnect all wiring from relay and mark all wiring for reassembly.
4. Remove main relay and overload protector.
5. Remove overload protector from main relay and mount overload protector on new relay.
6. Reassemble in reverse order and check system for proper operation.
TIMER, 30 MINUTE COOL DOWN – REPLACEMENT
1. Shut off power at main breaker.
2. Remove control box cover.
3. Disconnect all wiring from 30-minute cool down timer and mark all wires for reassembly.
4. Remove one mounting bolt and remove 30-minute cool down timer.
5. Reassemble in reverse order and check system operation.
FUSE HOLDER – REPLACEMENT
1. Shut off power at main breaker.
2. Remove control box cover.
3. Disconnect wiring from fuse holder and mark all wiring for reassembly.
4. Remove mounting nut from fuse holder and remove fuse holder.
5. Reassemble in reverse order and check system operation.
SWITCH, ON/OFF – REPLACEMENT
1. Shut off power at main breaker.
2. Remove control box cover.
3. Disconnect wiring from switch and mark all wiring for reassembly.
4. Remove switch by depressing spring clips on sides of switch. Push switch out.
5. Reassemble in reverse order and check system operation.
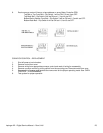
MOTOR, BURNER BLOWER – REPLACEMENT
1. Shut off power at main breaker.
2. Remove control box cover and front control box cover.
Disconnect wiring from motor. Mark all wiring for reassembly.
3. Remove three mounting screws and remove burner blower motor assembly.
4. Reassemble in reverse order and check system operation. Verify Air Mixture Disc is set to
0.75” ± 3/16 (24 – 14mm).
TRANSFORMER, BURNER/CONTROL – REPLACEMENT
1. Shut off power at main breaker.
2. Remove control box cover.
3. Disconnect wiring from burner/control transformer and mark all wiring for reassembly.
4. Remove two mounting screws and remove burner/control transformer.
5. Reassemble in reverse order and check system operation.
BURNER CONTROL – REPLACEMENT
1. Shut off power at main breaker.
2. Remove control box cover
3. Disconnect wiring from burner control and mark all wiring for reassembly.
4. Remove mounting screws and remove burner control.
5. Reassemble in reverse order and check system operation.


