


FULL OVERLAY PANEL INSTALLATION INSTRUCTIONS
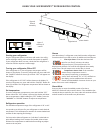
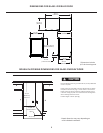
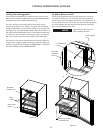
Step 9: Secure overlay panel to the door.
With the #10 wood screws provided fasten the overlay panel to
the door. (See Figure 13).
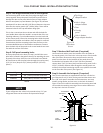
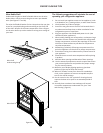
Step 10: Install lock cam (Models with locks only).
Aach the lock cam to the back of the lock assembly with the
phillips head machine screw provided. Orient the lock cam ver-
cally when installing on the lock.
Step 11: Install door gasket
Press the door gasket into the door channel. Make certain the
gasket corners are fully inserted. If applicable insert the key into
the lock and make certain the lock operates properly.
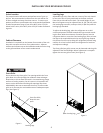
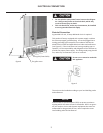
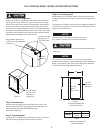
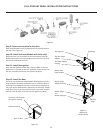
Step 12: Install the door
Install the top and boom hinge adapter bushings back into the
hinge adapters that were removed in step 6. Install the door by
reversing the procedure from step 2. Install the top hinge pin so
the screw head is ush with the top surface of the hinge. If appli-
cable insert key into lock and verify the lock cam works properly
with the catch bracket on the front of the appliance cabinet.
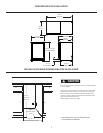
Clearance hole through
door gasket channel
#10 Wood Screw
Back of door
Top hinge pin
Top door hinge
adapter
Top hinge adapter
bushing
Top hinge
Boom door
hinge adapter
Boom hinge
adapter bushing
Boom hinge pin
Boom hinge
cam
11
Boom
hinge
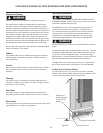
1.234” (31.3mm)
.991” (25.2mm)
Figure 12
Figure 13
Figure 14
Right hand
hinges shown