


Fresh food compartment
shelves
Your refrigera-
tor has either
Spill-
Catcher™ or Tempered Glass Shelves.
The Spill-Catcher™ shelves have a spill
retainer edge which allows for easier
clean up, and some are equipped with
the Easy Glide slide out feature.
To slide out (select models), grasp the
front of the shelf and pull forward. Push in
the shelf to return to the original position.
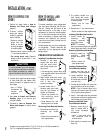
To remove and install 3-hook style shelf:
To remove a shelf, slightly lift up the rear
of the shelf and pull the shelf straight out.
To lock the shelf into another position, tilt
up the front edge of the shelf. Insert the
hooks into the desired frame openings and
let the shelf settle into place, being sure
the shelf is securely locked at the rear.
To remove and install single hook
style shelf:
To remove a shelf, slightly lift up the front
of the shelf and pull the shelf straight out.
To lock the shelf into another position, tilt
up the front edge of the shelf. Insert the
hooks into the desired frame openings and
let the shelf settle into place, being sure
the shelf is securely locked at the rear.
9
LOOKING INSIDE
DOOR STORAGE
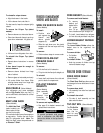
The Pick-Off Door Bins are adjustable
and can be easily removed.
To remove, lift the bin front up until it
clears the retainers on the door liner then
pull the bin straight out.
To replace, reverse the above procedure.
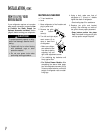
DAIRY COMPARTMENT
(Select Models)
The dairy compartment provides conven-
ient storage for items such as butter and
margarine. This compartment is an
adjustable feature located in the door. It
can be moved to several different loca-
tions to accommodate storage needs.
To remove:
➢ Open dairy door, pull upward and tilt
out.
To reinstall:
➢ Reverse previous
procedure.
FULL WIDTH DOOR SHELF
The lower shelf on the door is full width
and not adjustable.
To remove for cleaning:
➢ Lift shelf up and out.
To reinstall:
➢ Reverse above pro-
cedure.
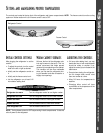
Special storage areas
Your refrigerator has a Snack Center
Drawer (select models).
To remove the Snack Center Drawer
for cleaning:
➢ Pull the drawer out until it stops.
➢ Lift the drawer up slightly and pull it out.
To reinstall the drawer:
➢ Reverse the above procedure.
This drawer can be positioned as desired
on either the left or right side of the refrig-
erator cabinet.
For best results, keep this drawer closed
tightly.
The Crispers provide storage for fruit
and vegetables. There is a humidity con-
trol (select models) located on the crisper
shelf above each of the crisper drawers.
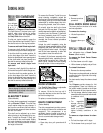
➢ For fruit storage, slide the crisper control
toward the center to provide lower humidi-
ty conditions in the
drawer.
➢ For vegetable
storage, slide the
crisper control
away from the
center to provide
higher humidity conditions in the
drawer.
To remove a crisper drawer for clean-
ing:
➢ Pull out the crisper until it stops.
➢ Tilt the drawer front up and pull it out.
Never attempt to adjust a shelf that is
loaded with food (except in the case of
the Elevator™ Shelf).
WARNING
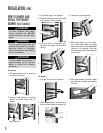
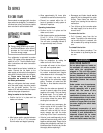
ELEVATOR™ SHELF
(Select Models)
The fresh food compartment is equipped
with an Elevator™ Shelf. This shelf has
a spill retainer edge for easy cleanup. It
also has the convenient slide out feature
that allows easy access to items stored at
the rear of the shelf.
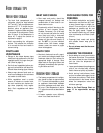
This shelf can be adjusted up or down
without having to be unloaded of its con-
tents. To adjust an Elevator™ Shelf, pull
out the knob on the crank handle. Rotate
the crank clockwise to raise the height of
the shelf, and counterclockwise to lower
the height of the shelf.
To remove the Elevator™ shelf for occa-
sional cleaning, completely unload the
shelf and pull the shelf forward. When the
shelf stops, press up on the tabs located
underneath its outside edges, then con-
tinue pulling forward, clear of the frame.
To reinstall, align the shelf to the frame
and push it all the way back. (There is no
need to depress the tabs for reinstallation).
In ordinary use, the Elevator™ shelf with
the frame assembly does NOT require
removal. Though unlikely, and not recom-
mended, the correct removal procedure
is as follows:
Unload the shelf completely, raise the
shelf to its highest possible position. While
supporting the shelf and frame from the
front, press both locks inward. Lift slightly
and tilt the frame assembly to allow the
rear guides to clear the vertical rails.
To reinstall, tilt the frame assembly while
depressing both locks, reposition the rear
guide behind the vertical rails. When the
shelf is level, release the locks allowing
the shelf to latch in the correct position.