


20
ENGLISH
SECTION 4 - MAINTENANCE
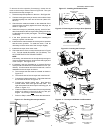
E. Blower Belts
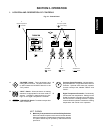
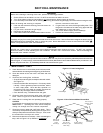
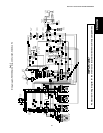
1. To gain access to each blower belt compartment,
remove the four screws shown in Figure 4-8. Then, lift
the rear shroud off its hangers.
If access to the blower motors is required, remove the
three mounting screws (two on the front of each shroud,
one on the rear). Then, lift the end shroud straight up
and off its hangers. The end shrouds can only be
removed AFTER the rear shrouds have been removed.
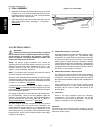
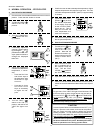
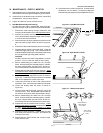
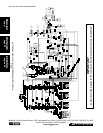
2. Check each blower belt for at least 1" (25mm) deflec-
tion at the center, and for cracking or excessive wear.
See Figure 4-9. Overtightening the belt will cause
premature bearing failure and possible vibrations.
3. If necessary, adjust the tension of the belt by loosening
the four motor mounting bolts. Reposition the motor
as necessary until the correct deflection is reached,
then tighten the motor mounting bolts.
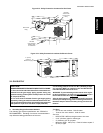
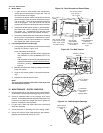
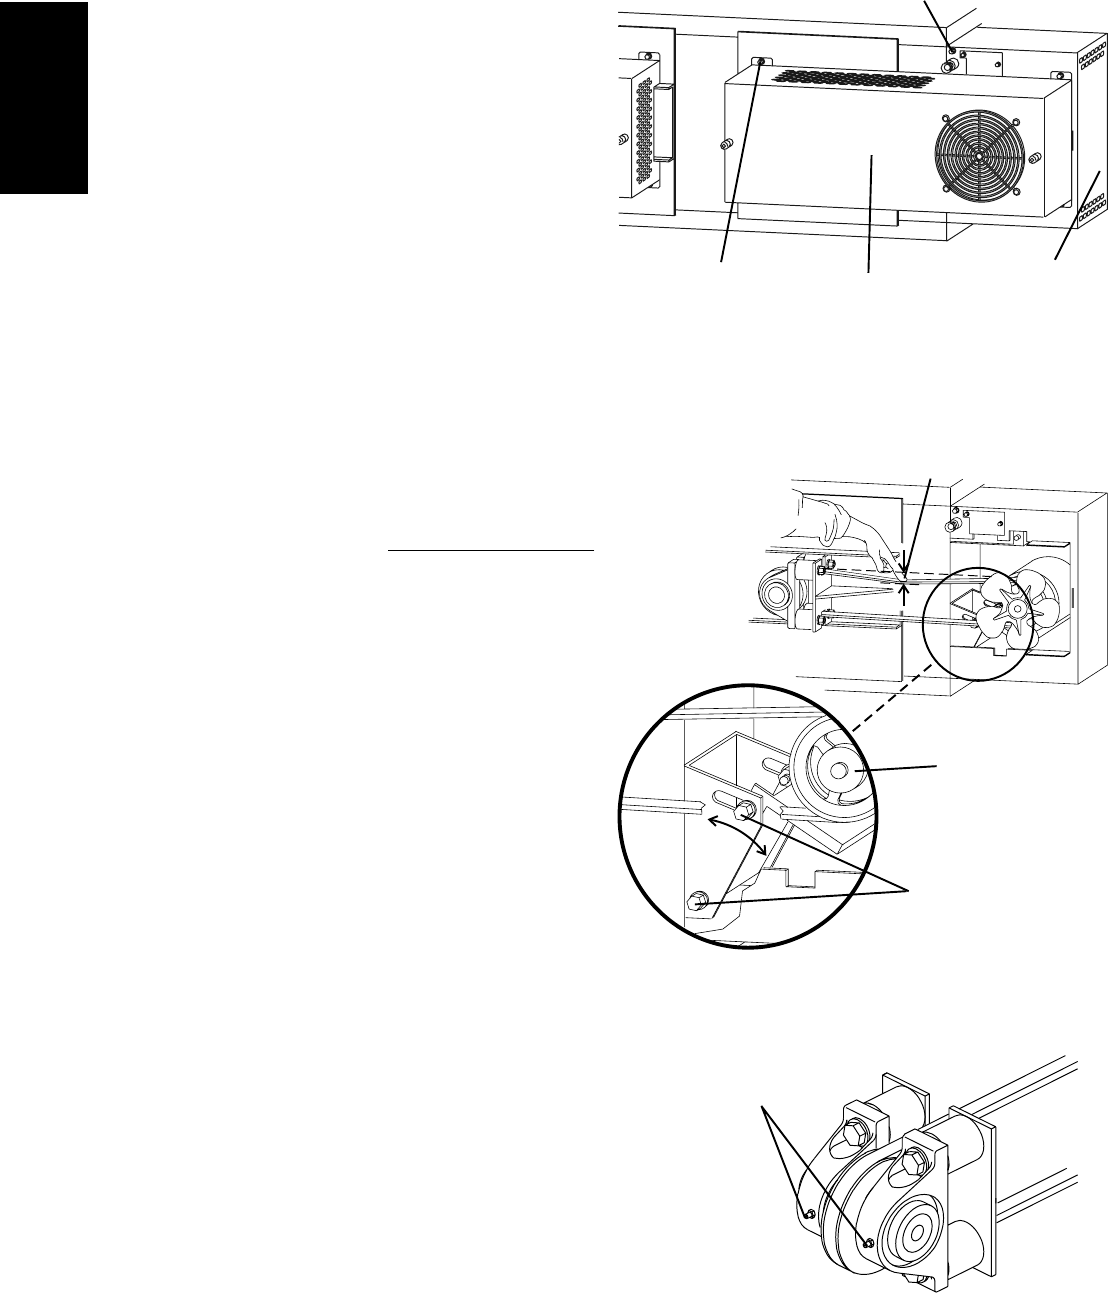
F. Lubricating the Blower Fan Bearings
1. Use a grease gun to lubricate the main blower fan shaft
bearings, as shown in Figure 4-10.
When lubricating the bearings:
Use a high-quality NLGI #2, lithium soap grease
with petroleum oil, such as Middleby P/N 17110-
0015.
Add the grease slowly until a small bead of grease
is present at the seals.
AVOID OVERGREASING.
Excessive greasing may cause harm to the
bearing.
2. Manually turn the blower shaft by pulling on the belt to
purge the grease.
3. Wipe off any excess grease on and around the bear-
ings.
4. Replace the shrouds onto the oven.
NOTE
The oven will not operate unless ALL of the motor and
rear shrouds are in place.
IV. MAINTENANCE - EVERY 6 MONTHS
A. Check that the oven is cool and the power is disconnected,
as described in the warning at the beginning of this Section.
B. Check for excessive wear on the conveyor drive motor
brushes. The brushes should be replaced if they have worn
to less than 1/4" (6.4mm) in length. Be sure to replace the
brushes in exactly the same position.
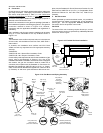
C. For gas ovens, clean and inspect the burner nozzle and
electrode assembly.
D. Check (and clean, if necessary) the oven venting system.
E. Check the conveyor drive shaft bushings and spacers.
Replace the components if they are worn.
Figure 4-10 - Lubricating the Bearings
At least 1" (25mm)
deflection
Grease fittings
(1 per bearing, 4
total)
Figure 4-9 - Fan Belt Tension
To adjust belt
tension, loosen 4
bolts and
reposition motor
Fan not shown -
see above
Figure 4-8 - Rear Shrouds and Guard Plates
Rear shroud screws
(4 per shroud for gas
ovens, 5 per shroud
for electric ovens)
Rear shroud -
remove FIRST.
Access to bearing
and fan belt
End shroud -
remove SECOND (if
necessary).
Access to blower
motor
End shroud screws
(3 per shroud - 1
rear, 2 front)