


18 19
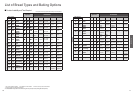
How to Use
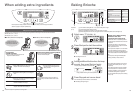
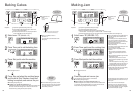
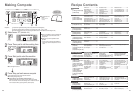
Baking Cakes
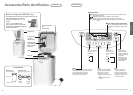
1
4
2
3
Turn to P. 36–39 for
cake recipes
To cancel/stop once
started
(hold for more than
1 second)
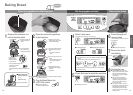
Preparation
Prepare the ingredients according to the recipe.
Line the bread pan with parchment paper or loaf tin liners
and pour in the mixed ingredients.
Set the bread pan into the main unit, and plug the machine
into the socket.(Make sure the start light is off.)
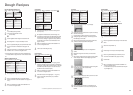
Select menu ‘15’
1
(SD-2500: ‘14’)
Timer is not available on menu 15
(SD-2500: 14).
(The Timer pad only sets the duration of the
baking time.)
Press Timer pad to set the baking time
2
Press Start pad to start the machine
3
Time until the selected program is complete
The start light will come on.
Press Stop pad when the machine beeps
4
and the bar at ‘End’ flashes, check that
baking is complete, and remove the pan
The flashing start light will go off.
If baking is not complete
Repeat steps 1–3
(Additional cooking time can be made up to twice. Each time should be within
50 minutes. The timer will start again from 1 minute when the unit is hot.
Increase the time by pressing the timer pad as required.)
Take care!
It’s hot!
To check whether baking is complete, insert a
skewer into the centre of the cake or tea bread
– it is ready if there is no mixture stuck to the
skewer when you remove it.
•
Line with parchment paper (Cake or tea bread
will burn if it directly touches the bread pan.)
•
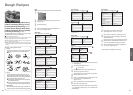
Remove the kneading blade
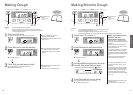
Making Jam
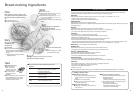
1
4
2
3
Turn to P. 40 for
jam recipes
To cancel/stop once
started
(hold for more than
1 second)
Preparation
Prepare the ingredients according to the recipe.
Put the kneading blade into the bread pan.
Place the ingredients into the bread pan in the following order:
half of the fruits → half of the sugar →remainder of fruits → remainder of sugar.
Set the bread pan into the main unit, and plug the machine into the socket. (Make sure the start light is off.)
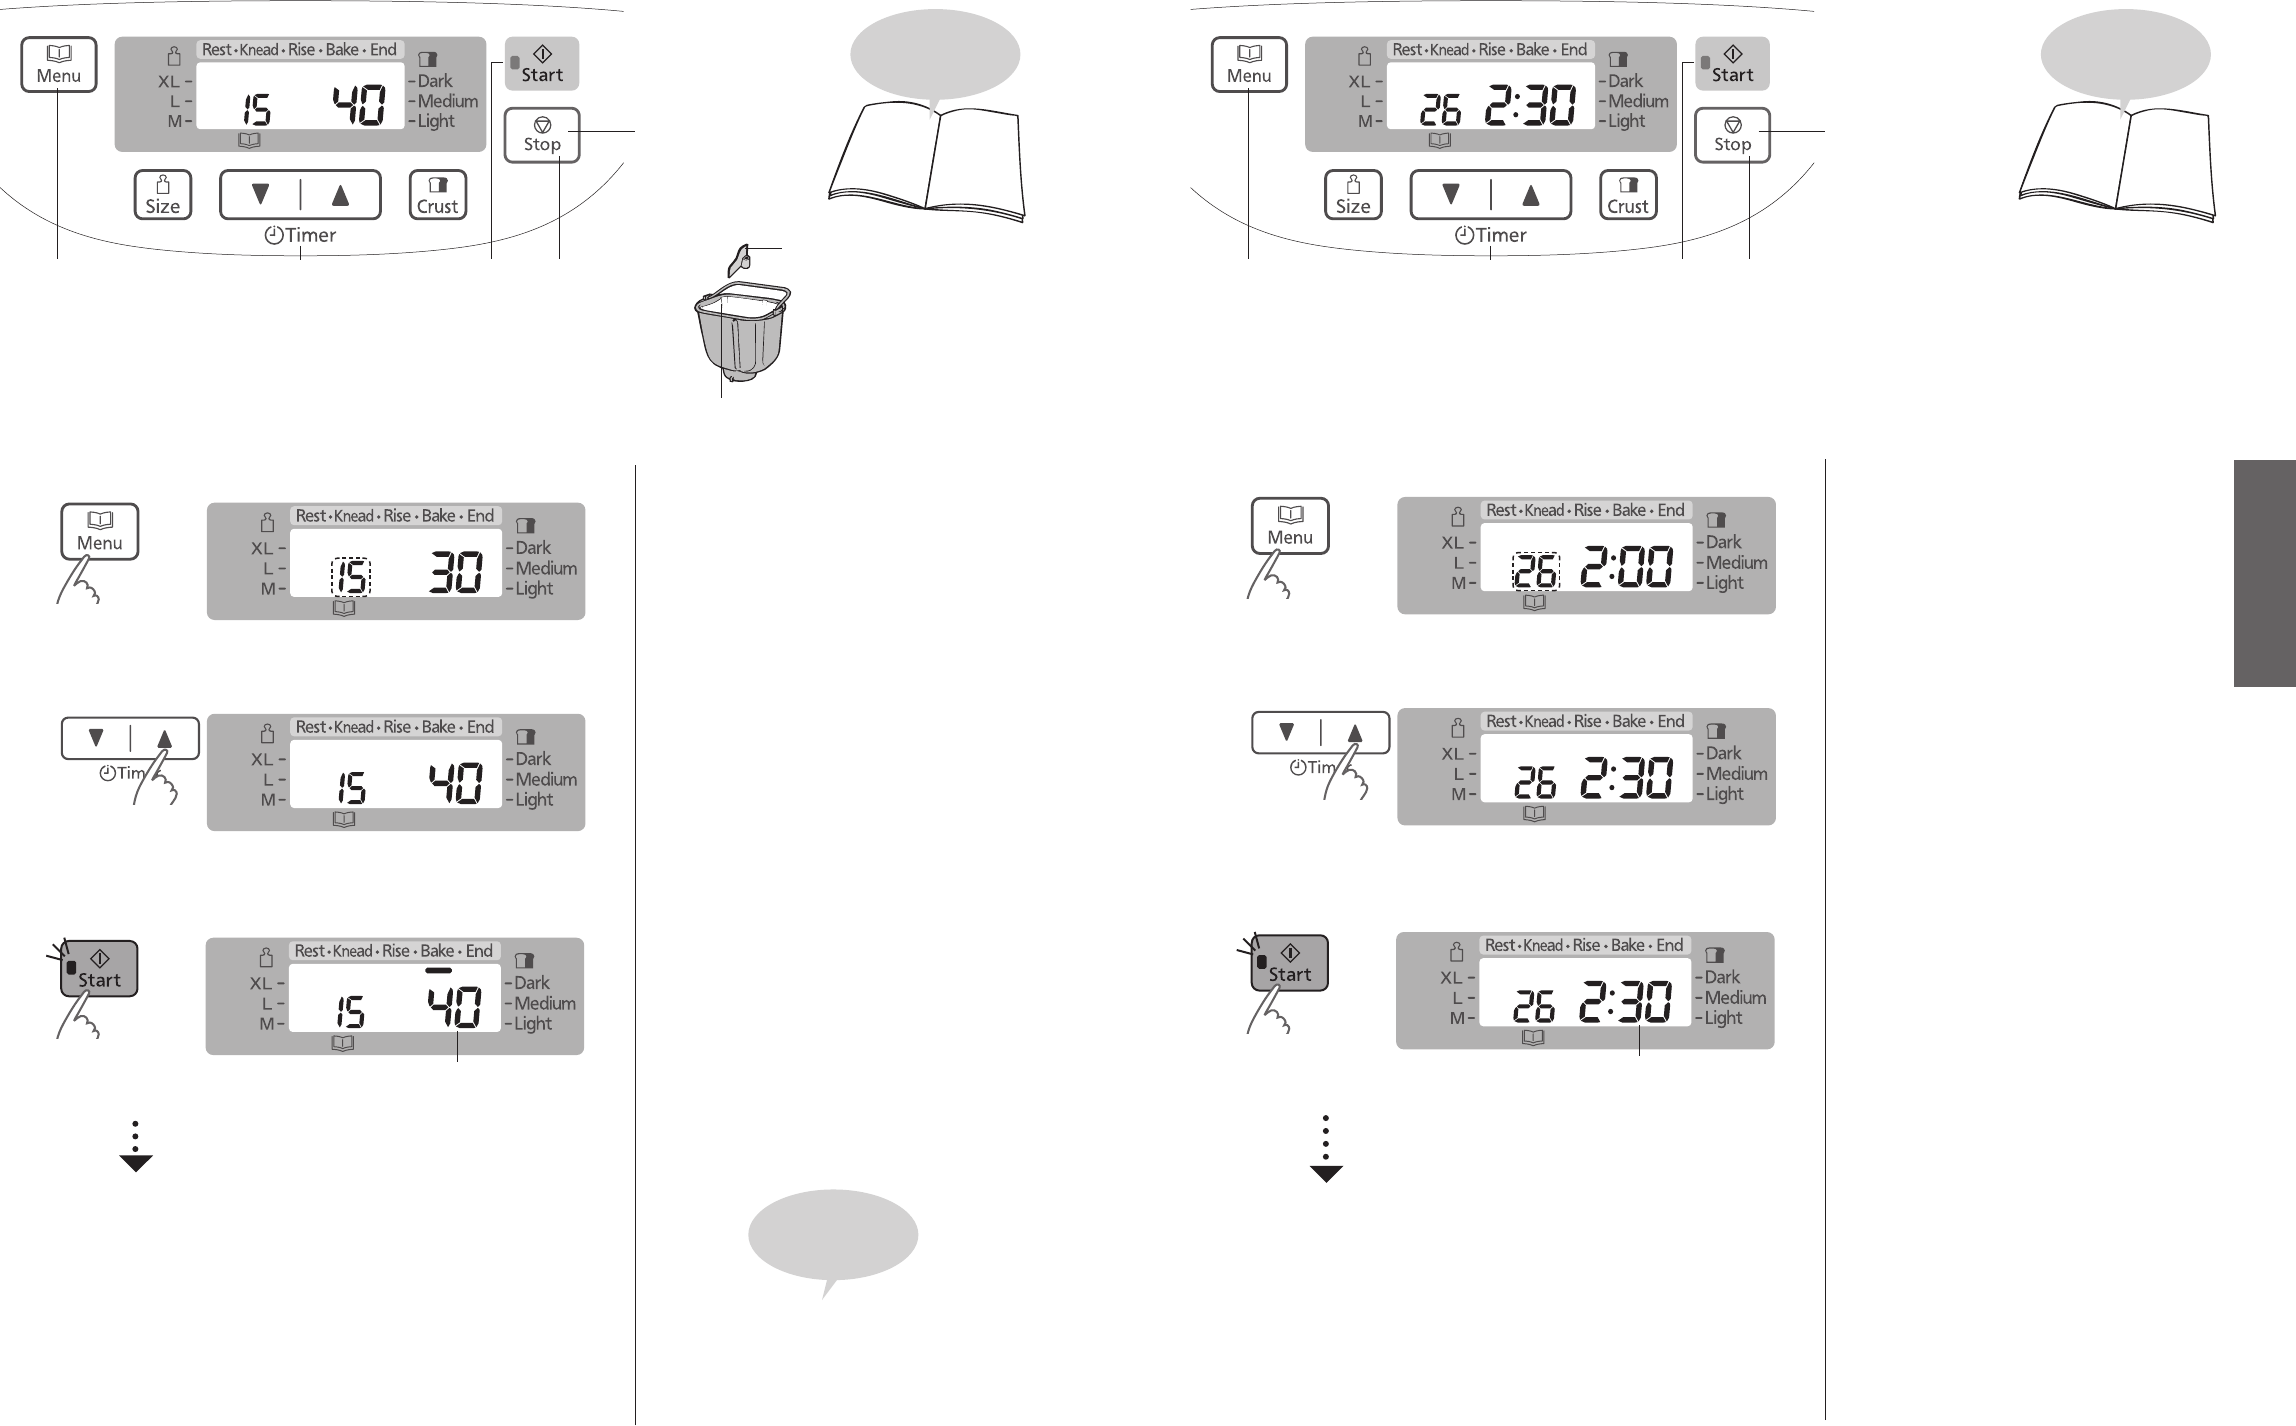
Select menu ‘26’ (SD-2500: ‘24’)
1
Timer is not available on menu 26 (SD-2500: 24).
(The Timer pad only sets the duration of the
cooking time.)
It is necessary to have an adequate amount of
sugar, acid, and pectin to make firm set jam.
Fruits with a high level of pectin set easily. Fruits
with less pectin do not set well.
Use freshly ripened fruits. Over or under ripe
fruits do not set firmly.
The recipes in this book make soft set jams. This
is due to lower levels of sugar.
Follow the recipe for the quantity for each
ingredient.
•
Do not increase or decrease the quantities
of fruits. It may cause the jam to boil over or
scorch.
•
Do not increase the quantity of sugar more than
half quantities of fruits.
It may cause the jam to boil over or scorch.
When decrease the quantity of sugar, jam does
not set firm.
* When the acidity of the fruit is strong, you can
decrease quantity of the lemon juice but if it is
decreased too much, jam does not set firm.
When the cooking time is short, fruit bits can
remain partially and the jam may become watery.
•
The jam will continue to set as it cools.
Be careful not to over cook.
Press Timer pad to set the cooking time
2
Press Start pad to start the machine
3
Time until the selected program is complete
The start light will come on.
Press Stop pad and remove jam
4
when machine beeps 8 times and the bar at ‘End’ flashes
The flashing start light will go off.
If the cooking is not complete
Repeat steps 1–3
(Additional cooking time can be made up to twice. Each time should be within
10–40 minutes. The timer will start again from 1 minute when the unit is hot.
Increase the time by pressing the timer pad as required.)
Put the finished jam into the container as soon as
possible. Please take care of the burn when you
take out jam.
Jam can burn if it is left in the bread pan.
Store the jam in a cool, dark place. Due to the
lower levels of sugar the shelf life is not as long
as shop bought varieties. Once open, refrigerate
and consume shortly after opening.