23
INSTALLATION
Check the ap pli ance is electrically safe and gas sound when you have fi nished.
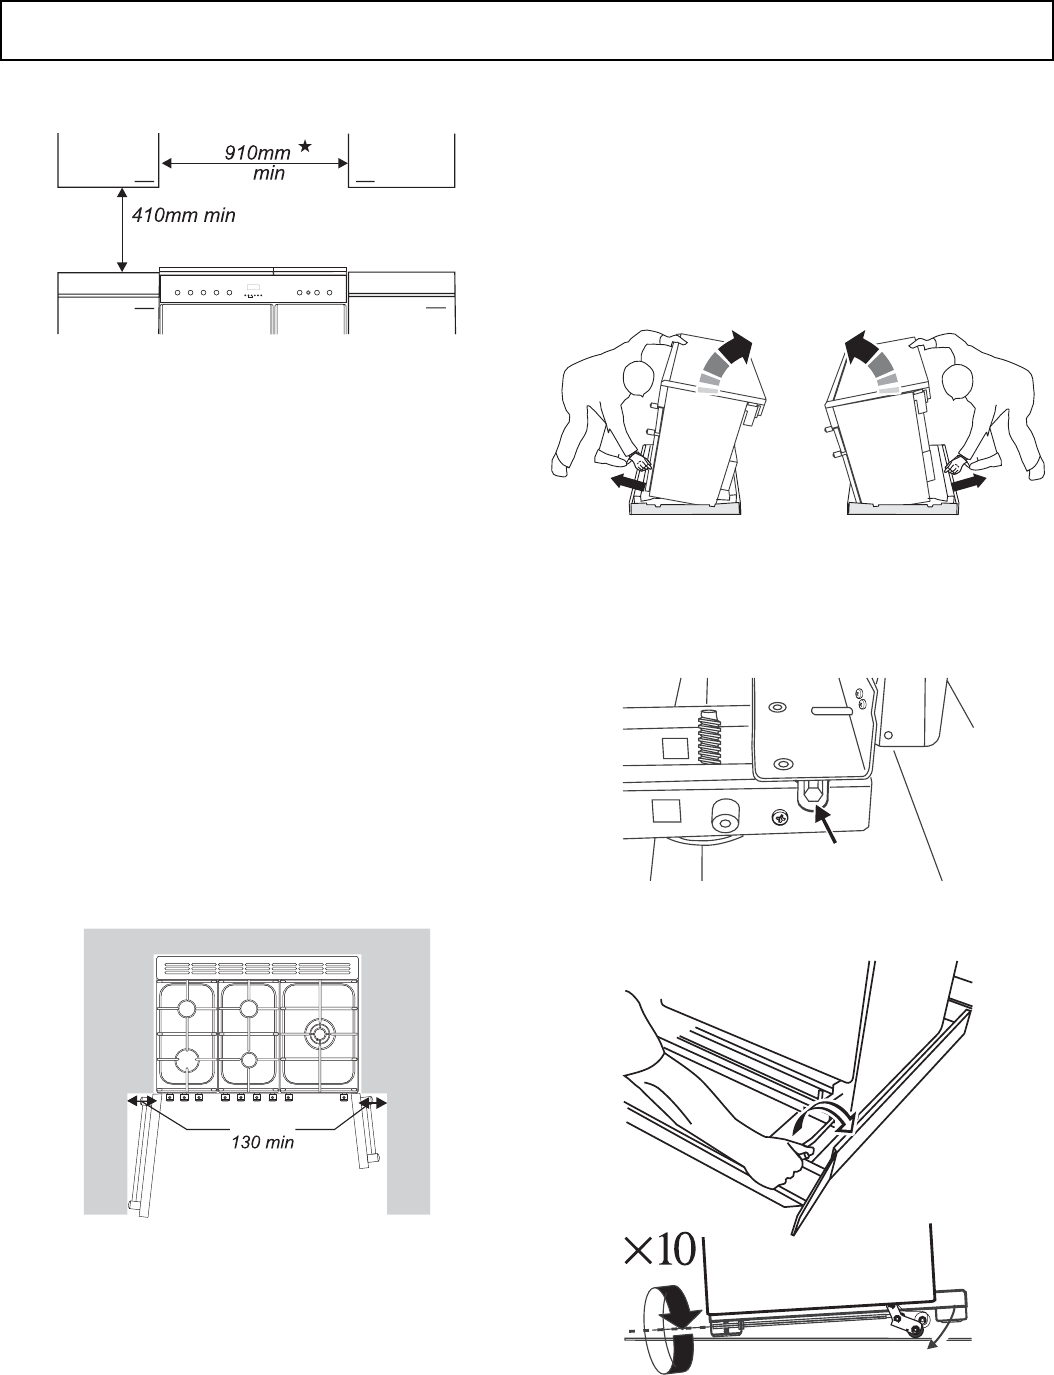
A minimum space of 650mm is required between the
top of the hotplate and a horizontal combustible surface.
*Any cooker hood should be installed in accordance with
the hood man u fac tur er’s instructions.
Surfaces of furniture and walls at the sides and rear of
the appliance should be heat, splash and steam resistant.
Certain types of vinyl or laminate kitchen furniture are
particularly prone to heat damage and discolouration.
We cannot accept responsibility for damage caused
by normal use of the cooker to any material that de-
laminates or discolours at temperatures less than 65°C
above room temperature.
For safety reasons curtains must not be fi tted
im me di ate ly behind the cooker.
We recommend a gap of 910mm between units to allow
for moving the cooker. Do not box the cooker in; it must
be possible to move the cooker in and out for cleaning
and servicing.
A clearance of 130mm is required if the cooker is near a
corner of the kitchen to allow the oven doors to open.
The actual opening of the doors is slightly less but this
allows for some protection of your hand as you open the
door.
Unpacking the Cooker
Do not take any packaging off the cooker until it is
directly in front of the place it is to be installed (unless it
will not fi t through a door in its outer packaging).
Cut the banding straps and lift the cardboard box off
the cooker, leaving the cooker standing on the base
packaging. See the loose unpacking sheet.
Moving the Cooker
The cooker is very heavy. Take great care.
We recommend two people manoeuvre the cooker.
Ensure that the fl oor covering is fi rmly fi xed, or removed
to prevent it being disturbed when moving the cooker
around. You will need the levelling tool.
Remove the polystyrene base pack. From the front tilt
the cooker forward and remove the front half of the
polystyrene base.
Repeat from the back and remove the rear half of the
poly base.
LOWER THE TWO REAR ROLLERS.
First fi t the levelling tool on the hexagonal adjusting nut
as shown below.
Make 10 complete (360º) turns clockwise. (This means
turning and removing the levelling tool 20 times).
Make sure you lower BOTH REAR ROLLERS. There are
two adjusting nuts, one for each roller, at both the front
bottom corners of the cooker.


