


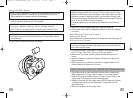
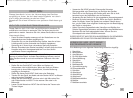
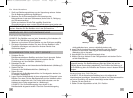

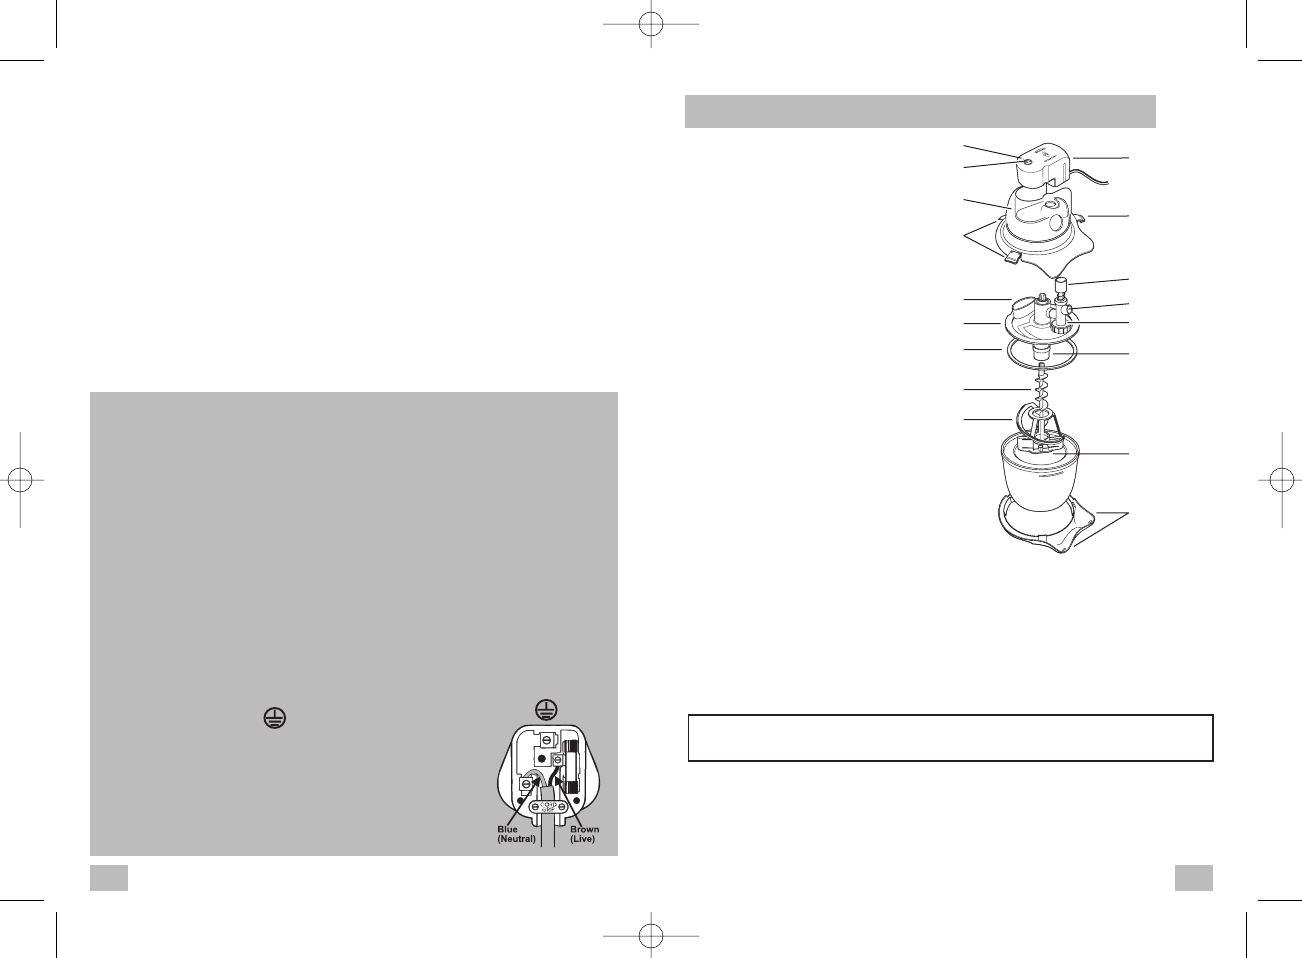
1. Locking Latch
2. Motor Housing
3. Indicator Light
4. I
(
On
)
/0
(
Off
)
Rocker Switch
5. Top Cover
6. Locking Latch
7. Mouth
8. Canister Lid
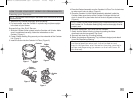
Before Use
1. Remove all packing materials and manual. Make sure to save manual.
2.
NOTE: Never immerse Motor Housing in water or any other liquids.
Never wash the Canister in the dishwasher.
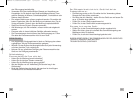
KNOW YOUR SOFT SERVE ICE CREAM MAKER
9. Rubber Sealing Ring
10. Dasher Assembly
11. Screw
12. Dispensing Button
13. Dispensing Opening
14. Dispensing Valve
15. Canister Lid Tube
16. Canister
17. Canister Collar
Wash the Soft Serve Ice Cream Maker, except for the motor housing,
in warm soapy water (see p. 7 - How to clean your soft serve ice-cream
maker). Rinse and dry all parts thoroughly. The Rubber Sealing Ring will
need to be thoroughly dried before assembling.
17
16
10
11
9
8
7
6
5
4
3
2
1
12
13
14
15
risk of injury to persons and or damage to the unit.
•Do not use sharp objects or utensils inside the Canister. Sharp
objects will scratch and damage the inside of the Canister. A rubber
spatula or wooden spoon may be used when the appliance is
turned off.
Servicing
• Should the appliance stop working, first check the fuse in the plug (UK
only) or fuse/circuit breaker at the distribution board to ensure it is
operating, before
contacting the manufacturer or service agent.
• If the supply cord or plug is damaged, it must be replaced by the
manufacturer or its service agent or a similarly qualified person in order to
avoid hazard.
THIS APPLIANCE IS FOR HOUSEHOLD USE ONLY.
DO NOT USE THE APPLIANCE FOR OTHER THAN THE
INTENDED USE.
If the plug is not suitable for the socket outlets in your home, it can be removed
and replaced by a plug of the correct type. Please refer to "Installation of a
plug" below.
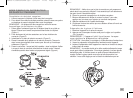
Installation of a plug - Applicable to U.K. and Ireland
DO NOT CONNECT either of these wires to the earth terminal in the plug.
The earth terminal plug is marked with the letter "E",
or with the earth symbol, or coloured GREEN,
or GREEN and Yellow.
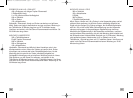
The wires in the mains lead are coloured as such:
BROWN - LIVE
BLUE - NEUTRAL
Please note that the colour of these mains wires may not correspond with the
colour markings that identify the terminals in your plug. Please proceed as
follows:
The BROWN coloured wire must be connected to the terminal, which is marked
with the letter "L" or is coloured RED.
The BLUE coloured wire must be connected to the terminal, which is marked
with the letter "N" or is coloured BLACK.
NOTE: If the terminals in the plug are not marked or if you
are unsure or in doubt about the installation of the plug
please contact a qualified electrician.
If a 13A 3-pin plug is fitted, it must be an ASTA approved
plug, conforming to BS1363 standard. Replacement 3A
fuses must be BSI or ASTA BS1362 approved.
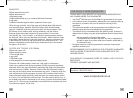
FITTING OF A PLUG - FOR U.K. AND IRELAND ONLY
3 amp
2 3
GC8250-I/GC8250I04M1.qxd 6/16/04 11:28 Page 2