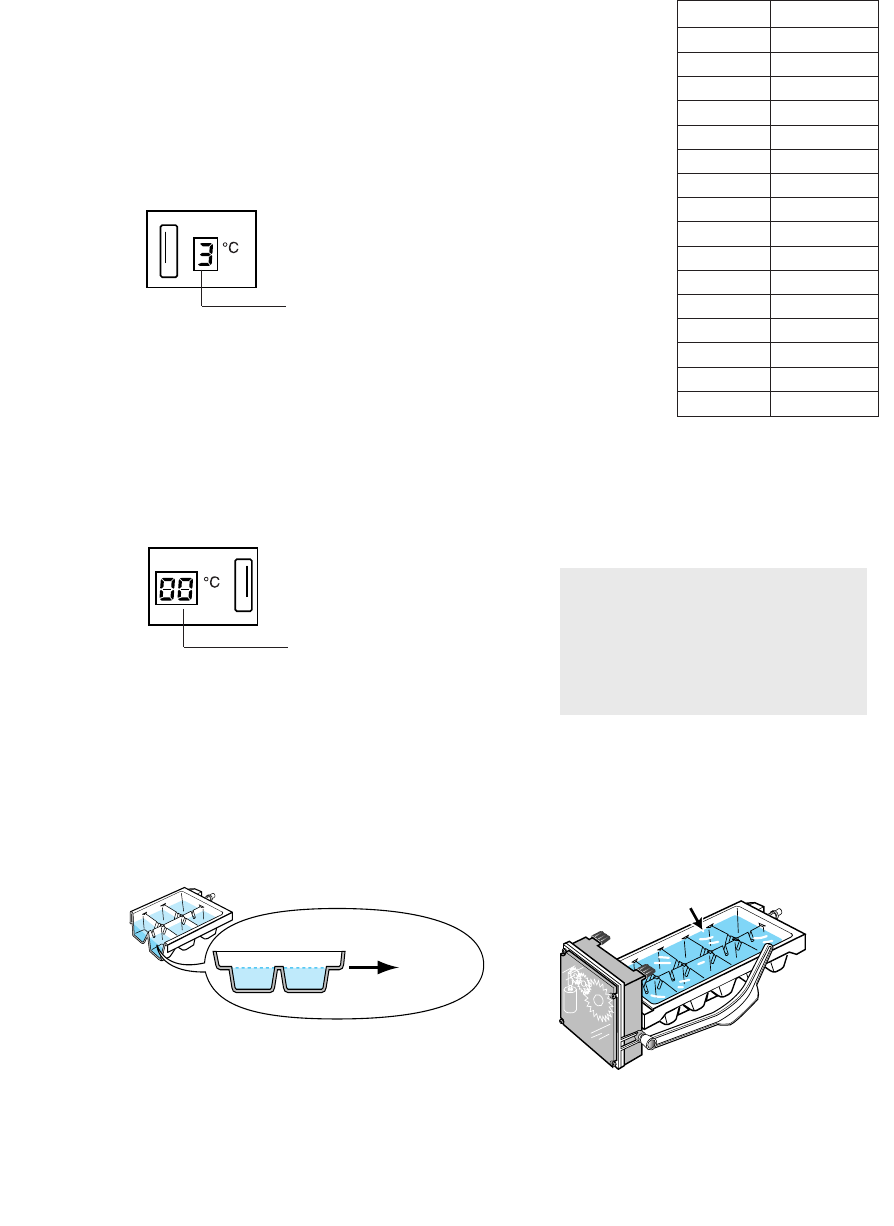
Checking the Volume of Water Supplied to the Ice Maker.
1. Set the control panel to the option change mode.
Press the FREEZER TEMP. and VACATION buttons at the same time for
about 12 seconds until the temperature display switches to the option
change mode and you hear a beep.
2. The number in the right-hand refrigerator temperature display corre-
sponds to the option number. Press the REFRIGERATOR TEMP. button
to increase the number. Press the VACATION button to decrease the
number. Set the number to 3.
3. The number in the left-hand freezer temperature display corresponds to
the value of each option. Press the FREEZER TEMP. button to increase
the value. Press the QUICK FREEZE button to decrease the value.
Choose the required volume, specified to the table above.
4. Wait until the control panel automatically switches to the control mode.
5. Check the volume of water supplied to the ice maker (refer to phase 9 on the previ-
ous page).
OPTIMUM
LEVEL
If the volume of water supplied is slightly below the optimum level, it is admissible
to use the ice maker.
Data Time
00 5
01 4
02 3
03 6
04 7
05 8
06 9
07 10
08 12
09 13
10 15
11 17
12 19
13 21
14 23
15 25
Volume of water
Note
When setting the water supply
volume, do not select the largest
volume directly, as the water may
overflow. Proceed step by step.
Five seconds
CHECK THE WATER SUPPLIED
15
DA68-00500P 6/26/02 2:35 PM Page 31


