


I
NSTALLATION
M
ARATHONER
G
OLD
& S
ILVER
S
TAR
G
AS
C
ONVECTION
O
VENS
P
AGE
14 O
PERATOR
’
S
M
ANUAL
1181887
REV
1
INSTALLATION
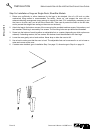
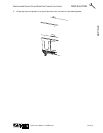
2. Install eye-bolt (item “F”) to a frame member on the rear of the equipment. After checking carefully
behind the frame member for adequate clearance, drill a 1/4" hole through the frame member.
3. Thread hex nut (item “G”) and slide the washer (item “H”) onto the eye-bolt. Insert the eye-bolt through
the 1/4" drilled hole and secure with a washer (item “H”) and nylon lock nut (item “I”).
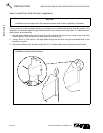
4. Using the spring-loaded snap hooks, attach the restraining device to the bracket and the eye-bolt.
5. Using the cable clamp (item “D”), adjust the restraining device extended length to prevent over-bending
or kinking of the appliance connector.
For units not equipped with flame safety devices, be sure all valves are turned off prior to disconnecting.
After reconnecting, be sure that the oven is switched OFF.
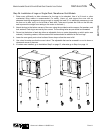
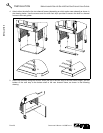
Step 4: Stack Double-Deck Oven (if necessary)
Double-deck ovens can be shipped already assembled, but can instead be shipped as two single-deck
ovens to be stacked in the field. Also, ovens that were originally ordered as single ovens can be stacked in
the field (additional parts are required). This installation step describes the procedure for stacking two
single-deck ovens to form a double-deck oven.
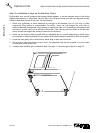
1. Uncrate the two ovens. Identify the oven that will be the lower oven (it will be the oven with leg pads
attached to the bottom corners). Attach the legs (or casters) to the lower oven as described in Step 2c
on page 12.
2. If the oven that will be the top oven was NOT ordered as part of a double-deck oven, remove the four
leg pads from the bottom of the top oven.
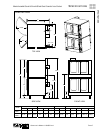
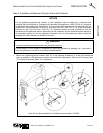
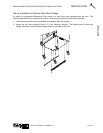
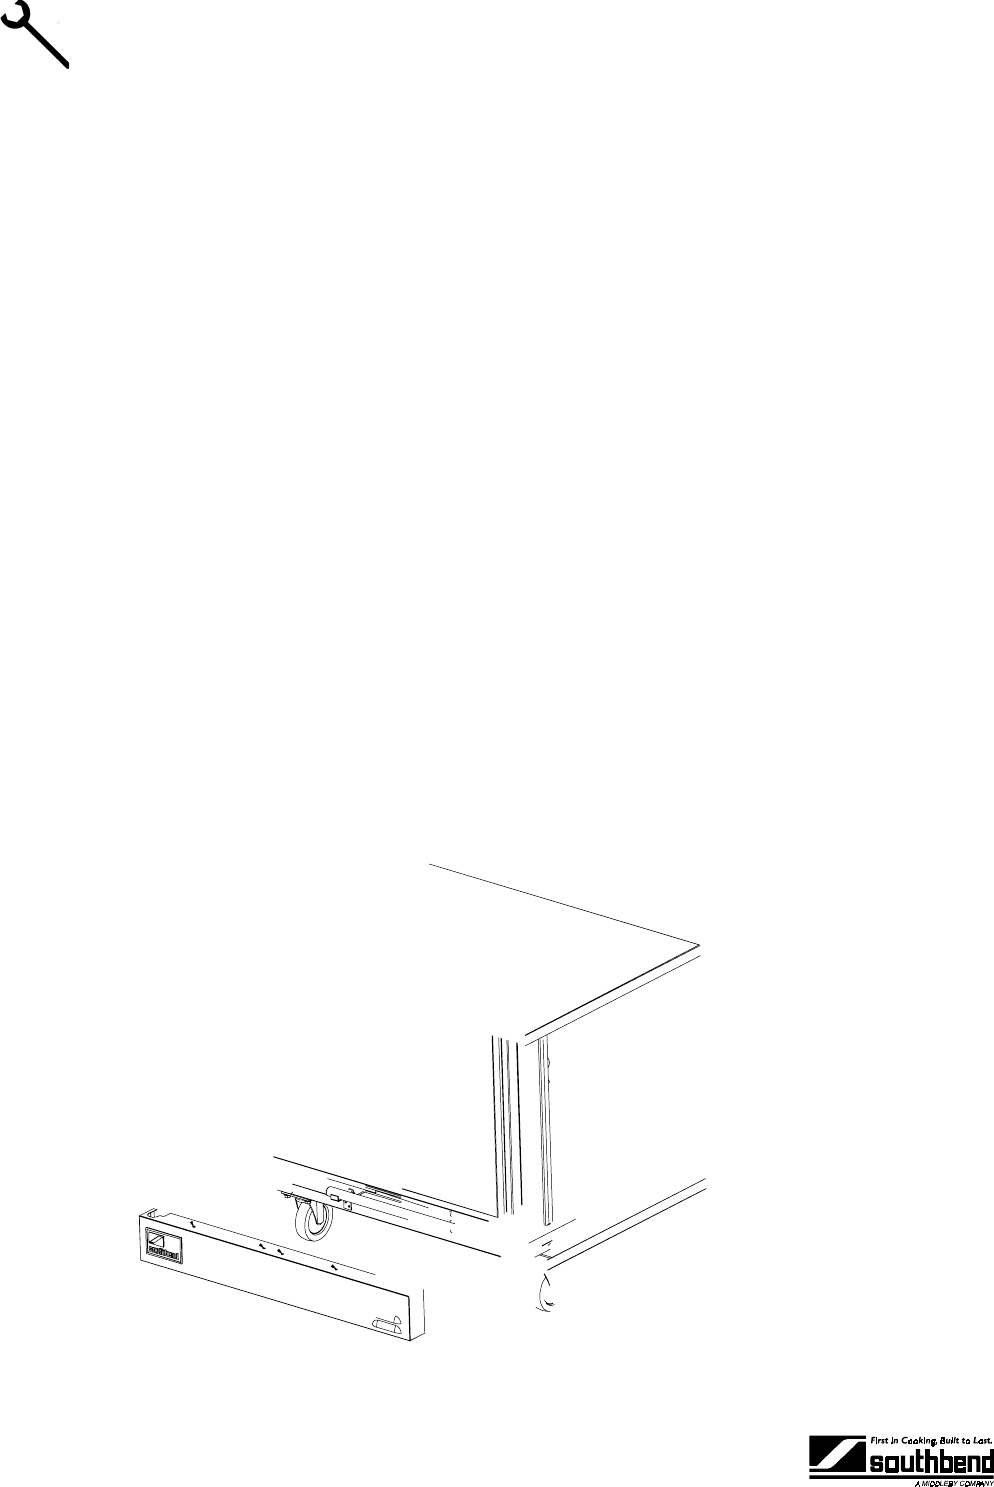
3. Locate and remove the four screws that secure the lower front panel (items “A” in the drawing below).
Lift up the panel and pull it forward to remove it, then set it aside.
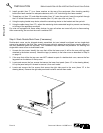
4. Locate and remove the five screws that secure the right side panel to the oven (items “B” in the
drawing below). Remove the right side panel and insulation and set them aside.