


14
Recalibration Guide (continued)
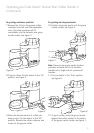
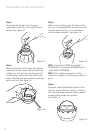
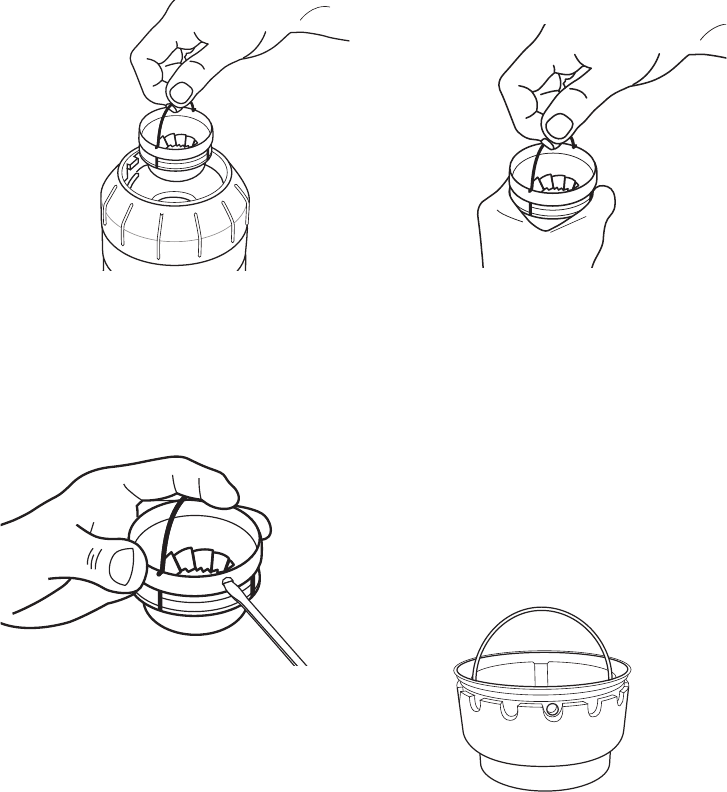
Step 3:
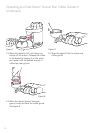
To remove the top burr from the grind
adjustment collar lift it out using the wire
handle. See figure 12.
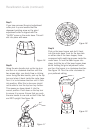
Step 4:
When holding the top burr you will observe
that there are two screws that sit below the
outside rim. You will need to unscrew both
screws using a small sized flat head screw
driver. Unscrew and remove both screws and
set to one side. See figure 13.
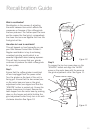
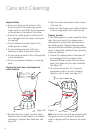
Step 5:
With one hand firmly grasp the body of the
top burr. To recalibrate the top burr hold onto
the wire handle and turn in a clockwise or
anti-clockwise direction. See figure 14.
NOTE: To achieve a FINER grind rotate
CLOCKWISE. To achieve a COARSER grind
rotate ANTI-CLOCKWISE.
NOTE: Only a slight movement in either
direction is required to achieve your perfect
grind.
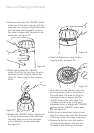
Step 6:
Once you have adjusted the position of the
top burr, ensure that the notches in the top
burr and the screw holes are aligned before
screwing both screws into position.
See figure 15.
Figure 13
Figure 14
Figure 15
Figure 12