


15
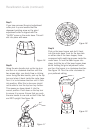
Figure 16
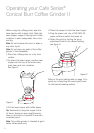
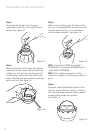
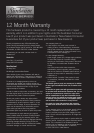
Step 7:
If you have removed the grind adjustment
collar pick it up and ensure that the
downward pointing arrow on the grind
adjustment collar is aligned with the
“ALIGN” arrow on the motor base. This will
slot into place with ease.
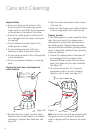
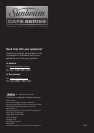
Step 8:
Using the wire handle pick up the top burr
and turn in a clockwise direction until the
two arrows align, you should hear a clicking
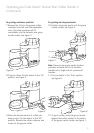
noise. Using the wire handle, pick up the top
burr and place it back inside the motor base.
Turn it in a clock-wise direction until it falls
into position. After this is done you should
not be able to turn the top burr any further.
This means you have placed it into the
correct position. Push down on the top burr
to ensure it is secure. Ensure that you push
the wire handle to one side so that it lies flat
and NOT upright. See figure 18.
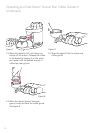
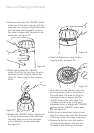
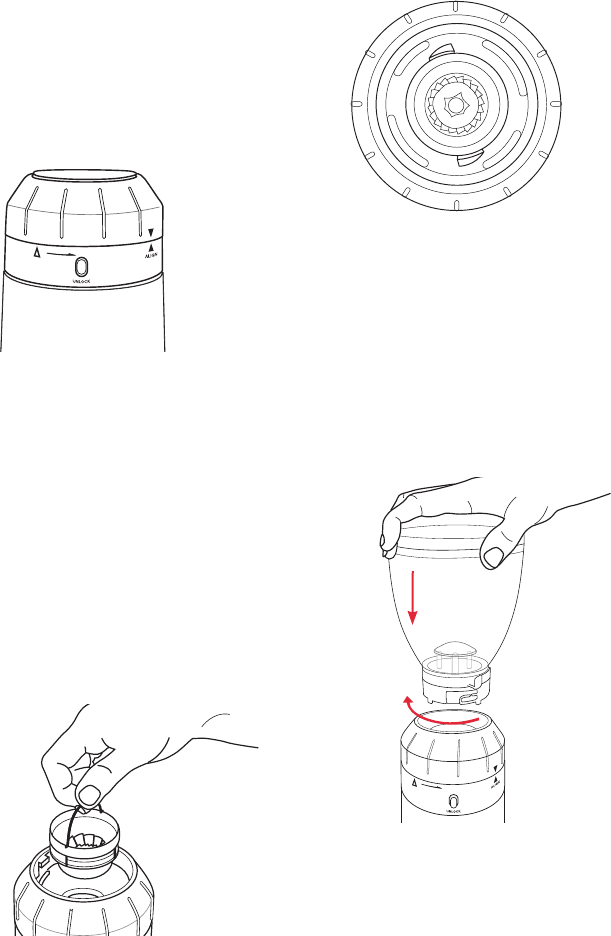
Step 9:
Pick up the bean hopper and slot it back
into the motor base. Look for the two slots
on either side of the bean hopper, these
correspond with matching grooves inside the
motor base. To lock the bean hopper into
place, hold the top of the bean hopper down
whilst holding the grind adjustment collar
and turn the hopper in a clockwise direction.
See figure 19. Turn the collar clockwise to
your preferred setting.
Recalibration Guide (continued)
Figure 17
Figure 18
Figure 19