


02/2005 9 www.U-LineService.com
™
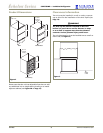
CO2075DWR — Ice Maker/Refrigerator
CAUTION
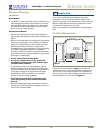
It is important to ensure that all drilled holes are drilled to
the correct depth in order to avoid splits in the wood
when hardware is installed.
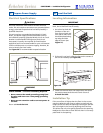
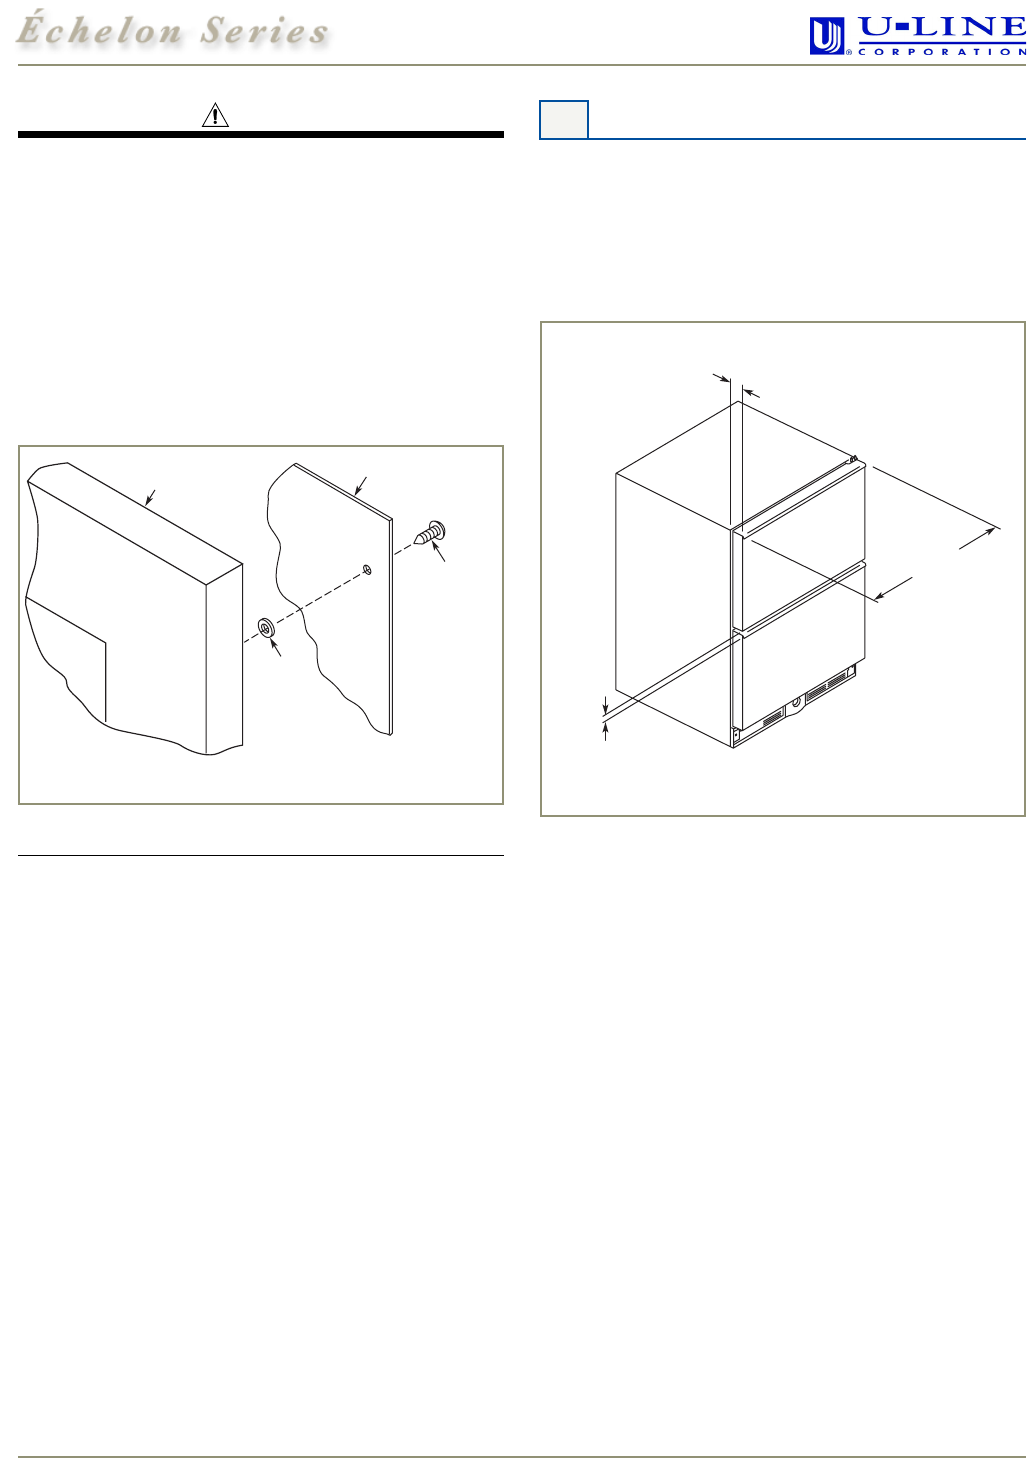
4. Remove tape adjoining the panels and enlarge the five
holes in the overlay panel using a 0.201
"
(#7) drill.
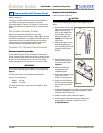
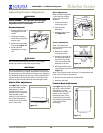
5. Attach the drawer panel to the overlay panel using
#10 x 5/8
"
wood screws and nylon spacers. The nylon
spacers fit between the overlay panel and the door
panel as shown in
Figure 11
. The spacers allow the
original drawer panel to slide back into the 1/4
"
-thick
drawer front reveal (channel).
IMPORTANT
Drawer panel and overlay panel must be aligned properly
or the drawer will not operate correctly.
Assembling the Drawer Front
1. Install the assembled panel by sliding the original door
panel back into the drawer front.
2. Replace the handle assembly and secure with the two
screws removed in Step 2 under Removing Existing
Drawer Fronts.
3. Starting at the corners and working toward the center,
push the drawer gasket back into place. Go on to
5 Adjust Drawers.
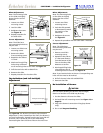
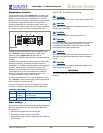
Checking Drawer Alignment
The unit’s drawers are aligned at the factory before
shipment. However, their alignment could have been
disturbed during shipment or during overlay panel
installation.
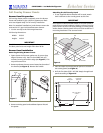
See Figure 12. Check each drawer to confirm that it is
aligned:
• Side-to-Side — When viewed from the top, the
drawer front should be square with the sides of the
cabinet.
• Front-to-Back — When viewed from the side, the
drawer front should be straight with the cabinet’s
sides, not cocked forward or back.
• Top-to-Bottom — When viewed from the front, the
drawer should be level horizontally.
If both drawers are properly aligned, go on to 6 Prepare
Plumbing. If either drawer is not aligned, carefully
follow instructions to remove that drawer, make the
necessary adjustment and re-install the drawer.
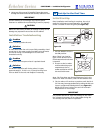
Drawer Panel
Typical
Wood Panel
Plastic
Spacer
Five
Required
#10
x
5/8"
Round
Head Screw
Five Required
Figure 11
5 Adjust Drawers
Aligned
Side-to-Side
Aligned
Front-to-Back
Aligned
Top-to-Bottom
Figure 12