


SS1095 13
MARINE SERIES
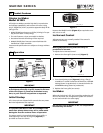
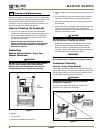
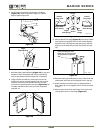
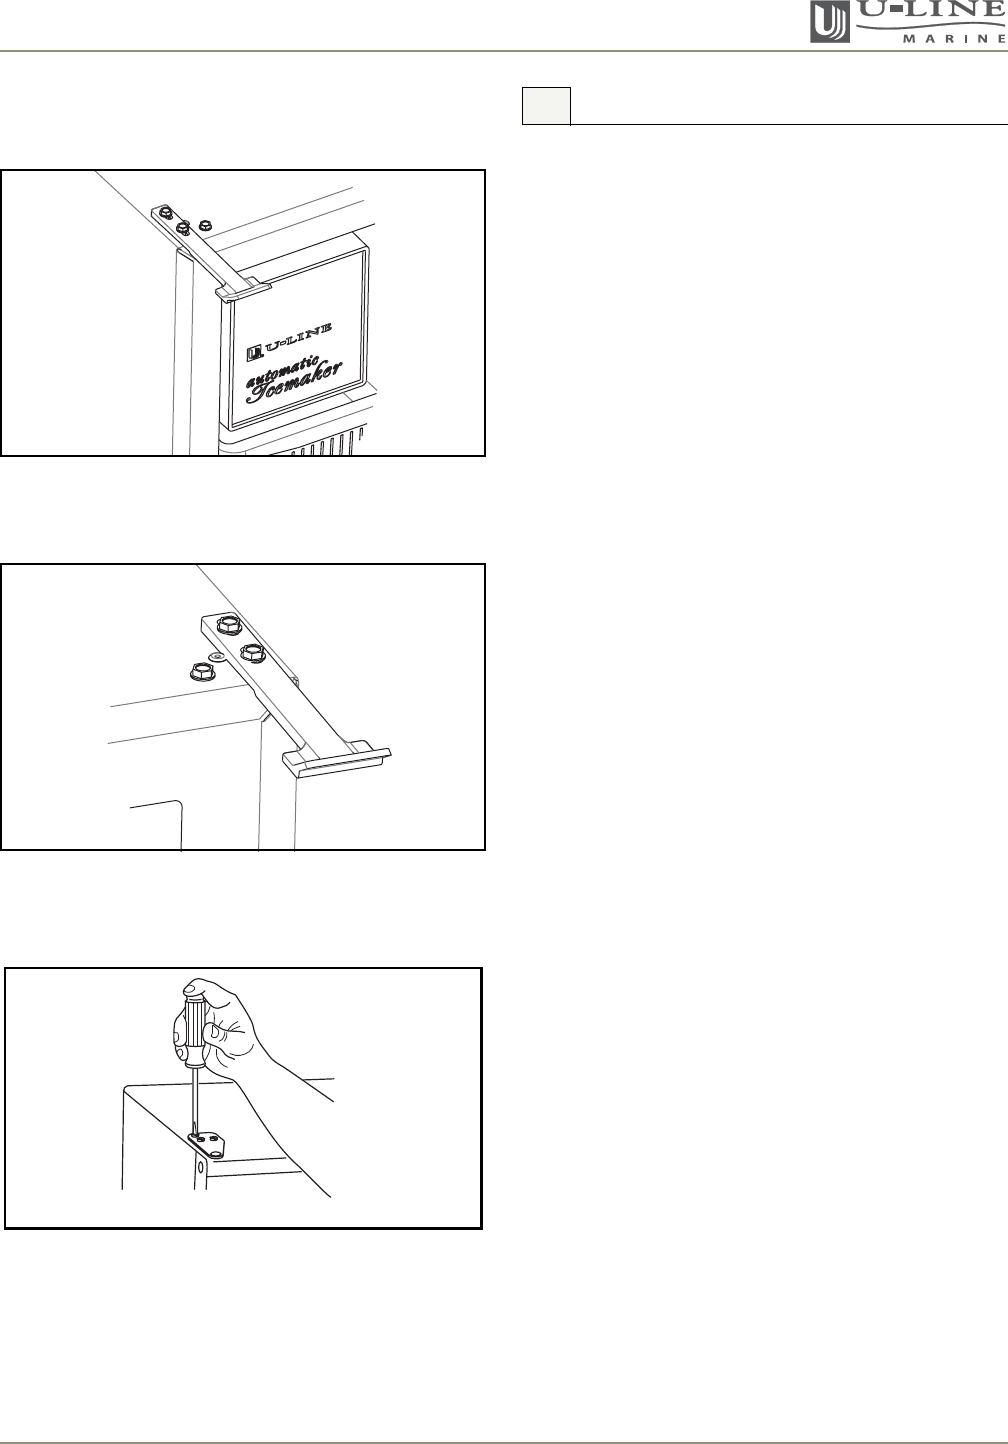
13. Remove all three screws on the opposite side of the
hinge and carefully lift off the door latch assembly
(Figure 23)
.
Figure 23
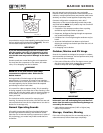
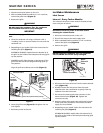
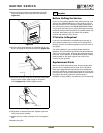
14. Place the door latch assembly on opposite side of unit.
Be sure to tighten all three screws securely
(Figure 24).
15. Place door on lower hinge pin. Invert and install upper
hinge on door. Fasten upper hinge to unit (three
screws)
(Figure 24)
. Partially tighten screws.
.
Figure 24
16. Adjust door to assure proper seal. Tighten upper and
lower hinge screws securely.
17. Replace screws in holes in bottom of unit on opposite
side.
18. Replace the grille.
Before Calling for Service
If your U-Line product appears to be malfunctioning, read
through the OPERATION section of this guide to ensure
that the function of all controls are clearly understood. If
the malfunction persists, the TROUBLESHOOTING GUIDE
in this guide will assist you in quickly identifying common
problems, and provide information on possible causes and
remedies. Most often, this will resolve the problem
without the need to call for service.
If Service is Required
If you do not understand a troubleshooting remedy, or
your product needs service, contact U-Line Corporation
directly. Contact information appears on the rear cover of
this guide.
You will be asked for your product Model and Serial
Numbers. This information should be recorded inside the
front cover of this guide, following the products original
purchase. It also appears on the Model and Serial number
plate located on the upper right or rear wall of the
interior of your product.
Replacement Parts
When you need replacement parts, always request that
genuine U-Line replacements be used. U-Line products
have been designed and engineered using components
that work efficiently, and provide superior service life and
performance. The use of aftermarket parts or components
may affect the safety, operation, performance or
durability of your product, and may also void its warranty.
ULIN_0145_A
7 Service