


– 9 –
H SERIES SERVICE & PARTS
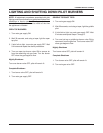
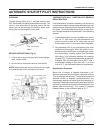
AUTOMATIC SHUTOFF PILOT INSTRUCTIONS
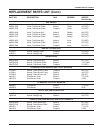
CLEANING
To clean limiting orifice (Fig. 7), turn gas supply to unit
OFF. Disconnect pilot tubing at the pilot burner body. The
orifice is then accessible at the body end of the pilot
burner and can be removed for cleaning. Clean spud,
taking care not to enlarge the orifice hole.
Fig. 7
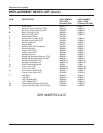
SERVICE INSTRUCTIONS (Fig. 8)
1. If valve fails to open with good pilot flame impinge-
ment, replace valve.
2. Do not remove interrupter valve for field service.
NOTE: Make certain gas line to inlet of control is purged
of air and that gas flow is available at this point.
Fig. 8
THERMOSTATICALLY CONTROLLED GRIDDLE
RECALIBRATION
Field recalibration is seldom necessary and should not
be resorted to unless cooking results definitely prove that
griddle surface temperature and thermostat setting do
not agree. To check griddle temperature, use an accu-
rate “surface temperature thermometer” in the following
manner.
1. Locate thermometer in center of griddle from front to
rear: on 17" wide units, use one thermometer and
center from side to side; on 34" wide units, use two
thermometers, one 8-
1
⁄2" from each side of the griddle.
2. Set thermostat dial to any temperature and allow
griddle to heat thoroughly. When the griddle is com-
pletely heated and the burner is on bypass gas, check
the thermometer reading against the thermostat
dial setting. If the difference between the readings
exceeds 15° F, the thermostat should be recalibrated.
Example: With the thermostat dial at 400° F and a
thermometer reading of less than 385° F or more
than 415° F, the thermostat should be recalibrated.
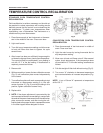
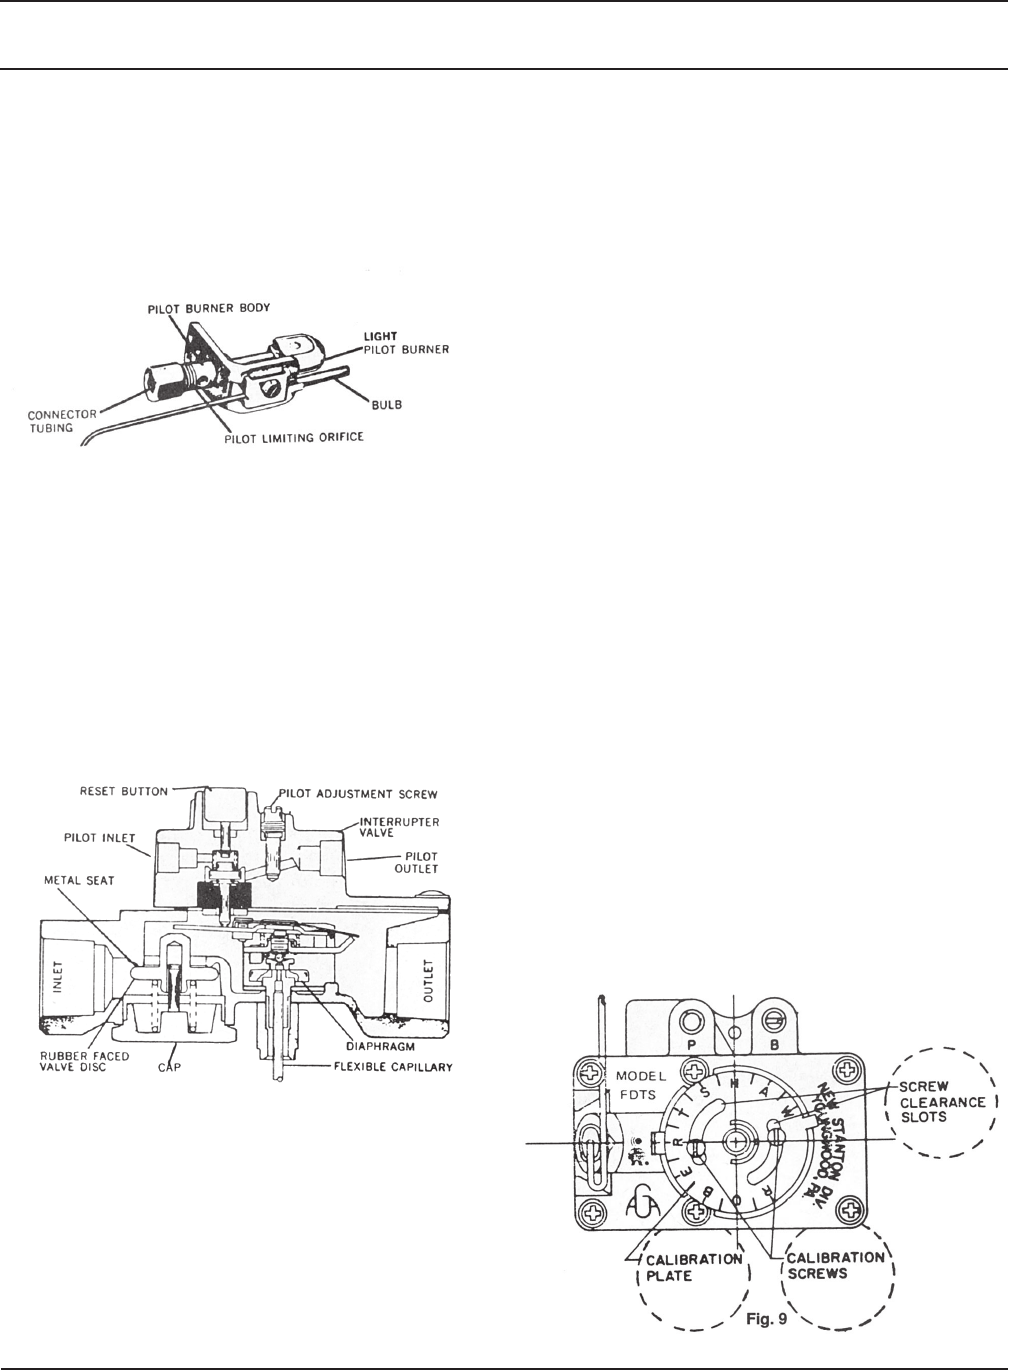
Recalibration Procedure
Make note of number of degrees thermostat is off.
Remove thermostat dial and loosen calibration screws
(Fig. 9) until plate moves freely. Turn calibration plate the
required number of degrees counterclockwise if the
thermometer reading was higher than the dial setting, or
clockwise if the thermometer reading was lower than the
dial setting. Hold calibration plate in desired position and
tighten plate screws firmly. The number of degrees
between letters on the calibration plate is 50° F.