


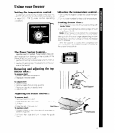
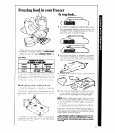
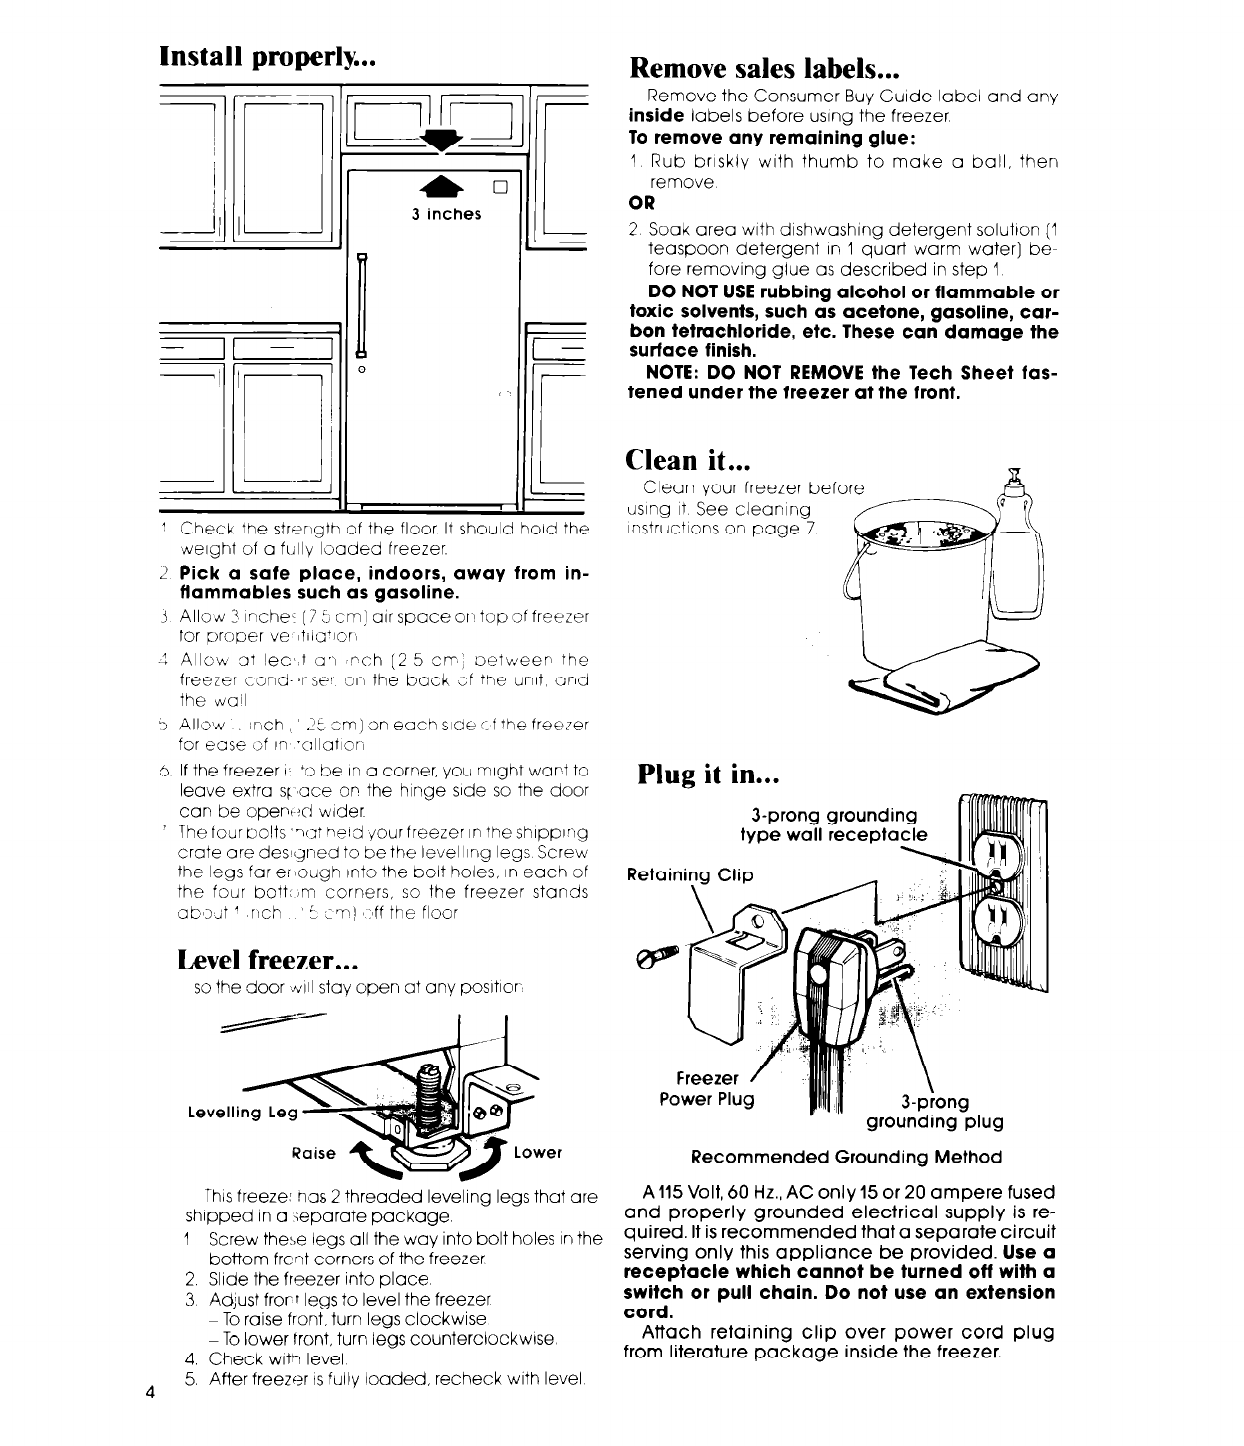
Install properly...
do do
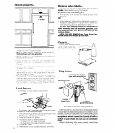
3 inches 3 inches
’ Check the strerlgth of the floor It should hoid the ’ Check the strerlgth of the floor It should hoid the
werght of a fL,lly loaded freezer. werght of a fL,lly loaded freezer.
L Pick a safe place, indoors, away from in- L Pick a safe place, indoors, away from in-
flammables such as gasoline. flammables such as gasoline.
? Alloti 3 IncheL [I L cm] arr space or top of freezer
for proper ve ~trra+lOrI
-: Allow at lecc t a7 pch (2 5 cm; between the
freezer cond-srser on the back cf the unrt. and
the wall
‘, Allow inch, .‘t
cm] on each side ‘1 f the freezer
for ease \:f rn Vc~llatlor;
6. If the freezer I ‘o be rn a corner, you rnrght wart to
leave extra sy ‘ace on the hinge sde so the door
can be open,t:ci wider
’ The four bolts ‘-at herd your freezer in the shrpprng
crate are desIgned to be the levelling legs Screw
the legs far erlough Into the bolt holes, in each of
the four bott:)ni corners, so the freezer stands
ab#sJ ’ rnch 5 ;m) ‘sff the floor
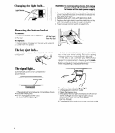
Level freezer...
so the door 4 stay oaen at any posrtror
Thus freeze: n’as 2 threaded leveling legs that are
shopped in a separate package.
1 Screw these legs all the way into bolt holes In the
bottom front corners of the freezer
2. Slide the freezer into place
3 Adjust frorr legs to level the freezer
~ To raise front, turn legs clockwise
- To lower front, turn legs counterclockwrse
4. Check with level
4
5. After freezer IS fully loaded, recheck with level
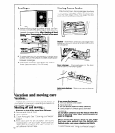
Remove sales labels...
Remove the Consumer Buy Gurde label and any
inside labels before using the freezer
To remove any remaining glue:
1 Rub briskly with thumb to make a ball, then
remove
OR
2 Soak area with dishwashrng detergent solutton (I
teaspoon detergent In 1 quart warm water] be-
fore removing glue as described in step 1
DO NOT USE rubbing alcohol or flammable or
toxic solvents, such as acetone, gasoline, car-
bon tetrachloride, etc. These can damage the
surface finish.
NOTE: DO NOT REMOVE the Tech Sheet fas-
tened under the freezer at the front.
Clean it . . .
Clean your freezer befor
using rt See cleaning
instructions on page 7
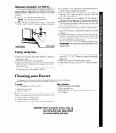
Plug it in...
-
3-prong grounding
type wall receptacle
Retaining Clip
eF
Freezer 1 ..
Power Plug
I
’ - ” grounding-plug
Recommended Grounding Method
A 115 Volt, 60
Hz.,
AC only15 or 20 ampere fused
and properly grounded electrical supply is re-
quired. It is recommended that a separate circuit
serving only this appliance be provided. Use a
receptacle which cannot be turned off with a
switch or pull chain. Do not use an extension
cord.
Attach retaining clip over power cord plug
from literature package inside the freezer.