


13
Tools Required: None
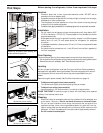
Refrigerator Toe Grille
Assembly Instructions
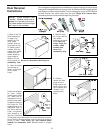
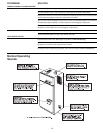
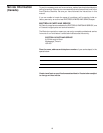
To Attach the Toe Grille to the Mounting Clips:
• With the end of the Toe Grille against the side of the
Lower Hinge, align the two (2) Assembly Slots with the
two (2) Mounting Clips.
• Snap the Toe Grille onto the Mounting Clips. (See
Figures 1A and 1B)
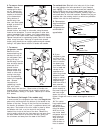
To Remove the Toe Grille:
• Carefully tilt the bottom edge of the Toe Grille away from
the refrigerator base.
• Pull the Toe Grille toward you until it “unsnaps” from the
Mounting Clips. (See Figure 2)
For Cleaning:
Hand wash in Warm Soapy Water.
Figure 2
NOTE: If your refrigerator has the type of Mounting
Clips shown in Figure 1B below, use this procedure.
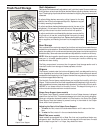
The Toe Grille and Mounting Clips are NOT
dishwasher safe. Placing them in the dishwasher will result
in a warped and unusable Grille.
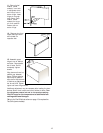
NOTE: A properly mounted Toe Grille should have its edge
against the Lower Hinge, and the back of the Toe Grille tight
against the refrigerator base.
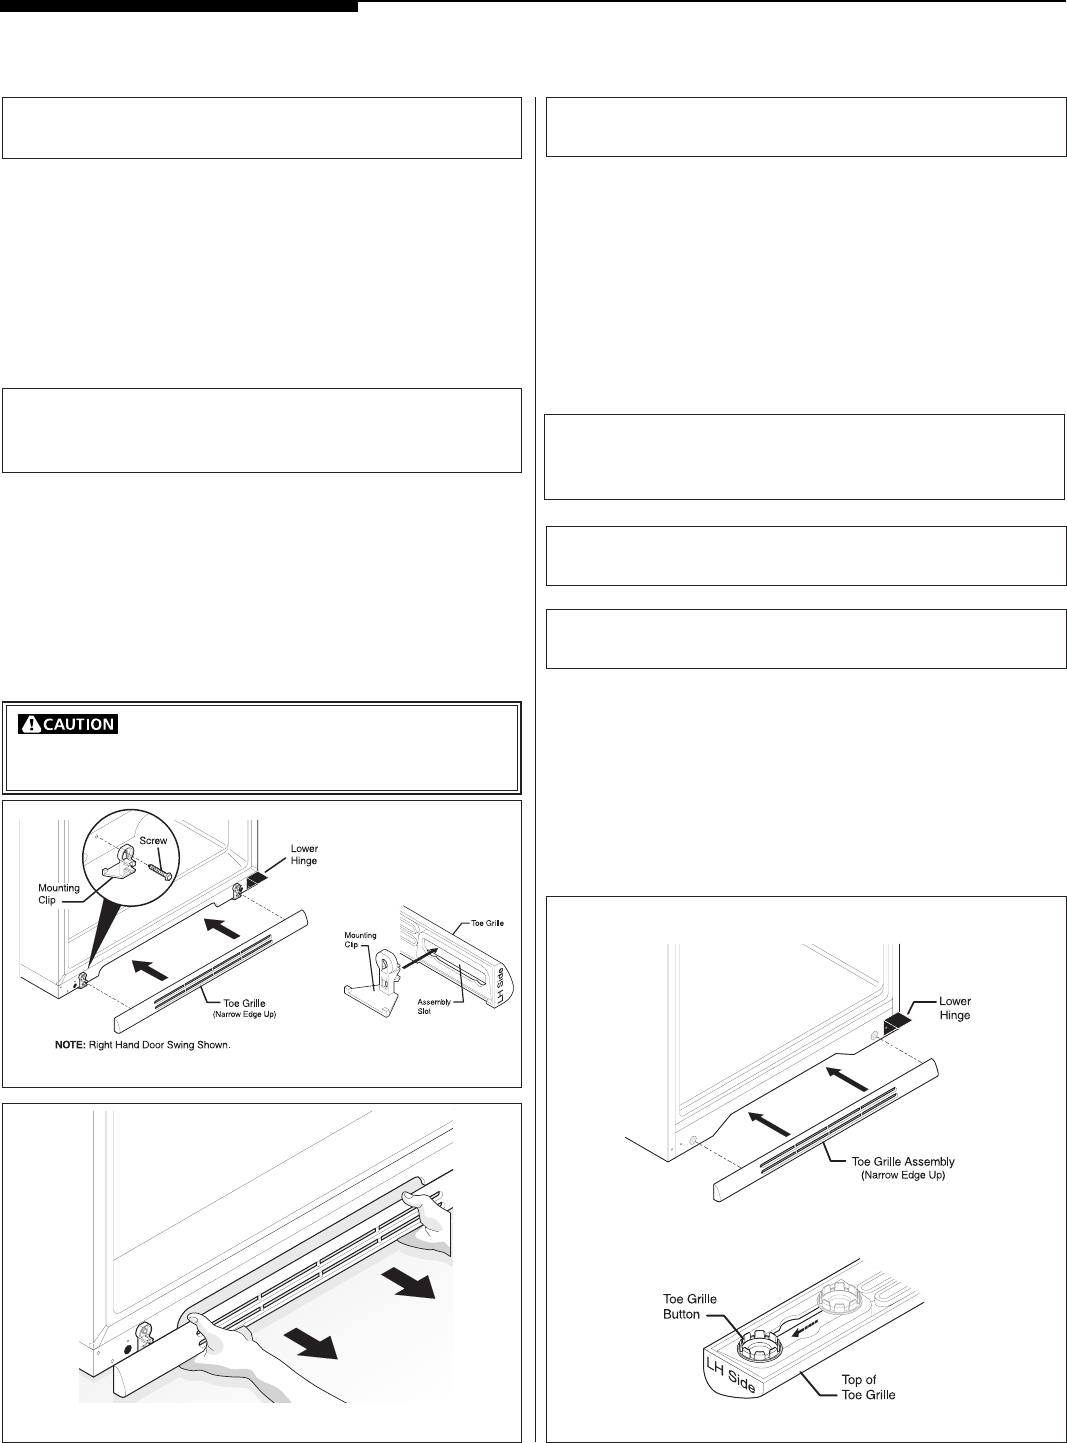
NOTE: Both Toe Grille Buttons must be mounted on the
same side of the two keyhole slots.
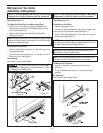
To Attach the Toe Grille:
• Open the refrigerator door.
• Line up the Toe Grille Assembly over the two large holes
on the front of the refrigerator base (See Figure 1).
• Push the Toe Grille Assembly into the holes until the grille
snaps in place (See Figure 1).
NOTE: The Toe Grille should be flush with the side of the
refrigerator and not interfere with the Lower Hinge.
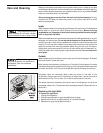
NOTE (some models): If your refrigerator has a left hand
door swing, the Toe Grille Buttons must be positioned on the
left side of the keyhole slots (See Figure 2).
To Remove the Toe Grille:
• Grasp the Toe Grille on each side and pull directly
outward.
• The grille assembly will pop out of the holes for easy
cleaning.
For Cleaning:
Hand wash in Warm Soapy Water.
NOTE: If your refrigerator has the type of Mounting
Clips shown in Figure 2 below, use this procedure.
Tools Required: None
Figure 2
Figure 1
Figure 1B
Figure 1A