


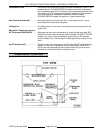
FULL SIZE GAS CONVECTION OVENS - SERVICE PROCEDURES AND ADJUSTMENTS
F32700 (February 2006)Page 25 of 64
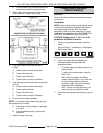
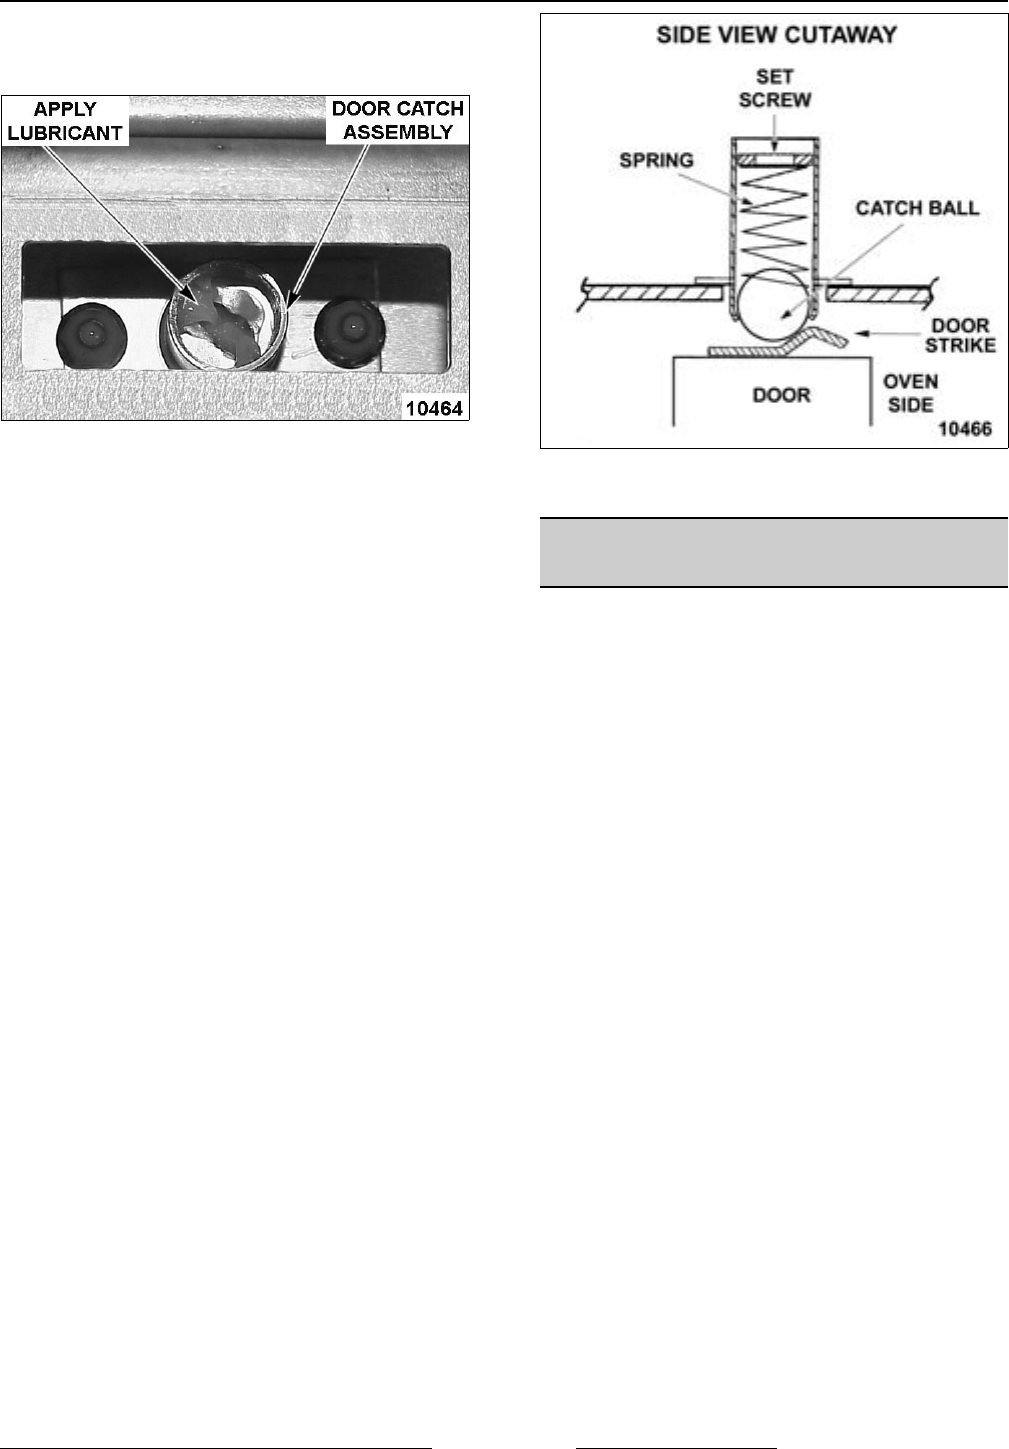
4. Apply lubricant at the top of the door catch
assembly to lubricate the internal spring. See
LUBRICATION under GENERAL.
5. Close the doors and check them for proper
alignment.
A. Doors should be centered and parallel at
the top and bottom in the oven cavity
opening as outlined under DOOR
ADJUSTMENT.
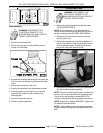
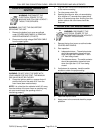
6. Open right side door and view the left side catch
ball and door strike position. Ensure catch ball
is resting upon the angular surface of door
strike. Repeat on opposite door.
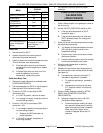
NOTE: If catch ball is striking the flat surface on door
strike, shims will be required under the door catch
assembly.
NOTE: The catch ball should make contact near the
center of door strike.
A. If adjustment is necessary, loosen
mounting screws then slide door strike
from front to back until roller ball rests upon
the angular surface of the door strike.
Tighten screws and check operation.
B. If proper adjustment cannot be achieved,
add shims beneath the door strike. Repeat
step 6. DO NOT BEND THE DOOR
STRIKE.
7. Each oven door should open with a force of 8 to
25 pounds when pulled at the handle. The
adjustment must allow the doors to remain
closed during normal operation and allow
opening without exertion by the user.
NOTE: The amount of tension on catch ball
determines the opening force of door.
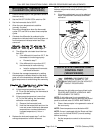
A. Adjust catch ball tension as follows:
1) Turn set screw inside the catch
assembly housing clockwise to
increase tension on catch ball and
counterclockwise to decrease tension
on catch ball.
2) Continue adjustment until proper door
operation is achieved.
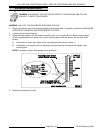
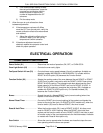
DOOR CHAIN ADJUSTMENT
(SIMULTANEOUS DOORS)
Introduction
When the oven doors are in proper adjustment, as
the doors come together, the right door will lead the
left door in closing by about 1/4 inch. The doors will
feel like they are self closing the last 1/2 inch of
travel.
Procedure
1. Remove the lower sill cover as outline under
COVERS AND PANELS in REMOVAL AND
REPLACEMENT OF PARTS.
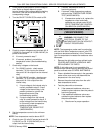
2. Close doors and check door chain for factory
setting.
A. Turnbuckles should be 5 to 5 1/2 inches
apart.
B. Short eye bolt should be connected to the
end of the chain that goes to the front of
the sprocket.
C. At the rear of the sprocket, one open link of
the chain should be partially engaged with
a tooth on the sprocket, the next open link
should not be engaged (completely empty),
and the last open link should be secured to
the long eye bolt.
D. Chain must be tight enough that the doors
move simultaneously when opened or
closed.
E. When the doors are opened, the
turnbuckles will move away from each
other.