


FULL SIZE GAS CONVECTION OVENS - REMOVAL AND REPLACEMENT OF PARTS
F32700 (February 2006)Page 9 of 64
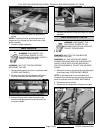
6. Reverse procedure to install the replacement
burner.
NOTE: Ensure that burner positioning bracket (U
shaped end) is inserted into slot at the rear of the
burner chamber.
7. Check for proper operation.
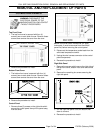
GAS ORIFICE
WARNING: DISCONNECT THE
ELECTRICAL POWER TO THE
MACHINE AND FOLLOW LOCKOUT /
TAGOUT PROCEDURES.
WARNING: SHUT OFF THE GAS BEFORE
SERVICING THE UNIT.
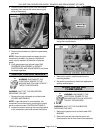
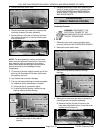
1. Remove the bottom front cover as outlined under
COVERS AND PANELS.
2. Remove the bolts securing the gas manifold to
the oven and place the manifold to the side.
3. Remove the gas orifice from the spud on the
manifold and replace with the correct orifice for
the given altitude.
4. Reverse procedure to install and check for proper
operation.
GAS SOLENOID VALVE
WARNING: DISCONNECT THE
ELECTRICAL POWER TO THE
MACHINE AND FOLLOW LOCKOUT /
TAGOUT PROCEDURES.
WARNING: SHUT OFF THE GAS BEFORE
SERVICING THE UNIT.
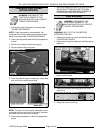
WARNING: ALL GAS JOINTS DISTURBED
DURING SERVICING MUST BE CHECKED FOR
LEAKS. CHECK WITH A SOAP AND WATER
SOLUTION (BUBBLES). DO NOT USE AN OPEN
FLAME.
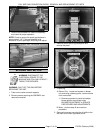
1. Remove the control panel and the right side panel
as outlined under COVERS AND PANELS.
NOTE: If right side panel is not accessible, this
component can be serviced by removing the control
panel as outlined under COVERS AND PANELS.
2. Disconnect the lead wires.
3. Disconnect the compression fittings to the valve.