23
Chapter 5 Reference
Chapter 5 Reference
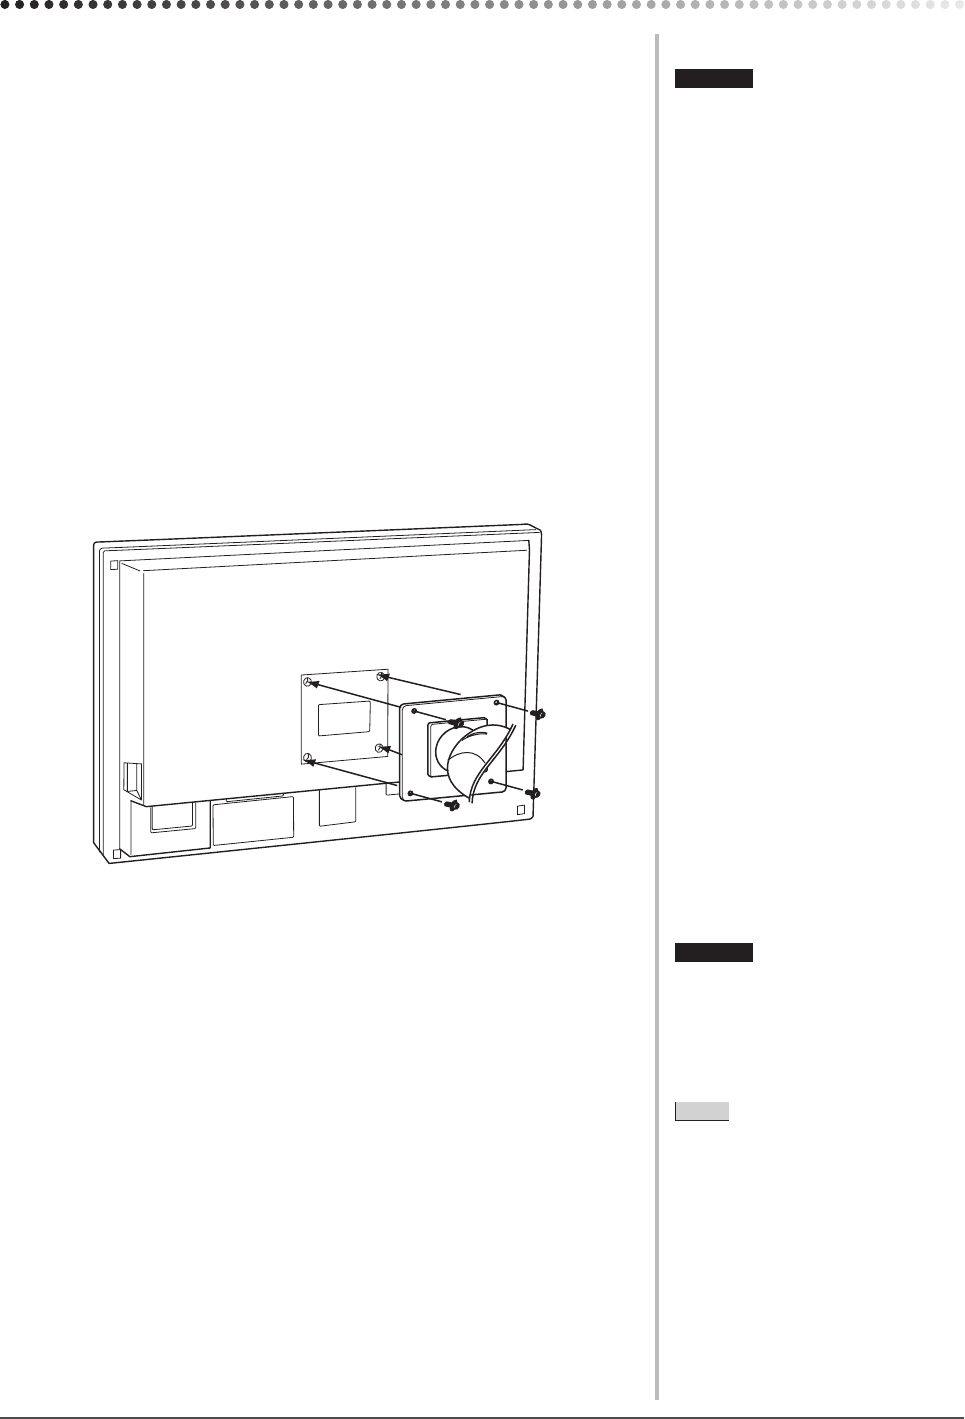
5-1 Attaching an Arm
The stand can be removed and replaced with an arm (or another stand) to be
attached to the monitor.
[Attaching]
1
Lay the LCD monitor on a soft cloth spread over on a stable
surface with the panel surface facing down.
2
Remove the stand. (Prepare a screwdriver.)
Unscrew the four screws securing the unit and the stand with the
screwdriver.
3
Attach the monitor to the arm or stand.
Secure the monitor to the arm or stand using the screws specifi ed in the
user’s manual of the arm or stand.
5-2 Cleaning
Clean the monitor periodically to keep the monitor clean and extend its life.
Cabinet
Clean the cabinet with a soft cloth dampened with little mild detergent.
LCD Panel
• Clean the LCD panel with a soft cloth such as cotton cloth or lens cleaning
paper.
• Remove persistent stains gently with a cloth dampened with little water, and
then clean the LCD panel again with a dry cloth for better fi nishing.
Attention
• When attaching an arm or stand,
follow the instructions of their user’s
manual.
• When using another manufacturer’s
arm or stand, confi rm the following in
advance and select one conforming to
the VESA standard. Use M4 × 12 mm
screws supplied with the monitor.
– Clearance between the screw holes:
100 mm × 100 mm
– Thickness of plate: 2.6 mm
– Strong enough to support weight of
the monitor unit (except the stand)
and attachments such as cables.
• Attach an arm or stand to meet the
following tilt angles of the monitor.
– Up 45 degrees, down 45 degrees
(Within operating range)
• Connect the cables after attaching an
arm.
Attention
• Never use any solvents or chemicals,
such as thinner, benzene, wax,
alcohol, and abrasive cleaner, which
may damage the cabinet or LCD
panel.
NOTE
• Optional ScreenCleaner is
recommended for cleaning the panel
surface.
SX3031W_UM_EN.indd 23SX3031W_UM_EN.indd 23 5/29/2007 1:46:10 PM5/29/2007 1:46:10 PM


