


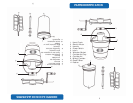

4
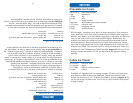
Figure 1
Before First Use:
1. Read all instructions and important safeguards.
2. Remove all packaging materials and make sure items have been received
in good condition.
3. Tear up all plastic bags, as they can pose a risk to children.
4. Wash the lid, mixing canister and all accessories in warm, soapy water.
5. Rinse and dry all parts thoroughly.
6. Wipe electric motor with a damp cloth.
7. Pour water (about 2/3 full) into the wooden bucket and leave in the sink or
water-safe area for one and a half hours. This will give the wood a chance
to expand so that the salt/ice mixture will not leak out during the freezing
process.
1. Lea todas las instrucciones y las medidas de seguridad importante.
2. Retire todos los materiales de empaque y asegúrese de que los artículos se
reciban en buenas condiciones.
3. Rompa todas las bolsas de plástico, ya que pueden representar un riesgo
para los niños.
4. Lave en agua tibia con jabón la cubierta, la garrafa del congelador y todos
los accesorios.
5. Enjuague y seque perfectamente todas las partes.
6. Agregue agua dentro de la cubeta de madera (a llenarla hasta 2/3
aproximadamente) y déjela durante una hora y media. Esto dará tiempo
para que la madera se hinche, de manera que durante el proceso de
congelamiento no haya fugas de la mezcla de sal y hielo.
USING YOUR ICE CREAM MAKER
COMO USAR EL APARATO
To Make Ice Cream:
1. Select your recipe and prepare ingredients per recipe instructions.
Antes de usarla por primera vez:
1. Seleccione su receta favorita y prepare los ingredientes de acuerdo con
las instrucciones de la receta.
2. Enfríe la mezcla en el refrigerador hasta que está completamente fría. Enfríe
el bote para el helado en el congelador (hacia atrás) para por lo menos
una hora (se recomienda durante la noche).
3. Agregue la mezcla fría del helado dentro del bote frío para el helado (sólo
hasta llenar 2/3 de su capacidad, ya que la mezcla se expandirá durante el
proceso de congelamiento).
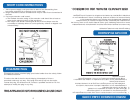
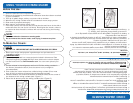
4. Inserte la agitadora y asegúrese que su parte inferior quede fija en el
centro de la parte inferior del bote (vea “Dibujo 1”).
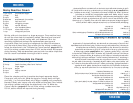
5. Coloque la tapadera sobre el bote (vea “Dibujo 2”).
Para hacer helado:
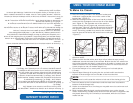
Dibujo 2
Figure 2
NOTE:
• Do not use abrasive cleaners or scouring pads.
• Do not immerse the electric motor, cord or plug in water at any time.
NOTE:
• SEE STEP 7 IN “BEFORE FIRST USE” SECTION BEFORE MAKING ICE CREAM.
HELPFUL HINT:
• There are many classic ice cream recipes included in this manual. See
“Recipes” beginning on page 10. Even more delicious ice cream recipes
can be found online at www.AromaCo.com. You can even upload your
own!
2. Chill the mixture in the refrigerator until cold. Chill the mixing canister in
the freezer (towards the back) for at least one hour (overnight is
recommended).
3. Pour chilled ice cream mixture into chilled mixing canister (fill no more
than 2/3 full, as mixture will expand during freezing process).
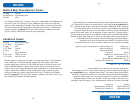
4. Insert the dasher and ensure the bottom of dasher is fixed in the center of
the bottom of the mixing canister (see “Figure 1”).
5. Place the lid securely onto the mixing canister (see “Figure 2”).
4
NOTA:
• No utilice limpiadores abrasivos ni fibras para lavar.
• Nunca sumerja en agua ni en otro líquido, la base ni el cordón eléctrico.
NOTA:
• Véase el número 6 de “Antes de usarla por primera vez” antes de
empezar.
Dibujo 1