


Installation
6
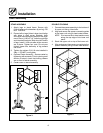
Oven Assembly
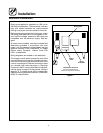
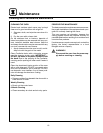
STAND ASSEMBLY
1. Attach legs to stand frame. Secure with
5/16-18 nuts and lockwashers (4 per leg). DO
NOT TIGHTEN.
2. Place shelf on legs. Holes in legs should align
with holes in shelf corner brackets. Legs
should be loose enough to assist in this align-
ment. Place 1/4-20 x 2-1/4” bolts through legs
and into s helf brackets. Bolts should fit radius
of legs. Install 1/4-20 nuts after all four corners
are in place. Tighten four nuts. Do not over
tighten these nuts, deformity of leg surface
can occur.
3. Tighten the sixteen 5/16 -18 nuts installed in
Step 1. DO NOT over tighten.
4. Optional Caster Assembly --- Secure caster by
tightening with a wrench. Prior to placing oven
section on stand, check that locking casters
are on front of stand assembly.
5. Center oven on stand assembly.
Figure 3
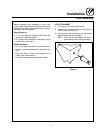
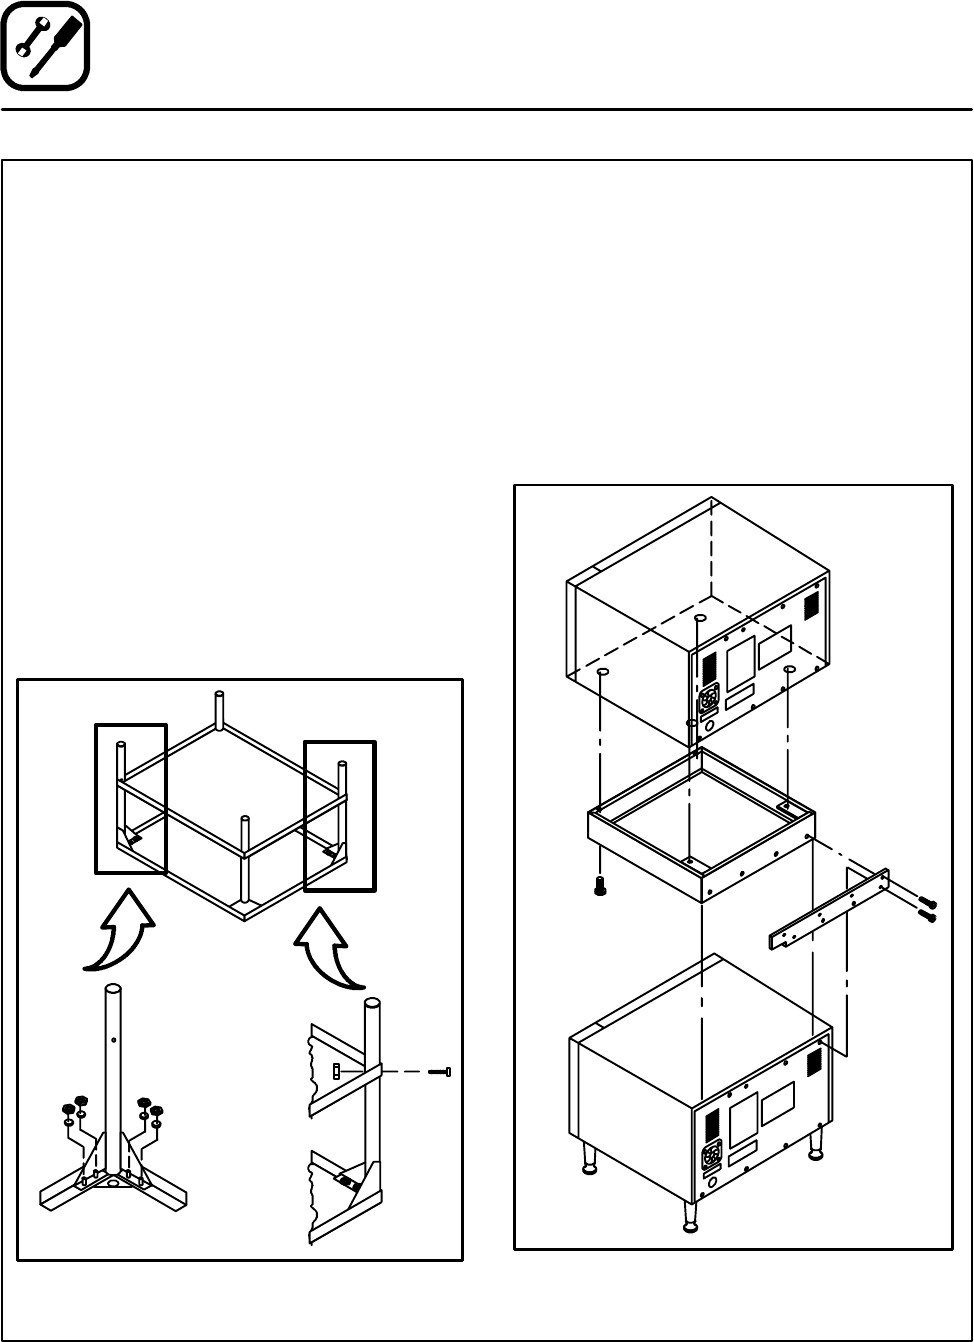
DOUBLE STACKING
1. Connect the spacer assembly to the bottom of
th upper unit using 4 hex bolts.
2. Align and secure the spacer connecting plate
to the lower unit using 4 sheet metal screw s.
NOTE: First remove the 4 sheet metal screws
along the top edge of the lower unit
panel.
3. Stack the upper unit on top of the lower unit.
4. Align and secure the spacer connecting to the
spacer assembly using 4 sheet metal screws.
Figure 4