23
11. Press START to begin kneading cycle. The operation
light will illuminate. The TIME remaining will begin
to count down in display window. COURSE, LOAF
SIZE, CRUST COLOR and CYCLE will be shown in
display window. (E).
Note: During kneading cycle, yeast will activate and
viewing window may begin to fog. (This will clear
eventually so you can view the progress.)
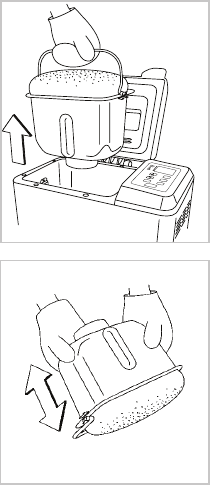
12. When your bread is finished baking, bread maker
will beep and “0:00” will appear in display window.
Press STOP and open lid. Using oven mitts, remove
bread pan (F).
Important: Remember, bread pan and loaf are both
very hot! Be careful not to place either on tablecloth,
plastic surface or other heat-sensitive surface that
may scorch or melt.
Note: If bread is not removed immediately after baking and STOP is not
pressed, the Keep Warm cycle will begin. Operation light will begin to flash.
Bread maker will automatically turn off after 60 minutes. Although this will help
prevent bread from becoming soggy, for best results, remove bread immediately
after baking.
Note: Keep Warm cycle does not apply to the following courses:
•Jam
•Dough
•PizzaDough
•BakeOnly
13. Turn bread pan upside down and shake to release bread. Place bread
upright on wire rack to cool 15 – 30 minutes before cutting. This allows
steam to escape.
Caution: Be sure to remove kneading paddle from the bread.
Caution: Bread pan, kneading paddle and bread will be very hot.
14. Always unplug bread maker after each use.
USING 24-HOUR DELAY BAKE TIMER
Important: Delay baking does not activate Jam Course. Don’t use delay
bake timer if your recipe includes eggs, fresh milk, yogurt or other dairy
products, meats, etc
To preset your bread maker, follow these steps:
1. Add ingredients as usual, taking care not to let yeast and liquid ingredients
contact one another.
Note: If your recipe contains salt, add it with the liquid ingredients, taking care
to keep it away from the yeast.
2. Close bread maker lid and plug it in.
F
E


