


31
SERVICE (cont.)
SOLENOID VALVES (DISPENSE) (cont.)
3. Drain enough water from the tank (approximately
1.0 gallon) so the water level is below the dispense
valve mounting hole.
NOTE: Bunn-O-Matic has a syphon assembly,
#12440.0000. available for this purpose.
4. Disconnect the water line from the solenoid valve.
5. Remove the #10-32 screw securing the solenoid
valve to side of the tank. Remove solenoid valve.
6. Using the #10-32 screw install new solenoid valve
on side of the tank
7. Push the water line onto the tube on bottom of
solenoid valve.
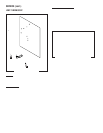
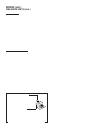
8. Refer to Fig. 29 when reconnecting the wires.
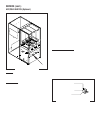
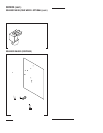
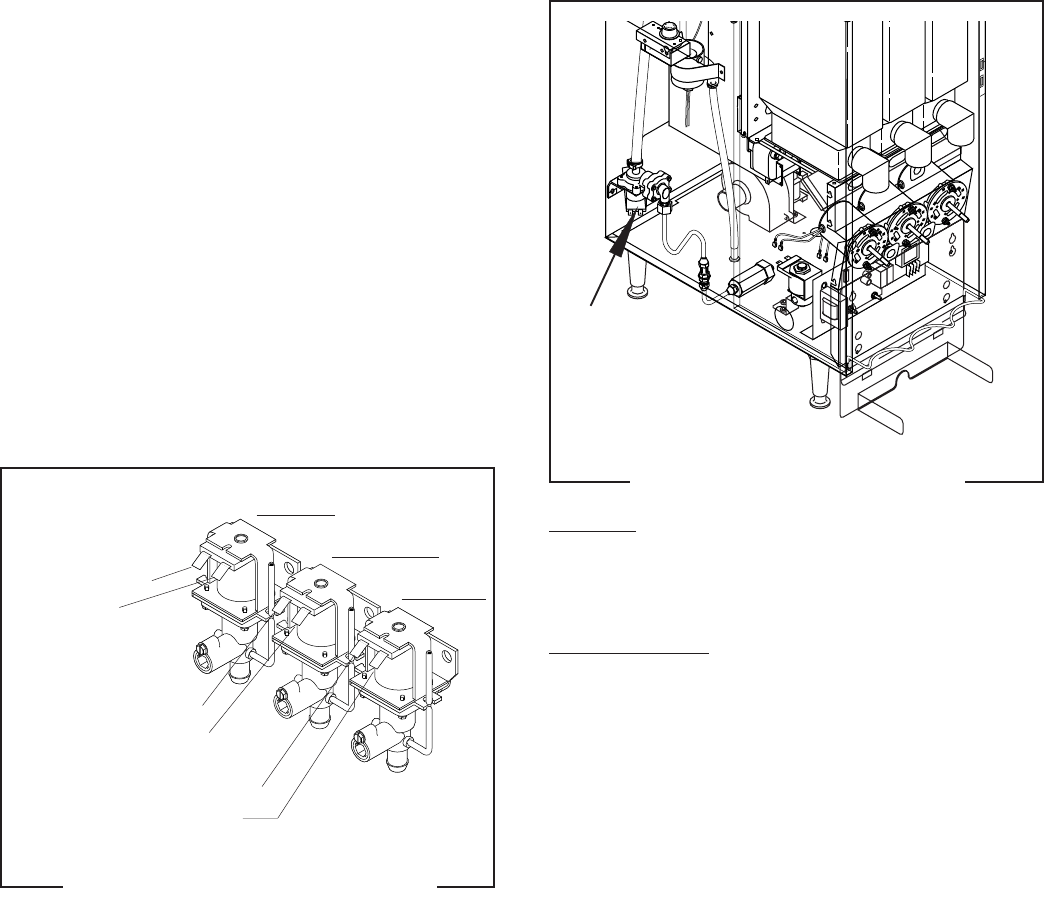
FIG. 29 DISPENSE SOLENOID VALVE
TERMINALS
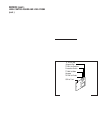
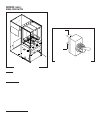
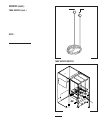
SOLENOID VALVE (INLET)
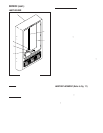
FIG. 30 INLET SOLENOID VALVE
P1445.40
Location:
The inlet solenoid is located inside on the left
rear of the dispenser housing.
Test Procedures:
1. Disconnect the dispenser from the power source.
2. Disconnect the white and violet wires from the
solenoid valve.
3. Check the voltage across the white and violet
wires with a voltmeter. Connect the dispenser to
the power source. The indication must be 120
volts ac for two wire 120 volt models, three wire
120/208, 120/240 volt models and 240 volts ac
for two wire 240 volt models.
4. Disconnect the dispenser from the power source,
If voltage is present as described, proceed to #5
If voltage is not present as described, refer to the
wiring diagram and check dispenser wiring harness.
5. Check for continuity across the solenoid valve
coil terminals.
If continuity is present as described, reconnect the
white and violet wires to the solenoid.
If continuity is not present as described, replace the
solenoid valve.
6. Check the solenoid valve for coil action. Connect
the dispenser to the power source. Listen care-
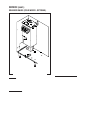
P1453.90
FMD-2 & 3
FMD-3 ONLY
FMD-2 & 3
28364 011598
TAN to Jumper Plug
or to Cold Switch
WHI to Main
Harness
ORN to Auger Motor
WHI to Main Harness
WHI/VIO to Auger Motor
WHI to Main Harness