


7
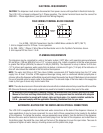
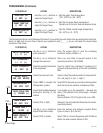
INSTALLING THE PUMP TUBING
(Refer to the Tubing Installation Instructions in side the cabinet door for details.)
1. Loosen the thumbscrew securing the tubing retainer plate to the pump housing. Set the retainer plate aside.
2. Depress the tension screw and remove it from the notch in the pump body, releasing the pump compression band.
3. Apply lubricant (BUNN-O-MATIC part number M2531.0001) to the new pump tubing.
4. Insert the tubing onto the mix chamber port and wrap the tubing around the pump rotor, making sure that the elbow and clamps
end up on the bottom side of the pump body.
5. Close the compression band reinsert the tension screw into the notch in the pump housing.
6. Replace the tubing retainer plate and tighten the thumbscrew.
7. Reconnect bag connector to the product box.
8. Repeat steps 1 through 7 for the other two pumps.
9. Prime the pumps. Refer to Priming the Concentrate Lines section.
Remove Retaining Plate Release Spring Tension Remove Tubing
Lubricate New Tube
Install New Tubing Completed Installation
Thumbscrew
Lubricate between arrows
2.0”
2.0”
Tension
Screw
Tube Clamp
Tension Screw
41129 110608
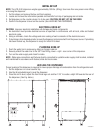
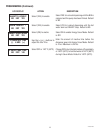
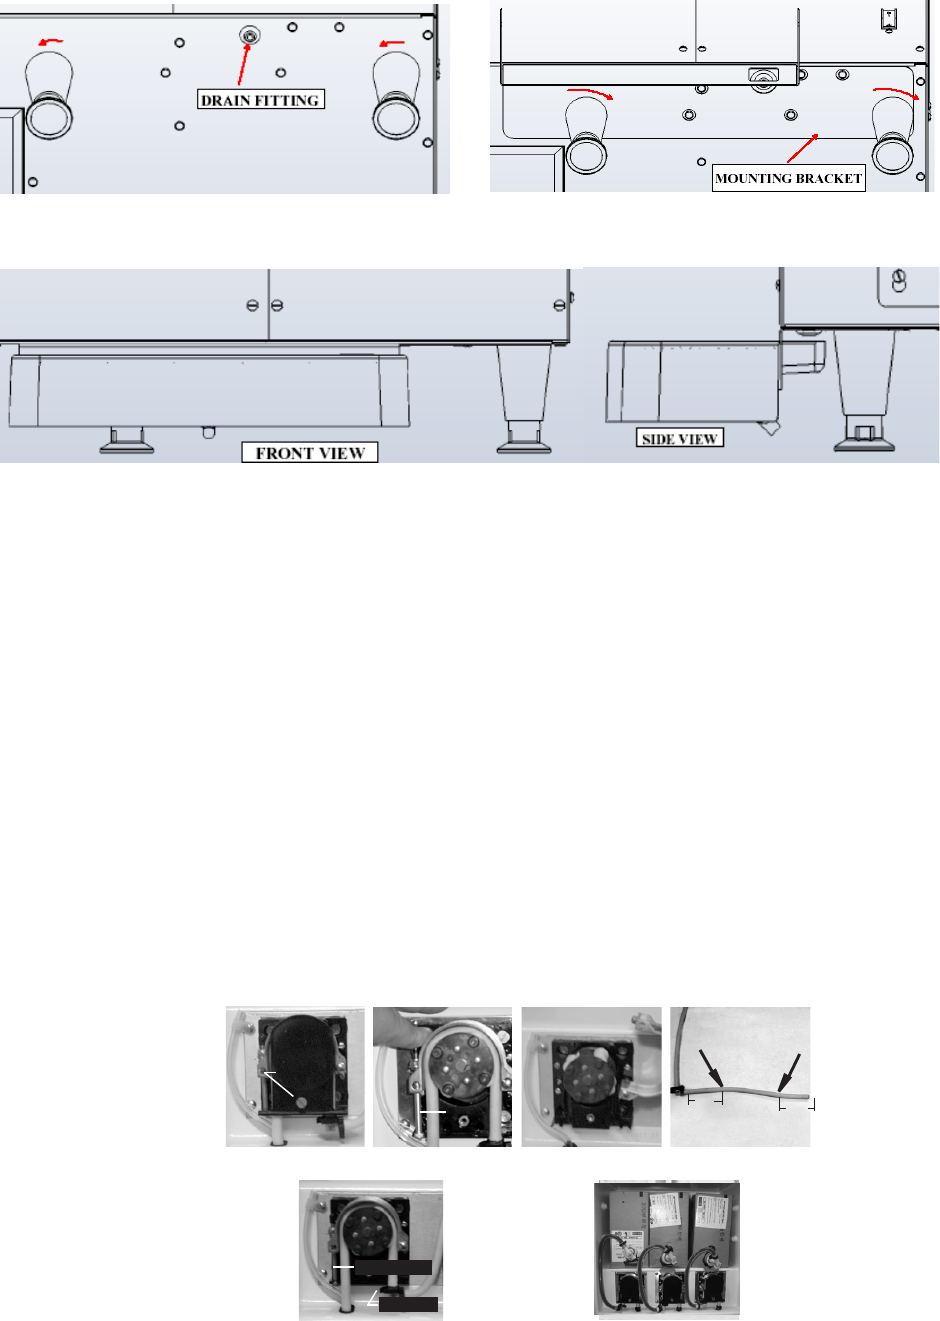
DRIP TRAY INSTALLATION
1. Unscrew the middle and right front legs (Fig. 1) - just enough to allow the mounting bracket to slide under the legs, (~1/8”).
Caution: The LCR-3 HV is very heavy. Use wood blocks to hold the machine up while working underneath it!
2. Insert the bracket between the legs and the base of the machine and retighten the legs, (Fig. 2).
Fig. 1 Fig. 2
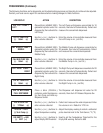
3. Insert the Drip Tray onto the mounting bracket, (Fig. 3). Make sure the drain fitting is still protruding through the hole.
Fig. 3
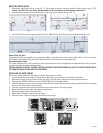
Optional Drip Tray Drain
A separate drain tube (not supplied) may be attached to fitting in the bottom of the tray, if desired. Note: Drill a ¼” hole in the center
of the fitting, before attaching the drain hose. Direct the other end of this hose into a permanent drain.
Alternate Evaporator Drain
For locations where the Drip Tray is not desired, connect a separate drain hose (not supplied) to the Evaporator Drain Fitting and direct
the other end of this hose into a permanent drain.
CAUTION: FAILURE TO INSTALL THE DRIP TRAY OR ALTERNATE EVAPORATOR DRAIN WILL RESULT IN WATER DRIPPING ON TO
THE COUNTER AND/OR FLOOR UNDER THE DISPENSER.